Developer Space
In Smart Vision, you can explore a variety of amazing application spaces. You can also use the platform’s models, Knowledge Base, persistence layer servers, and other develop components to create unique spaces, publish and run them, and share them with other platform users.
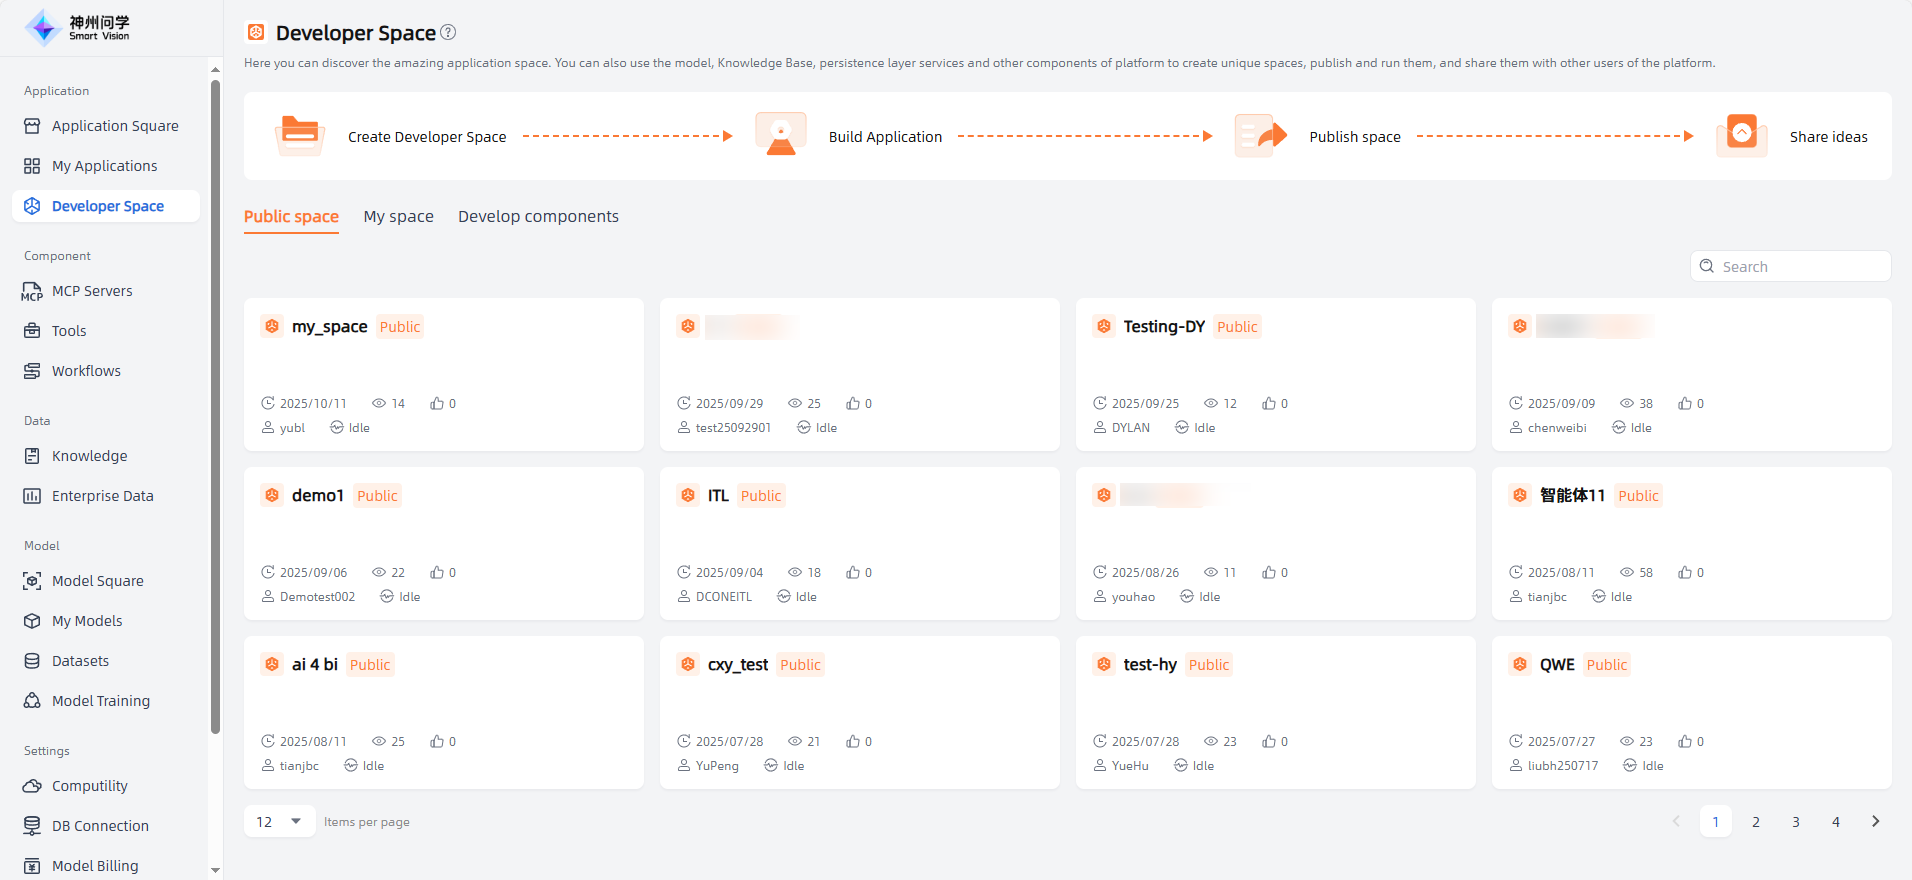
Public Space
In the Public Space, you can browse the list of public spaces and enter any space of interest. These spaces may include various types of content such as documents, images, videos, and audio. You can view and learn from these materials as needed.
Please note that when using public spaces shared by other users, you should respect their intellectual property rights and privacy. Always comply with relevant regulations and laws to ensure legal and compliant use of such content.
At the same time, you can also create your own space using the platform’s models, Knowledge Base, and persistence layer servers, and share it with others. This promotes knowledge exchange and sharing, improving learning efficiency and overall knowledge growth.
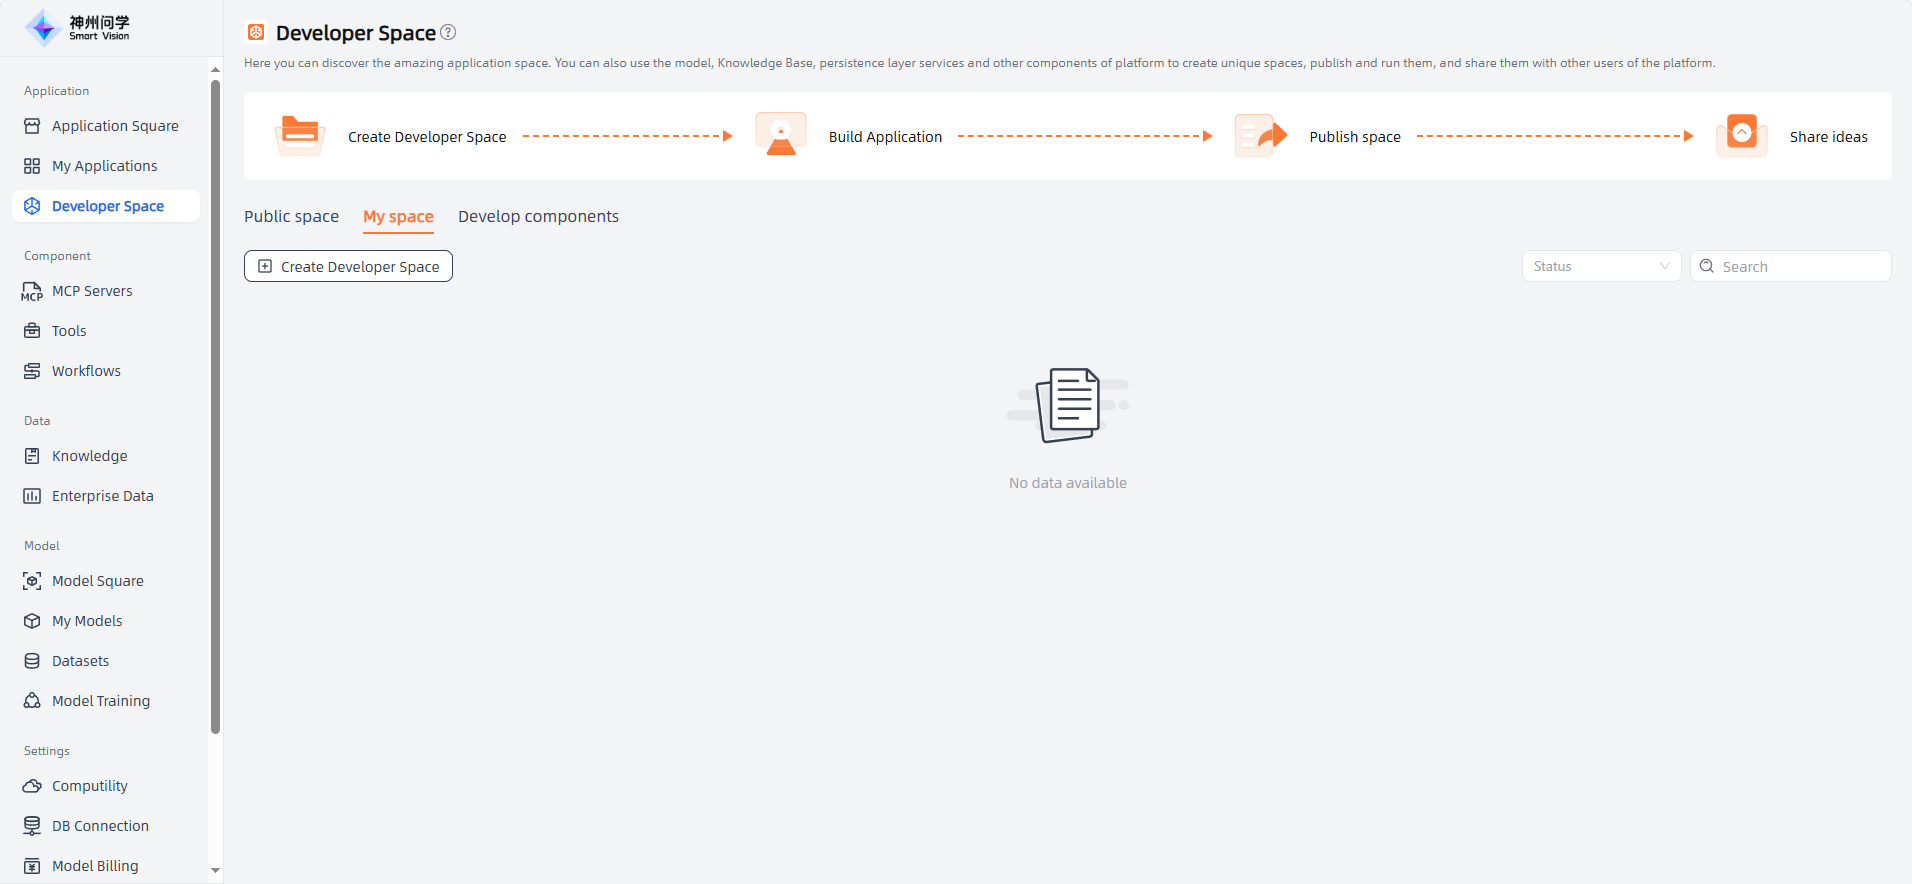
My Space
In My Space, you can create, manage, and edit your own spaces to meet your learning, work, and communication needs.
Through My Space, you can perform the following actions:
- Create new space: You can create new spaces based on your needs and interests, setting a unique theme and goal for each one.
- Manage existing spaces: If you have created multiple spaces, you can view and manage them in My Space. You can edit, modify, or delete spaces as needed.
- Build applications: You can use the large model, knowledge base, and persistence layer servers provided by Smart Vision, you can build various applications within your space. These applications can support your specific needs, such as knowledge management, team collaboration, or project management.
- Modify applications: If you have already built applications, you can modify and optimize them in My Space. You can adjust their layout, functionality, and style to better suit your actual needs.
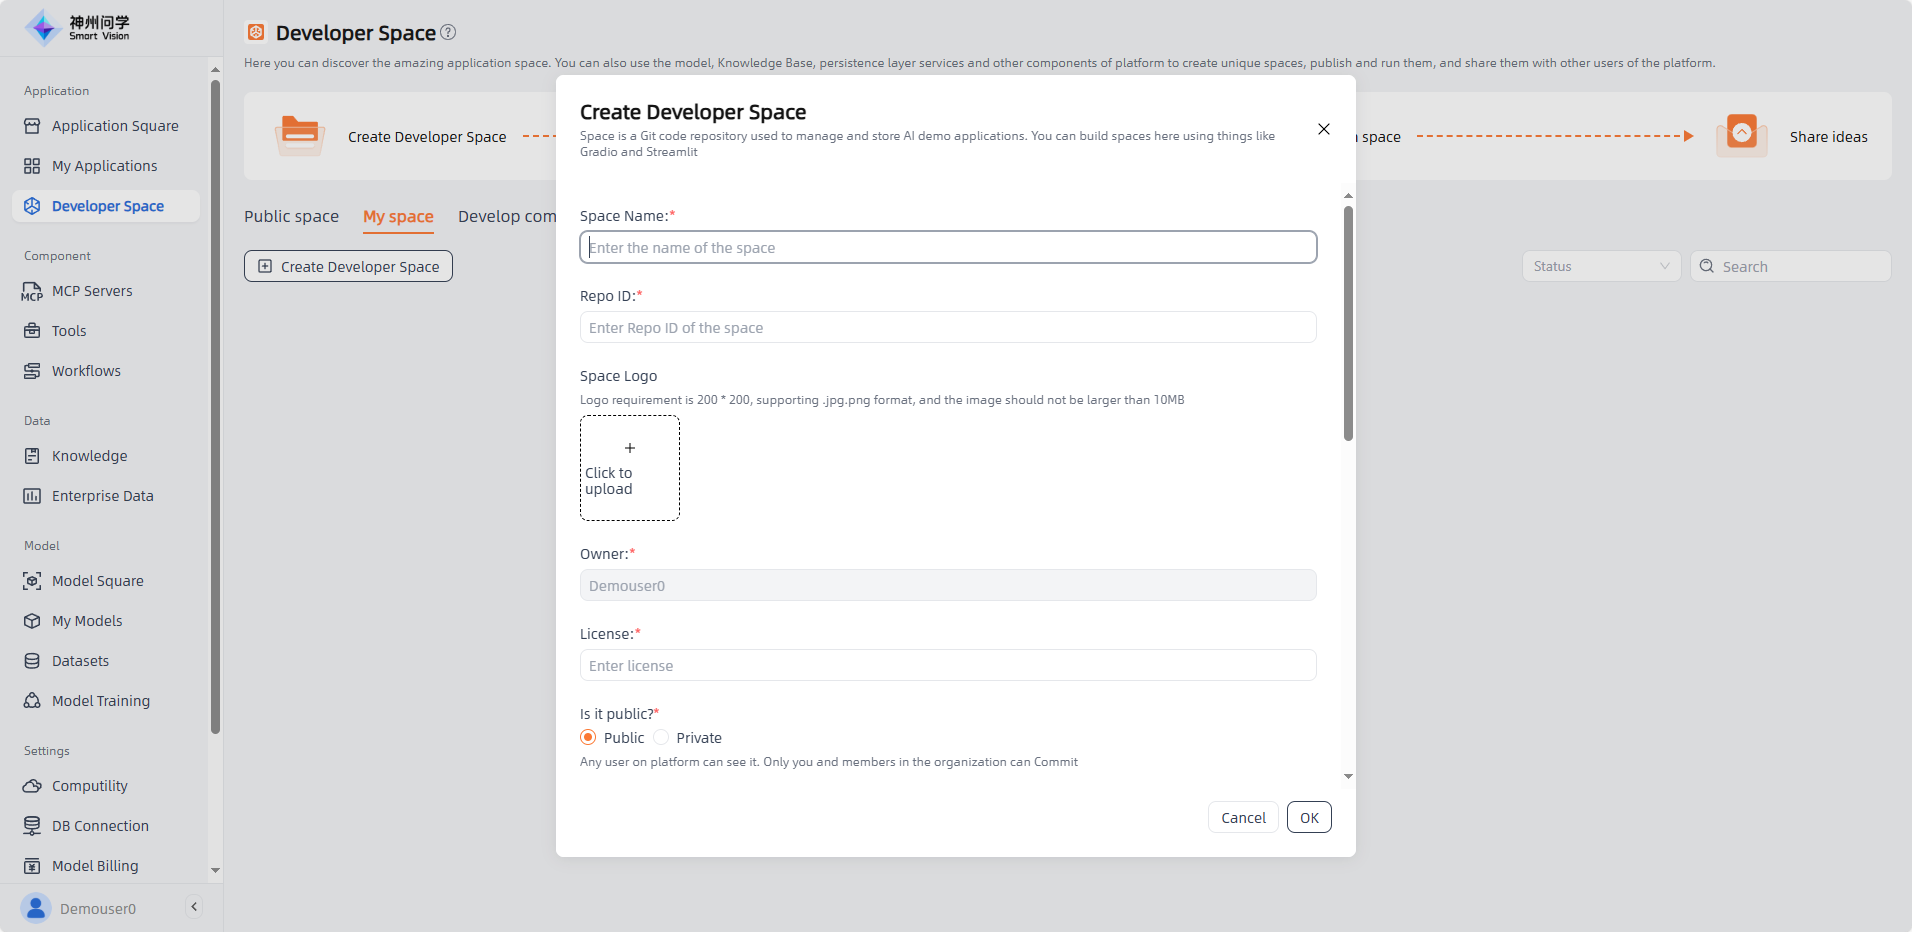
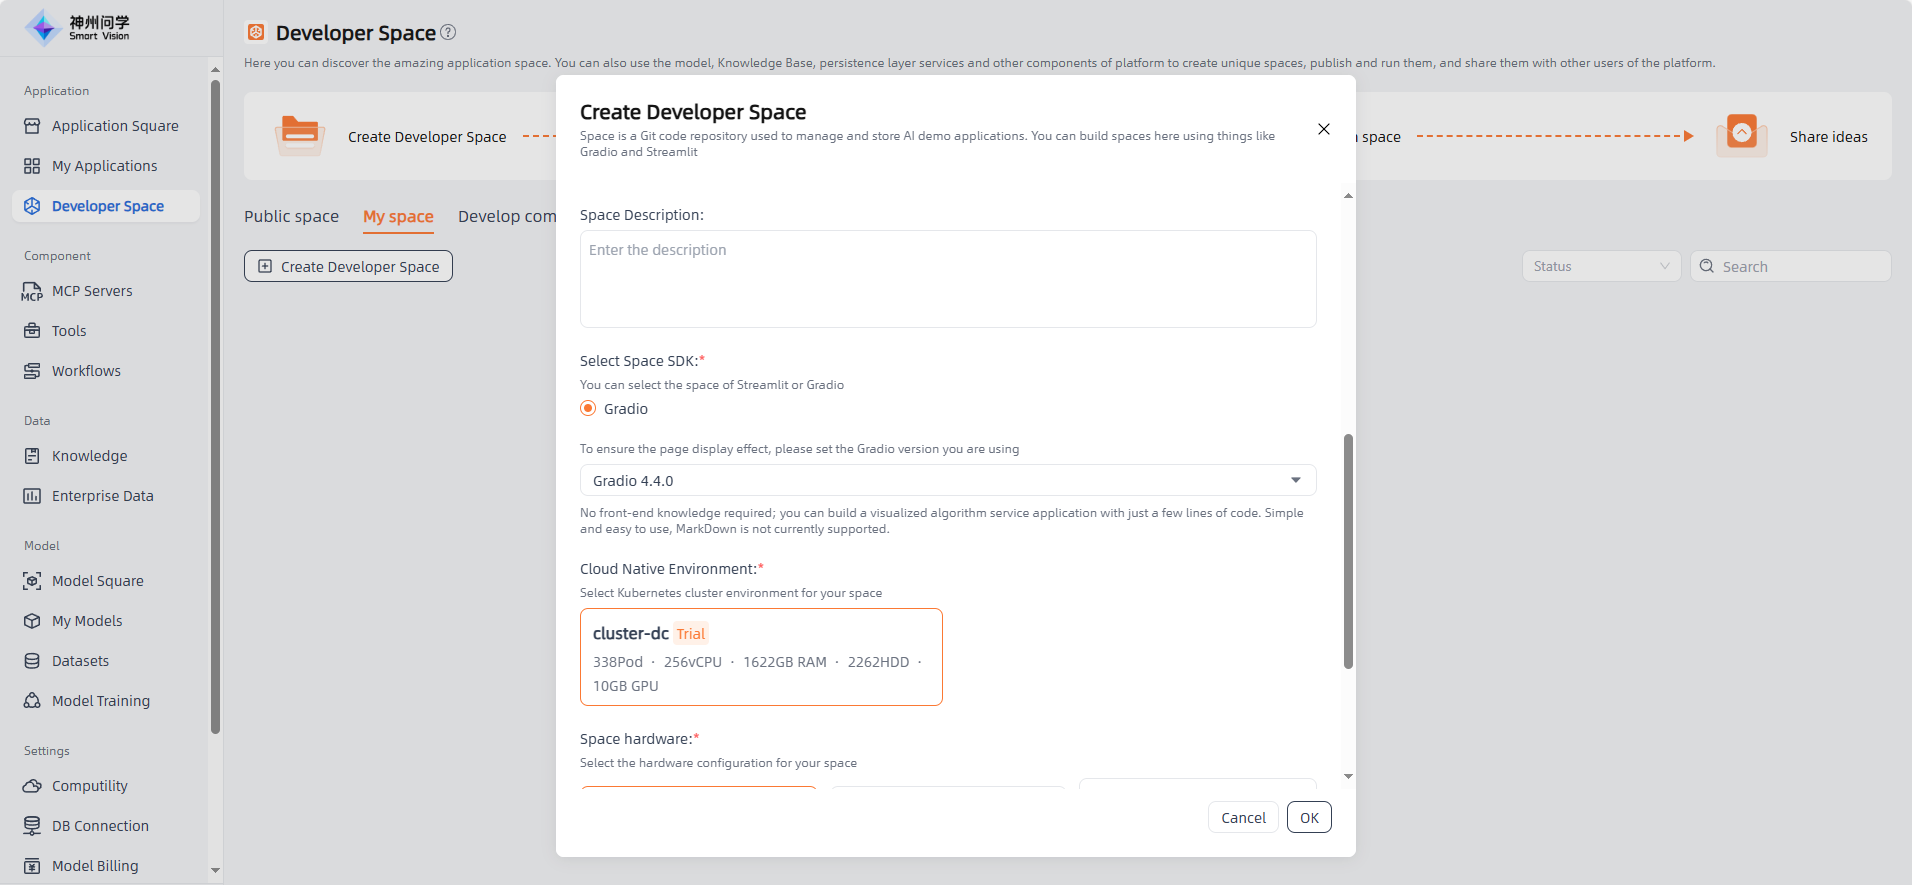
Create Developer Space
Space is used to manage and store the Git repositories of your AI applications. Here, you can build spaces using frameworks such as Gradio or Streamlit.
When creating a space, you’ll need to provide the following information:
- Space Name: The name of your Git repository, usually reflecting its purpose or project name. A good space name should be concise, clear, and easy to understand.
- Repo ID:The unique identifier of the repository, typically a combination of the repository name and its owner. It ensures the repository can be uniquely identified on the hosting platform.
- Space Logo: A visual identifier representing your repository or project.
- Owner: The individual or organization that owns and manages this Git repository. The owner controls access permissions, configuration settings, and other administrative options.
- License: The software license that defines how your code can be used, modified, and distributed. Common licenses include MIT, Apache, and GPL.
- Public or Private: Determines whether your repository is open to the public. Public repositories allow anyone to view, clone, and use the code. Private ones require specific access permissions.
- Select Space SDK: The SDK (Software Development Kit) is a collection of tools, libraries, and documentation that helps developers use a specific platform or language more efficiently. Choosing the right SDK can accelerate your development process based on your goals.
- Gradio: A Python library for quickly creating user interfaces. It allows you to easily build interactive frontends for machine learning models using custom input and output components. If you want to create intuitive and user-friendly interfaces for your AI demo applications, Gradio is an excellent choice.
- Streamlit: An open-source library designed for data science and machine learning. It offers a simple API for creating interactive web applications, ideal for data exploration, visualization, and building data-driven demos. If your project focuses on data analysis or interactive visualization, Streamlit is a suitable option.
- Cloud Native Environment: Selecting kubernetes cluster environment for your space means your Git repository and related resources will run on that cloud platform. Wenxue provides a default cloud-native environment. To add additional custom environments, see Computility
- Space Hardware: Refers to the hardware resources used to run your repository and related servers, including computing power, storage, and bandwidth. Choosing the right configuration ensures efficient and stable performance.
Use Developer Space
Enter the Developer Space and click on a space card to view its basic introduction. From there, you can select space capabilities, browse space files, configure and publish the space, and finally view the interactive interface of the running space.
Basic introduction
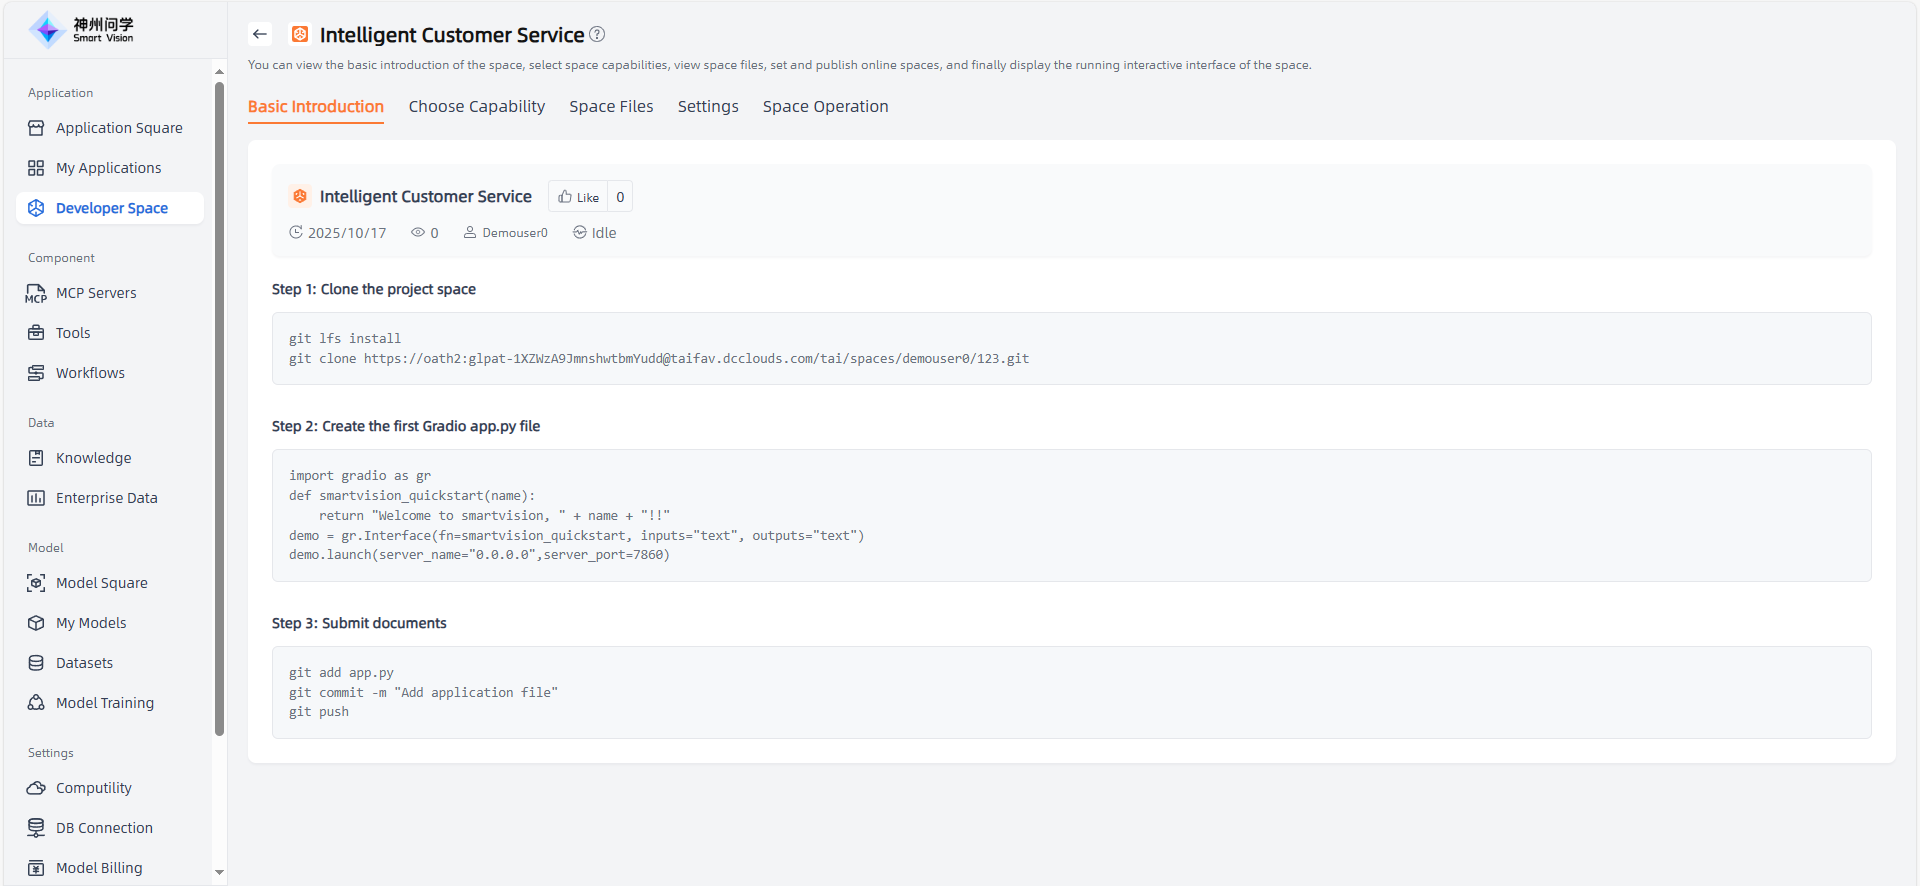
Enter the Develop Space and click on a space card to view its basic introduction. From there, you can select space capabilities, browse space files, configure and publish the space, and finally view the interactive interface of the running space.
Step 1: Clone the project space
Purpose: Cloning the project space means copying the remote repository to your local computer so that you can develop and modify the code locally without affecting the remote repository.
Substeps:
Open the terminal or command prompt.
use
git cloneClone the project space to your local environment. For example:
sh复制代码

git clone <仓库URL>
Replace
<repository-URL>with the actual URL of your Git repository.After cloning, you will have a local copy identical to the remote repository on your computer.
Step 2: Create the first Gradio app.py file
Purpose: In this step, you will create a new file named app.py and write your first Gradio application in it. Gradio is a library for quickly building user interfaces for machine learning models.
Substeps:
Install Gradio (skip if already installed): Run the following command in your terminal to install the Gradio library:
sh复制代码

pip install gradio
Create the app.py file: Use a text editor (such as VS Code or PyCharm) to create a new file named app.py in your project space directory.
Write Gradio app:
Open
app.pyand add the following example code to create a simple application:import gradio as gr def smartvision_quickstart(name): return "Welcome to smartvision, " + name + "!!" demo = gr.Interface(fn=smartvision_quickstart, inputs="text", outputs="text") demo.launch(server_name="0.0.0.0",server_port=7860)This code creates an interface with a text box and a label. Users can enter text in the box, click Submit, and see the welcome message displayed on the screen.
Step 3: Submit documents
Purpose: Submitting files means uploading the changes you made on your local computer (for example, the newly created app.py file) to the remote repository. This allows others to view and use your updates by accessing the remote repository. (If the created space is private, others will not see your modifications.)
Substeps:
Add changes to Git: In the terminal, use the following command to add the app.py file to the Git staging area:
sh复制代码

git add app.py
Commit changes:
Use the
git commitcommand to commit your changes, and include a descriptive message explaining what you have done:sh复制代码 git commit -m "Add first Gradio app: app.py"Push changes to the remote repository: Finally, use the
git pushcommand to push your changes to the remote repository:sh复制代码 git push origin <branch-name>
Replace <branch-name> with the name of the branch you are using (usually main or master).
After completing these steps, your Gradio application code will be saved in the remote repository for viewing and use. If you wish to deploy your Gradio app online, you can use the Publish feature in the Space operations.
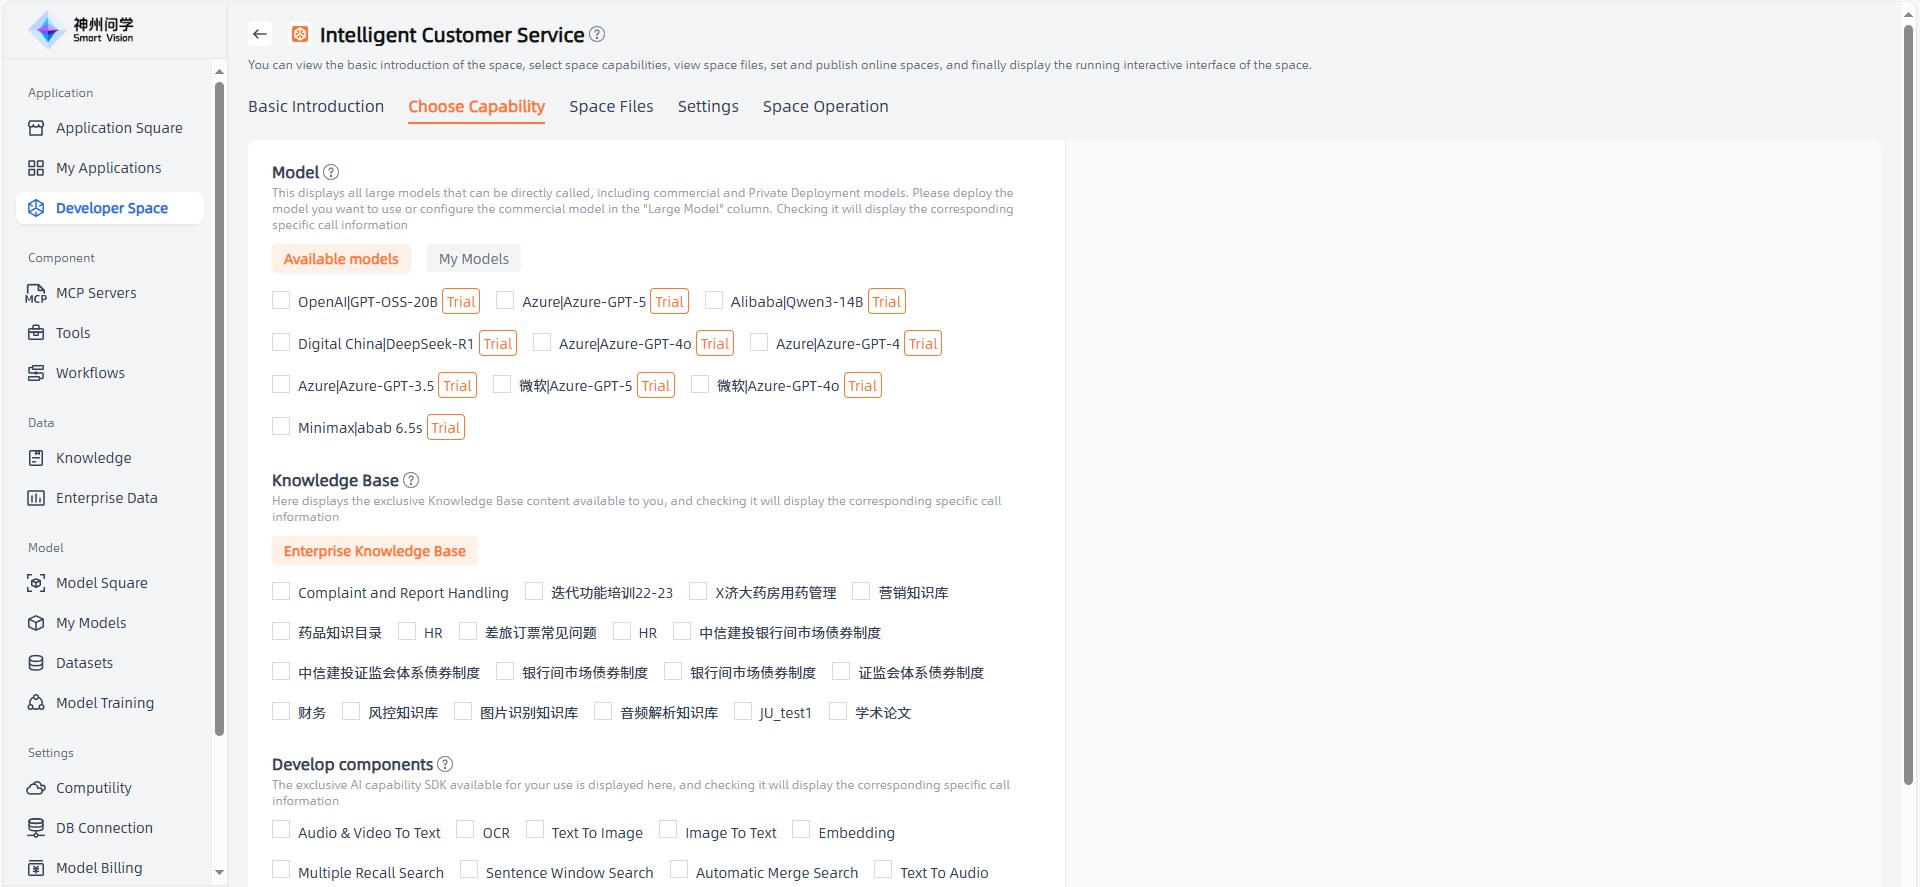
Choose Capability
On the Choose Capability page, users can choose different types of capabilities based on project requirements, including Large Models, Knowledge Base, Development Components, and Persistence Layer servers. These capabilities provide rich functionality and flexibility, allowing developers to easily integrate and utilize AI technology within their application code.
- Large Models: Large models refer to deep learning models with a large number of parameters and powerful learning capabilities. These models usually have hundreds of millions of parameters and learn complex feature representations through pre-training on large-scale data. They are usually used to process large-scale datasets and complex tasks.
- Knowledge Base: Knowledge base is a system for storing and managing knowledge, often containing large amounts of structured or unstructured data. By selecting a knowledge base, developers can leverage this data for querying, reasoning, and generating responses, providing rich knowledge resources and intelligent Q&A experiences within the application.
- Develop components: A collection of predefined algorithms and tools for implementing specific AI functions, such as speech recognition, natural language processing, or text-to-image generation. Selecting appropriate Develop Components allows developers to easily integrate them into their application code to realize intelligent interaction, data analysis, prediction, and other functions.
- Persistence Layer servers: Persistence Layer servers are used for data storage and management, such as databases and object storage. Selecting these servers enables developers to implement data persistence, querying, and updating within their applications, ensuring data reliability and consistency.
After selecting the required capabilities, the system provides corresponding interfaces to help developers integrate and use them in their applications.
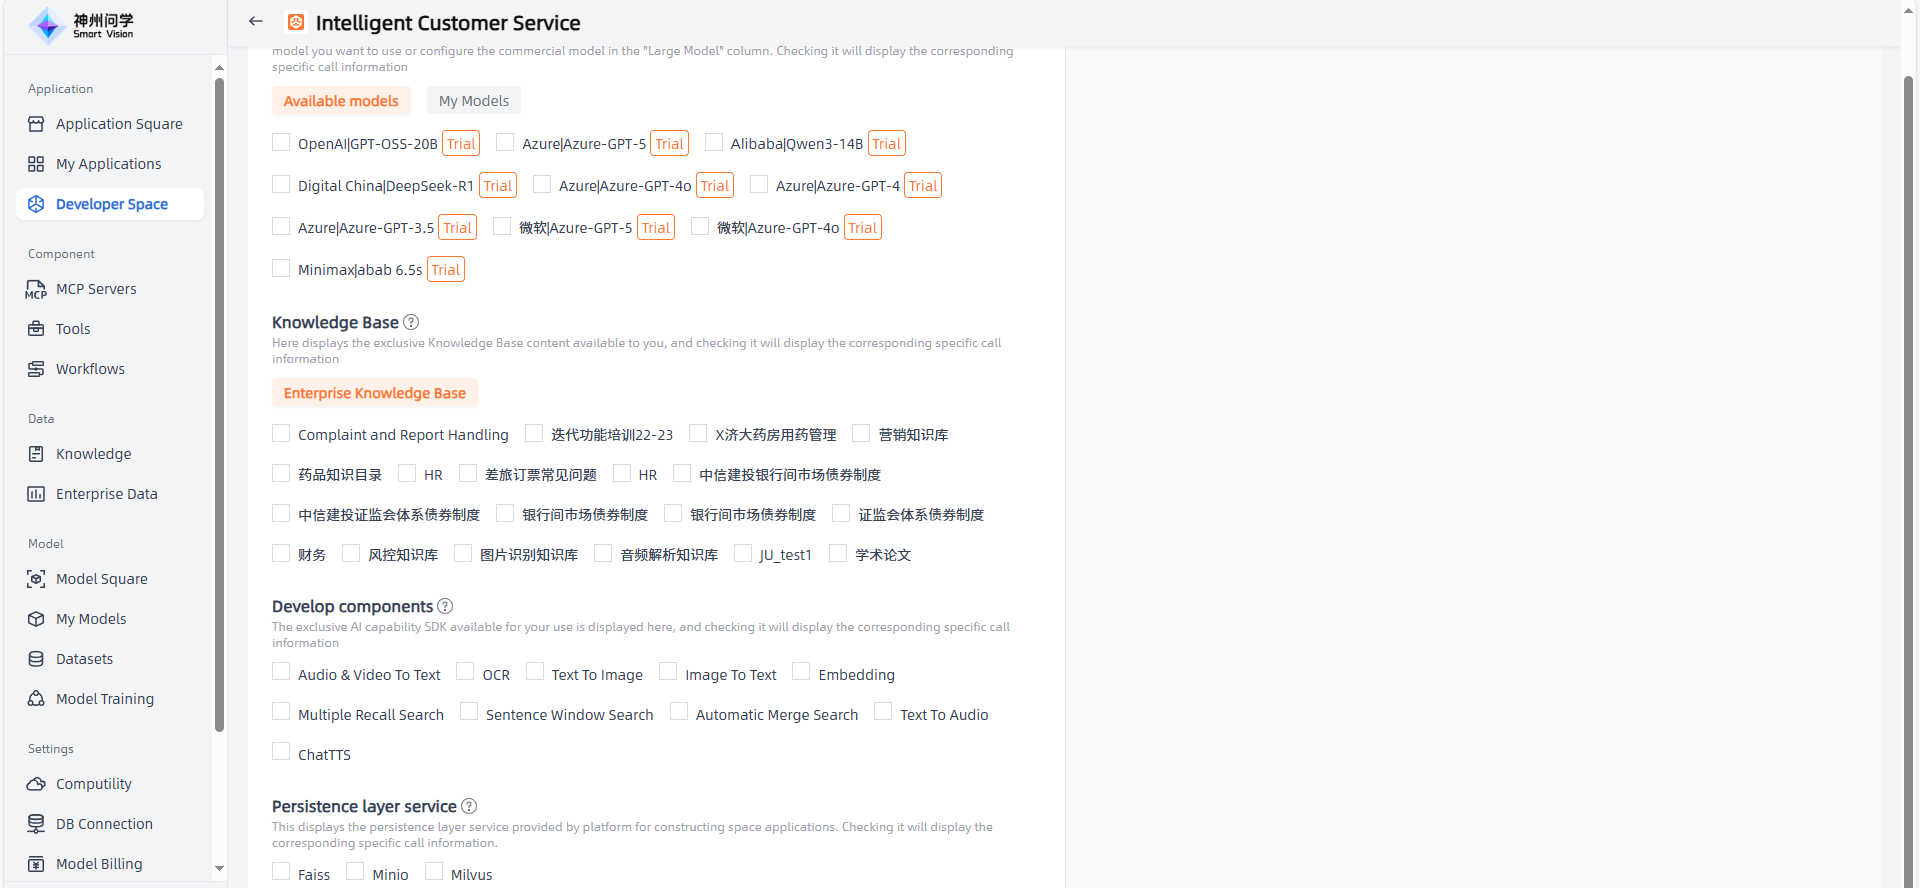
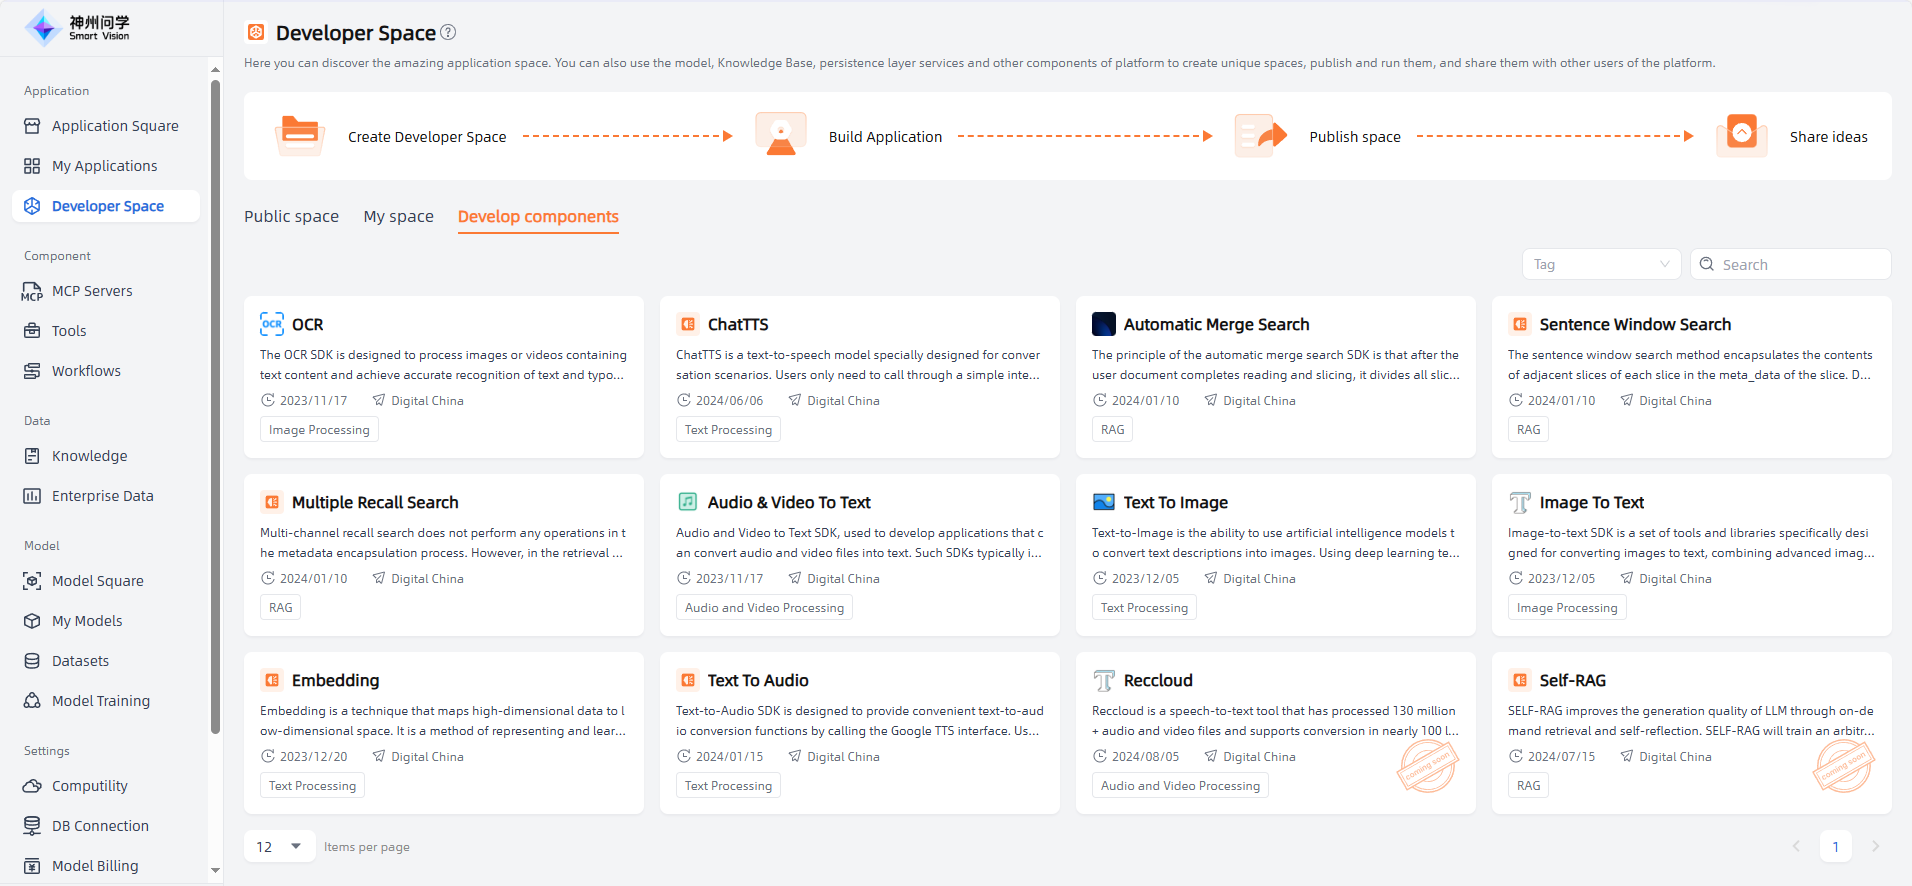
Develop components
Develop Components refer to the functions and capabilities that large models possess when performing various tasks. These capabilities are provided to developers through SDKs, making it easier to develop related applications. They are mainly used for handling human-computer interaction input and output, including audio and video processing, natural language processing, OCR, and more.
Developer Space - Develop components , all available components are displayed. You can click to view the introduction and SDK documentation of each component. According to your needs, you can integrate them into your AI application (this usually requires some programming work, as your application needs to connect with the component, which can be achieved through the SDK).