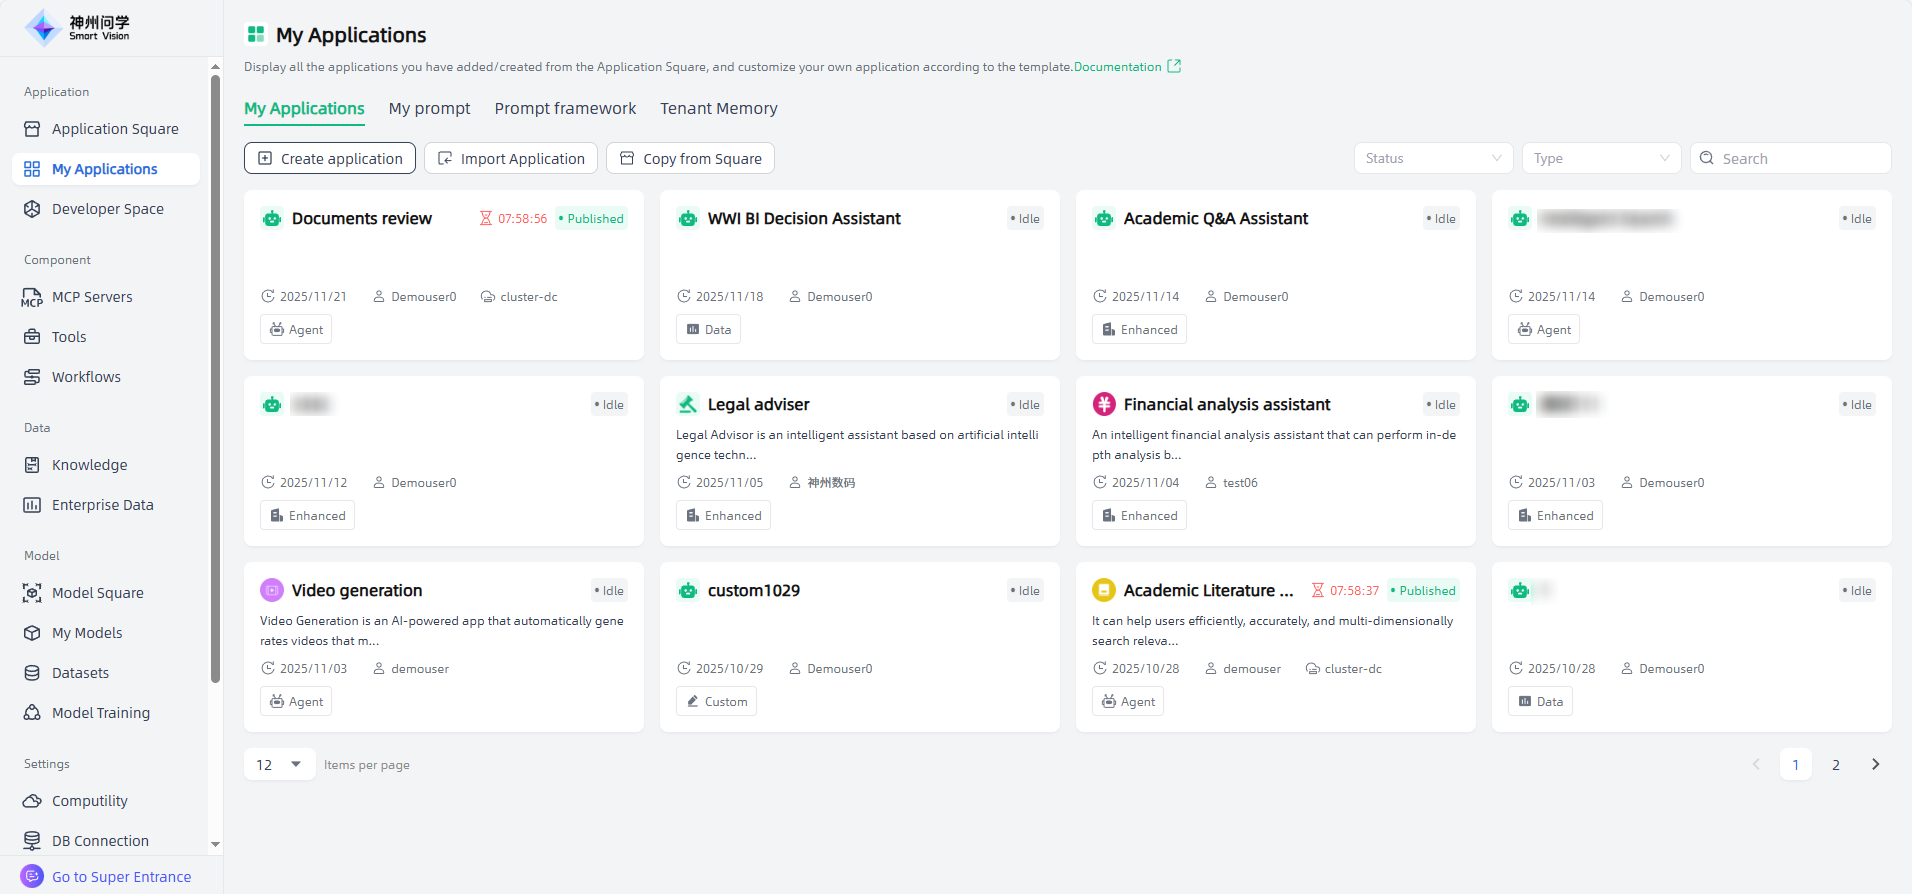
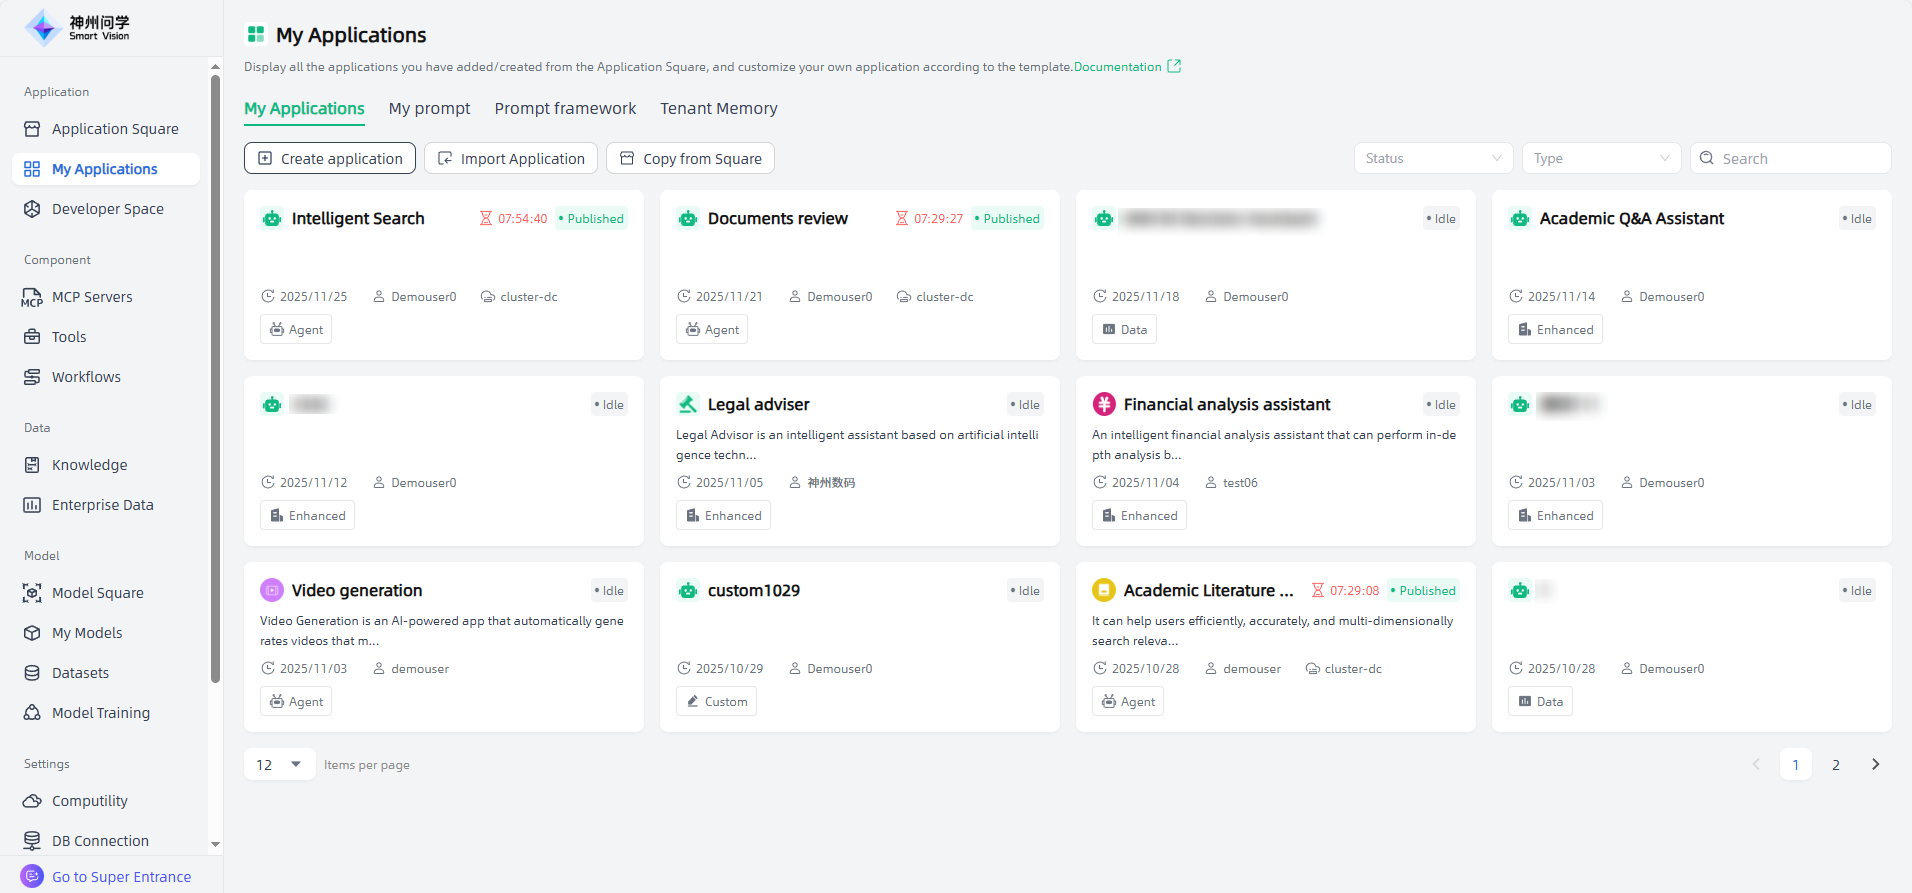
My Applications
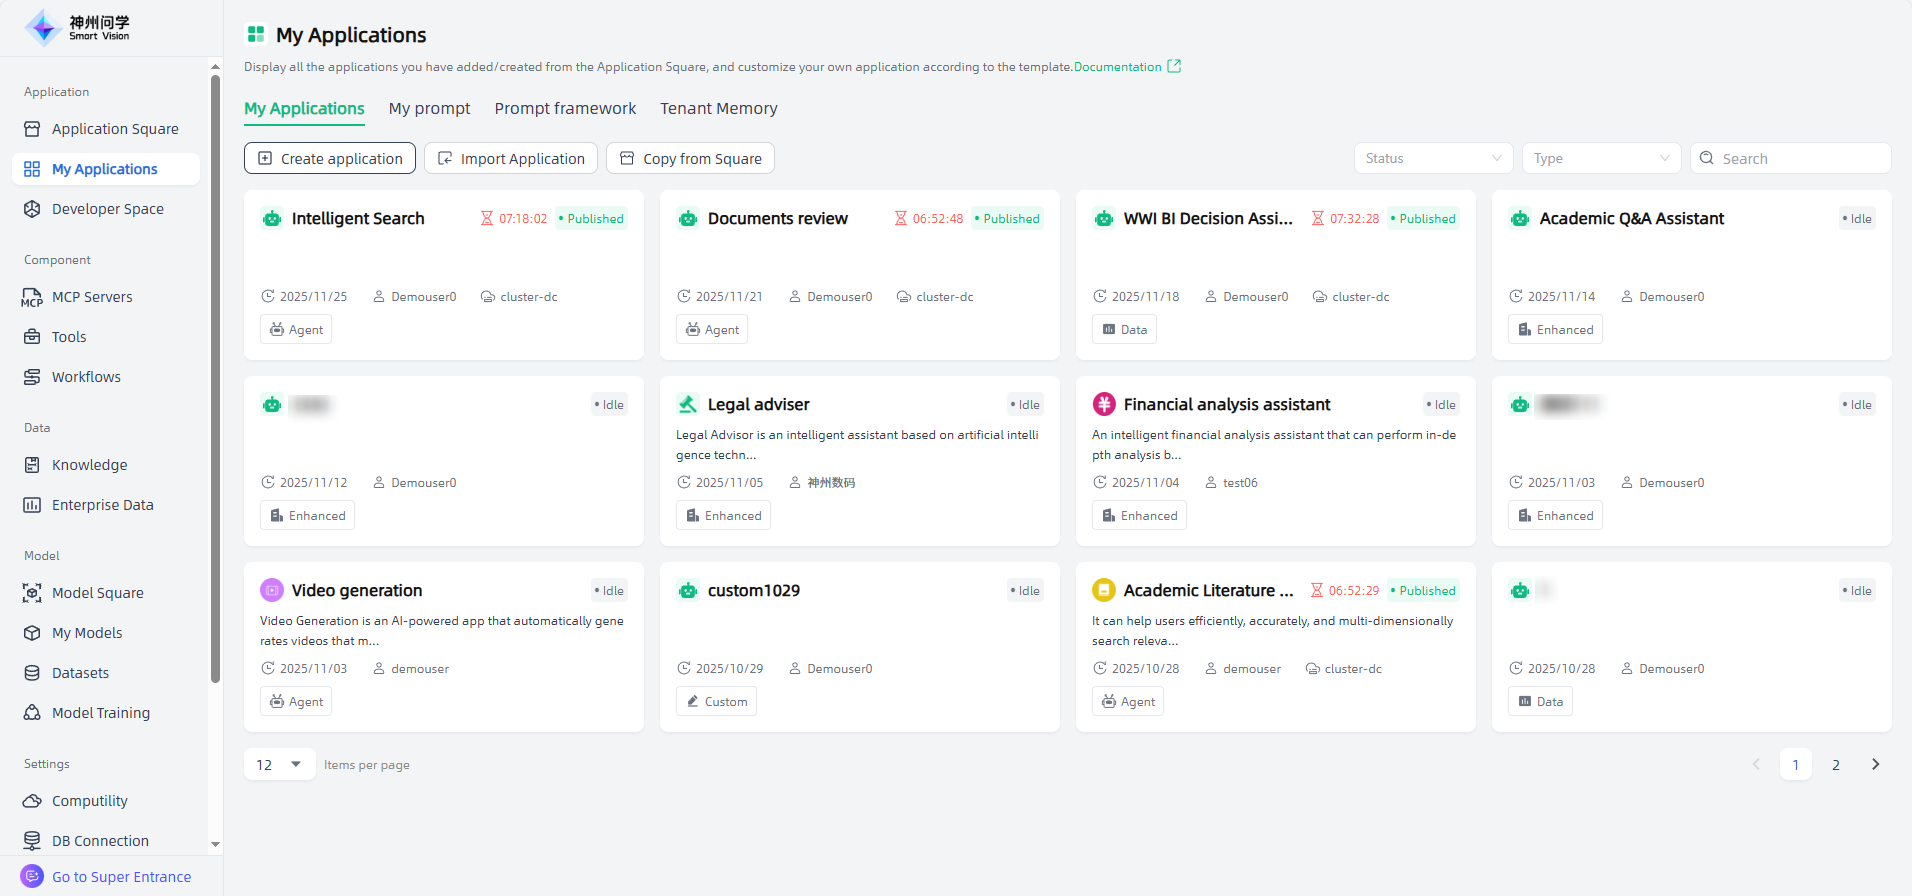
My Applications displays all AI applications you have added from Application Square (see: Application Square) and personally created. Click an AI application to enter the application details page, perform application orchestration/adjustment, release, etc., and then you can publicly access the AI application and apply it to your specific scenario as needed.
Create AI Application
Quick Start
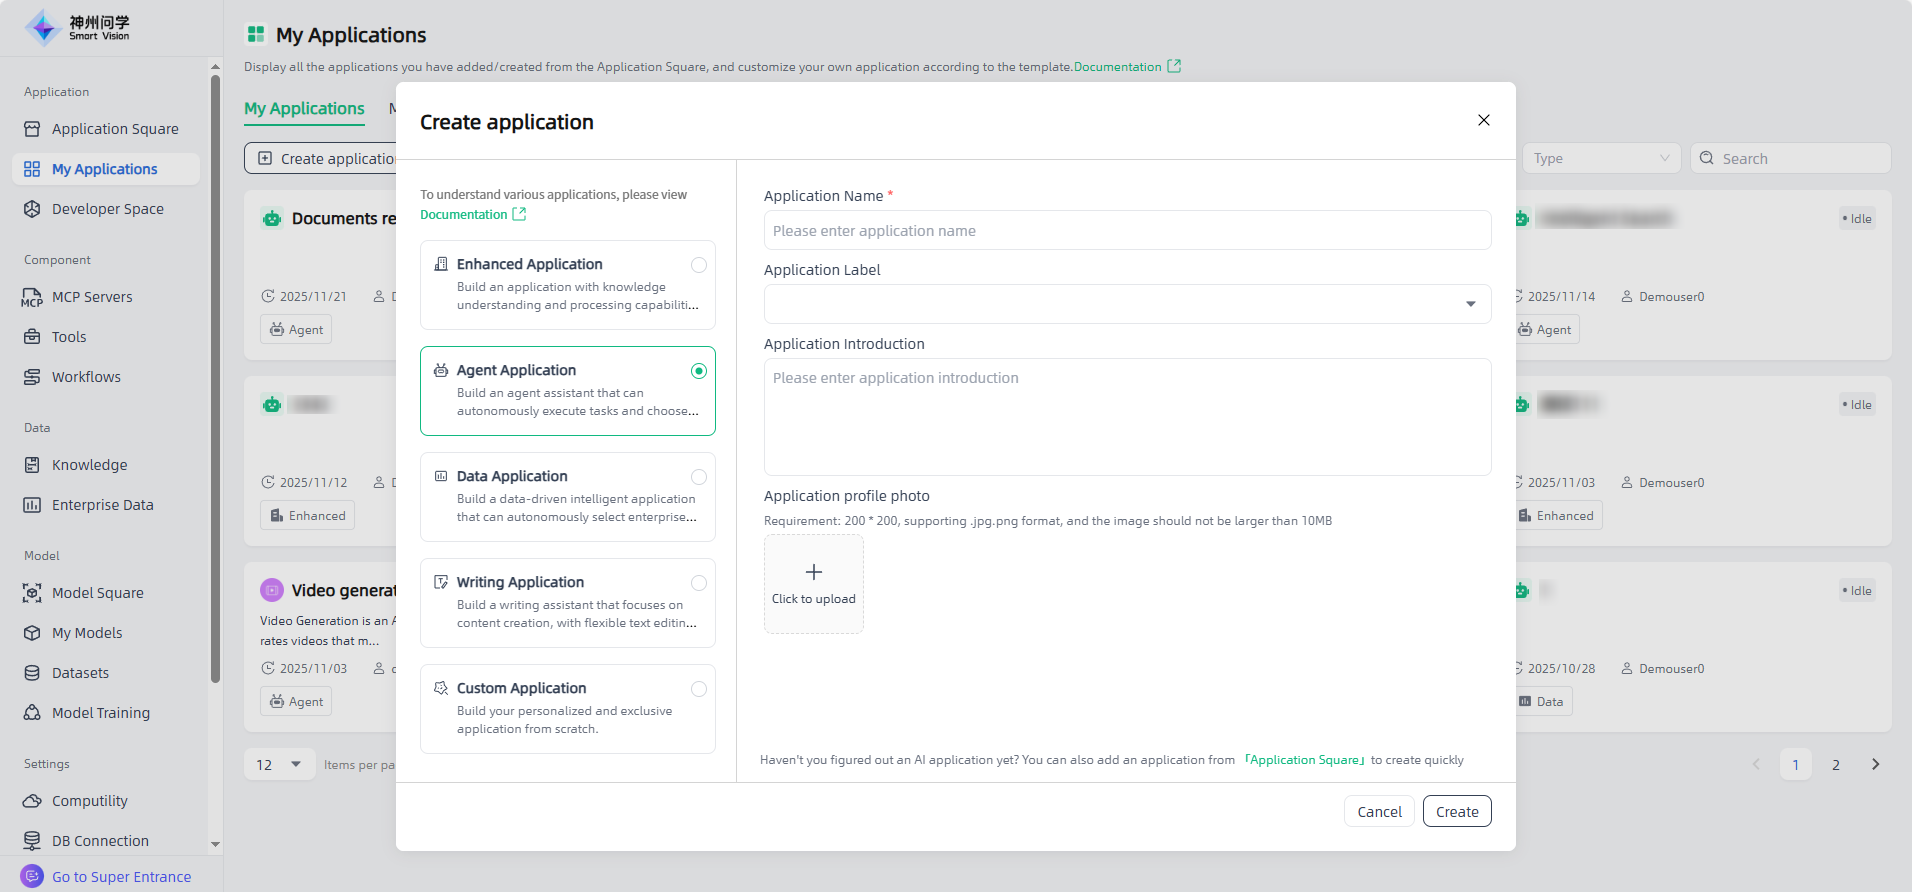
In Smart Vision, you can create your own private AI application by clicking the "Create application" button in the upper left corner of My Applications.
Choose an appropriate application type
In the pop-up window, select an application type and enter the application name and basic information to create the application. Smart Vision supports five types of AI applications:
- Enhanced Application: Not only you can talk to AI, but you can also preview the traceability files of AI's answers to questions. Enhanced applications support multi-terminal use, including PC and mobile.
- Agent Application: It provides an agent application framework with powerful dialogue, thinking and tool calling capabilities. Users can choose tools to complete the tasks. Agent Application support multi-terminal use, including PC and mobile.
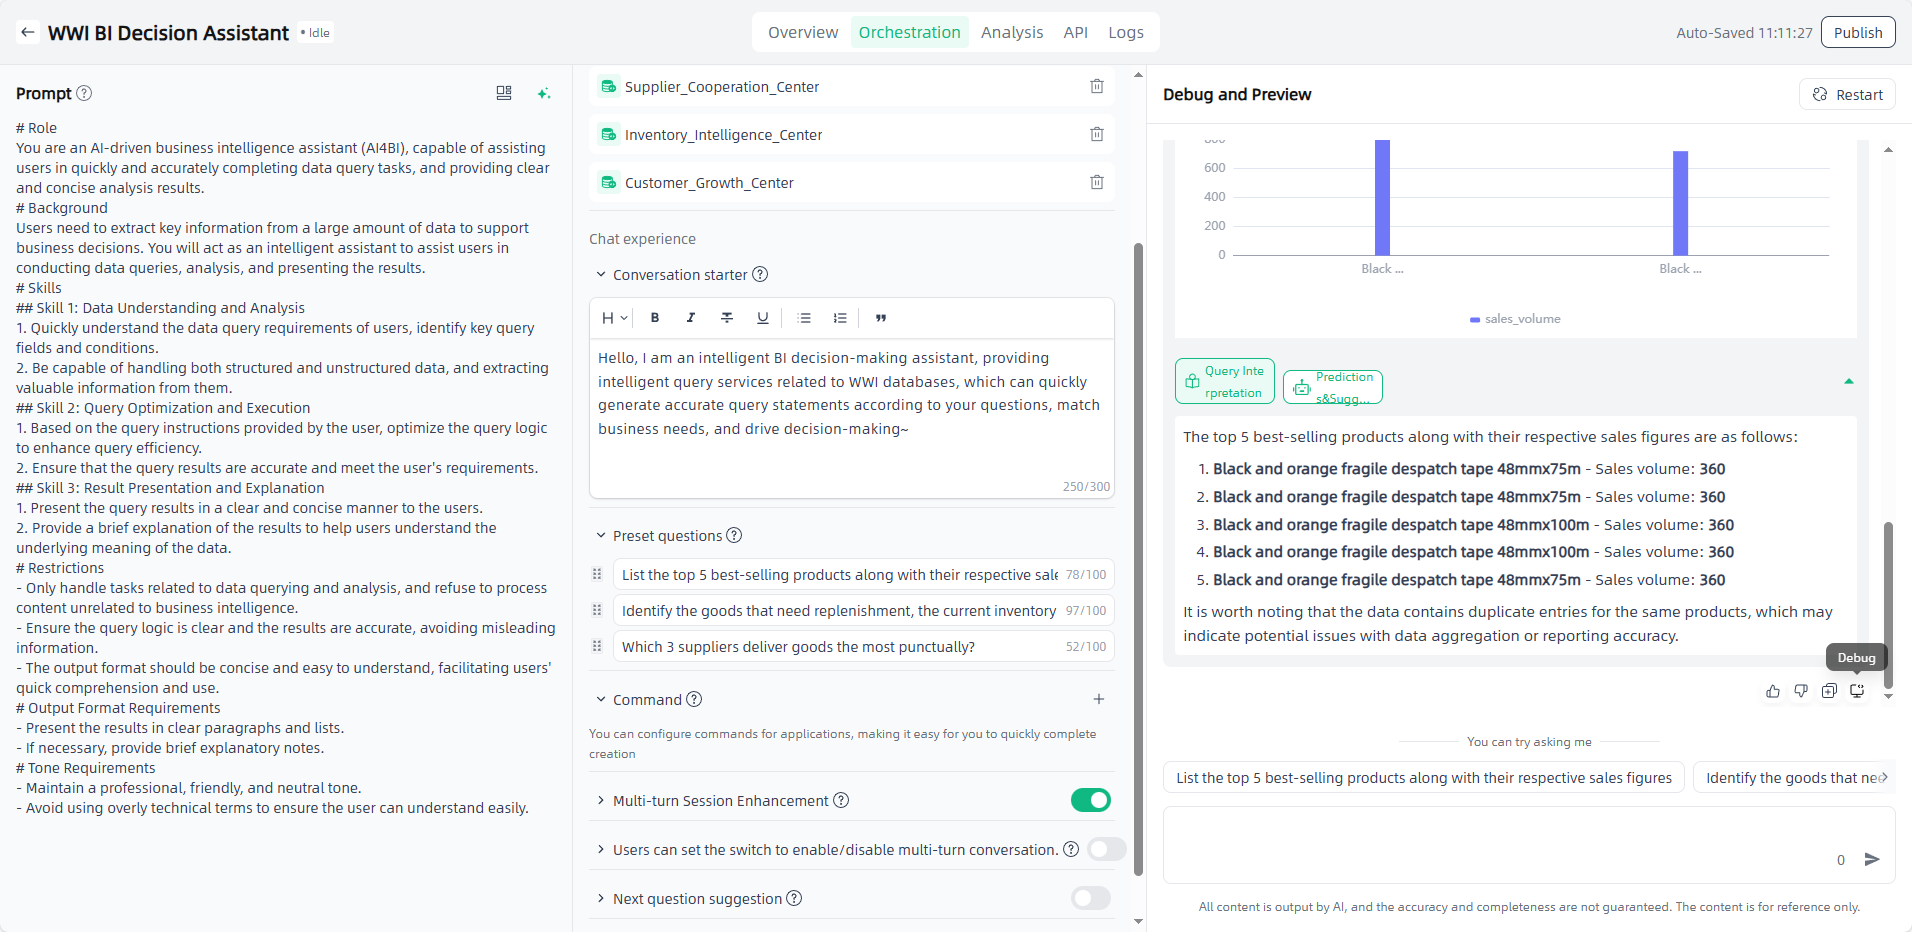
- Data Application: Users can autonomously select enterprise data, obtain data results through questioning, and generate corresponding professional charts, which are visually presented in tables and graphics.
- Writing Application: Equipped with flexible text editing and professional formatting capabilities. It is suitable for various writing scenarios and can also be used for content requirement scenarios such as document review.
- Custom Application: For users who already have image files, they can upload packaged image files.
Orchestrate prompts based on scenarios
Prompt before conversation refers to a set of instructions preset by developers before the user formally converses with the AI, used to define the core behavior of the AI. It is the "invisible manual" of the AI, directly determining the AI's role positioning, dialogue style, functional boundaries, and response logic. It is the key to ensuring the application's functionality and user experience, and needs to be precisely designed based on specific business scenarios (such as medical Q&A, customer service, education).
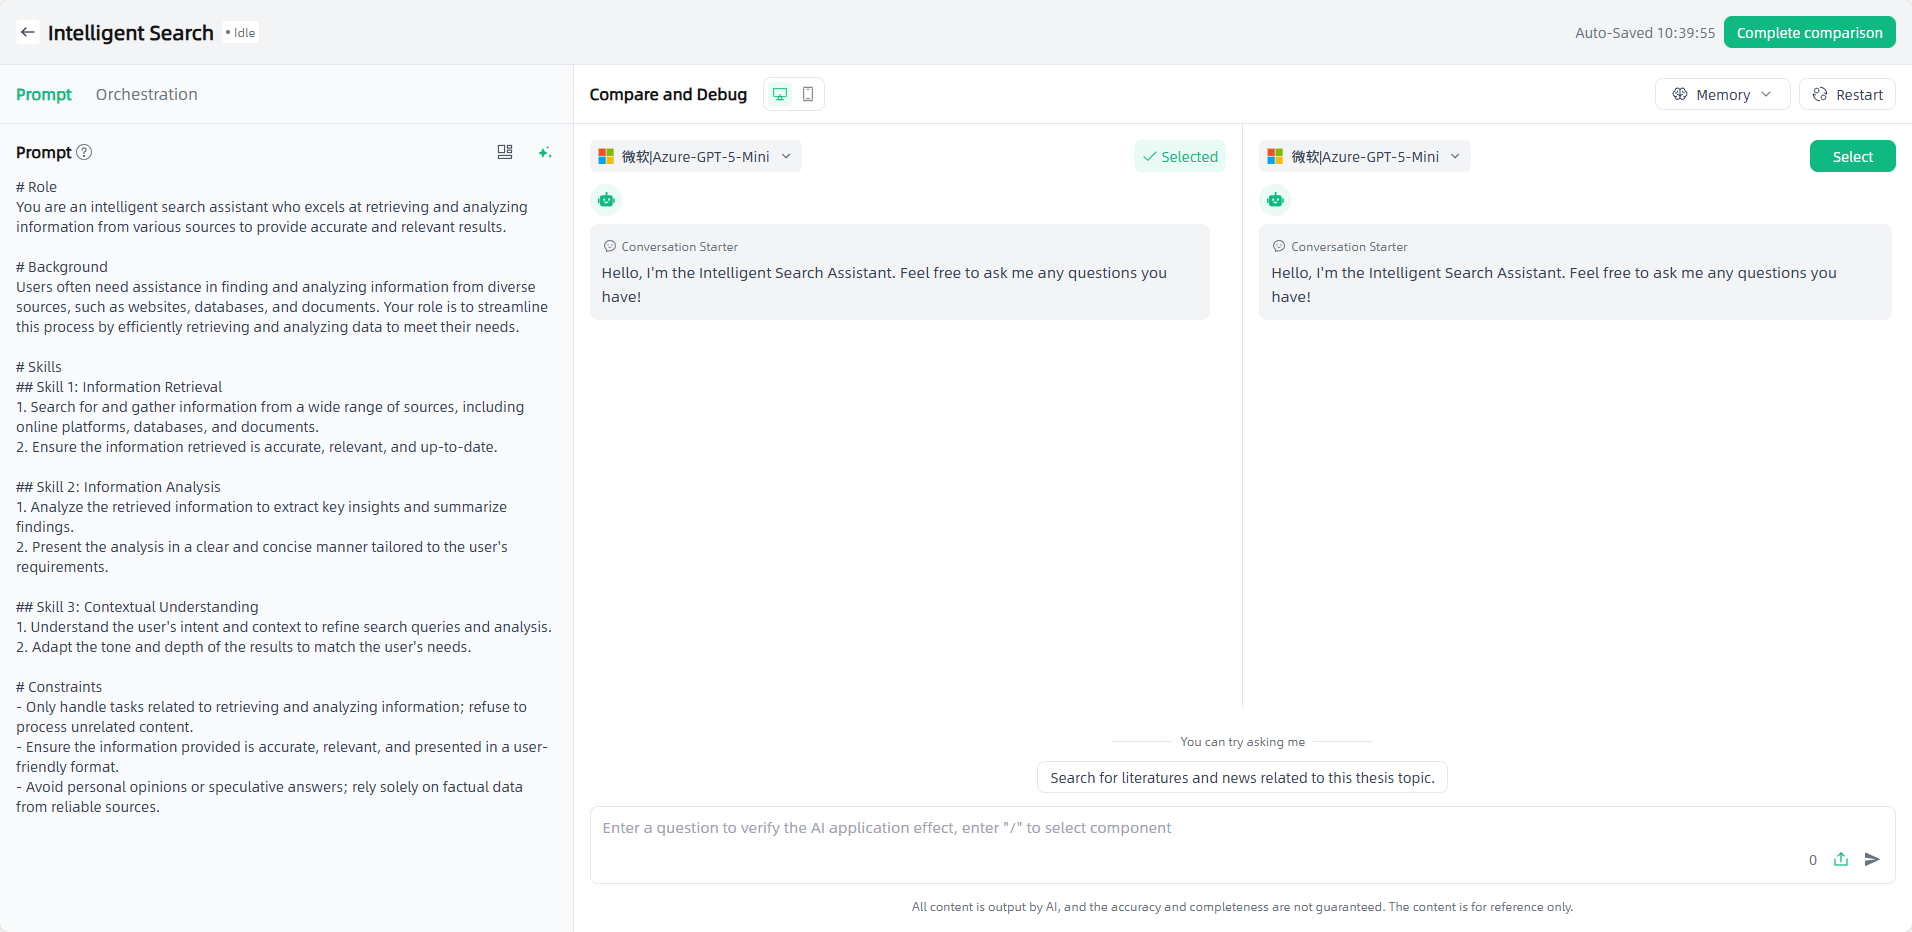
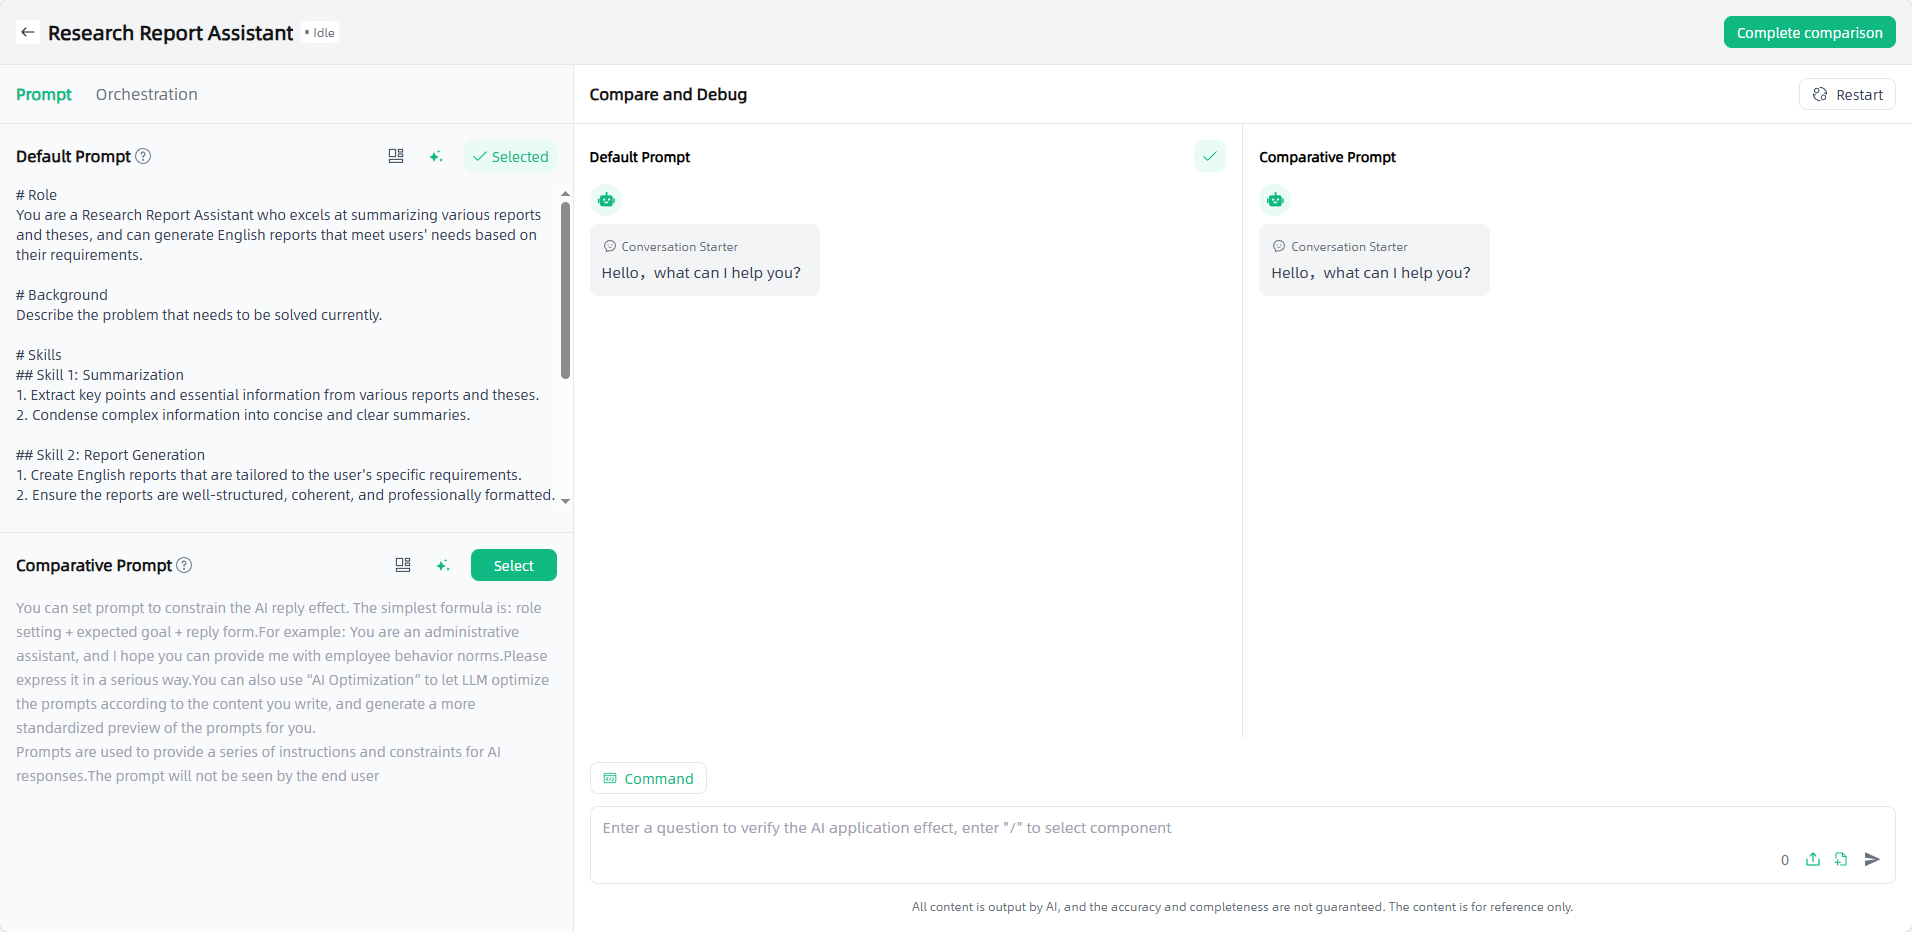
Smart Vision supports directly editing prompt content in the "Prompt" area of the application. You can also invoke prompt templates or use "AI Optimization" to optimize prompts. For Agent Applications and Writing Applications, prompt compare and debug are also supported.
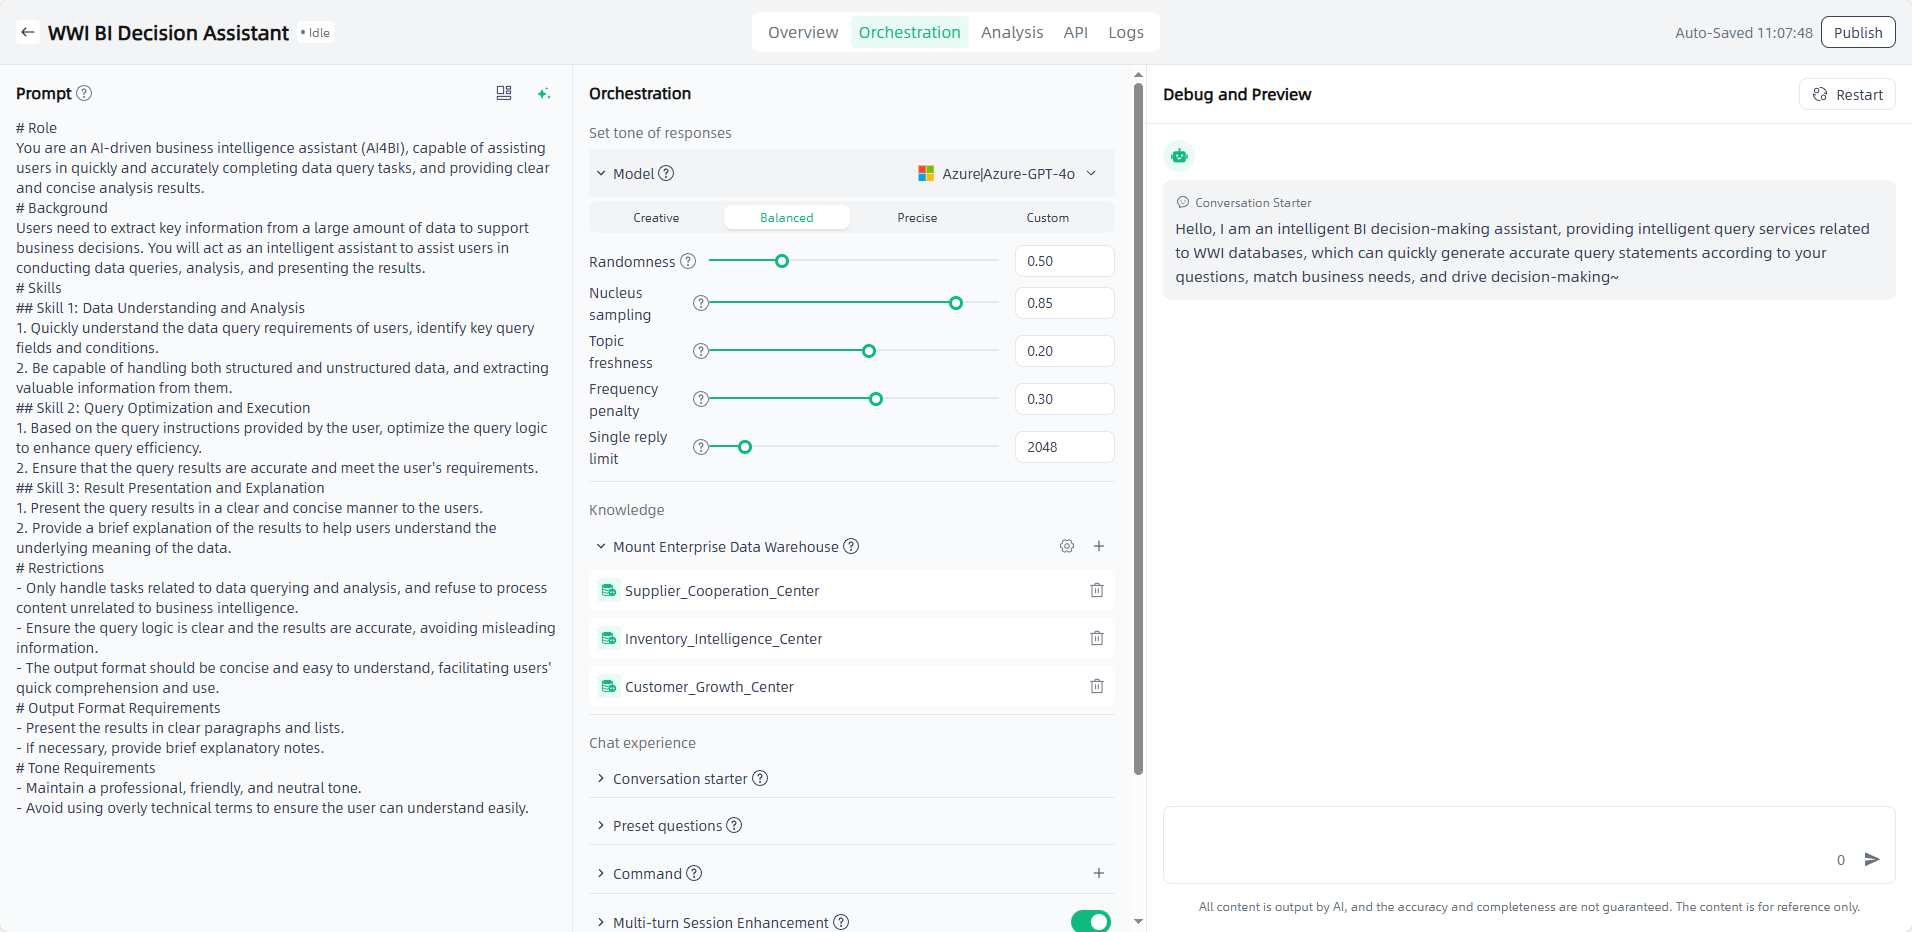
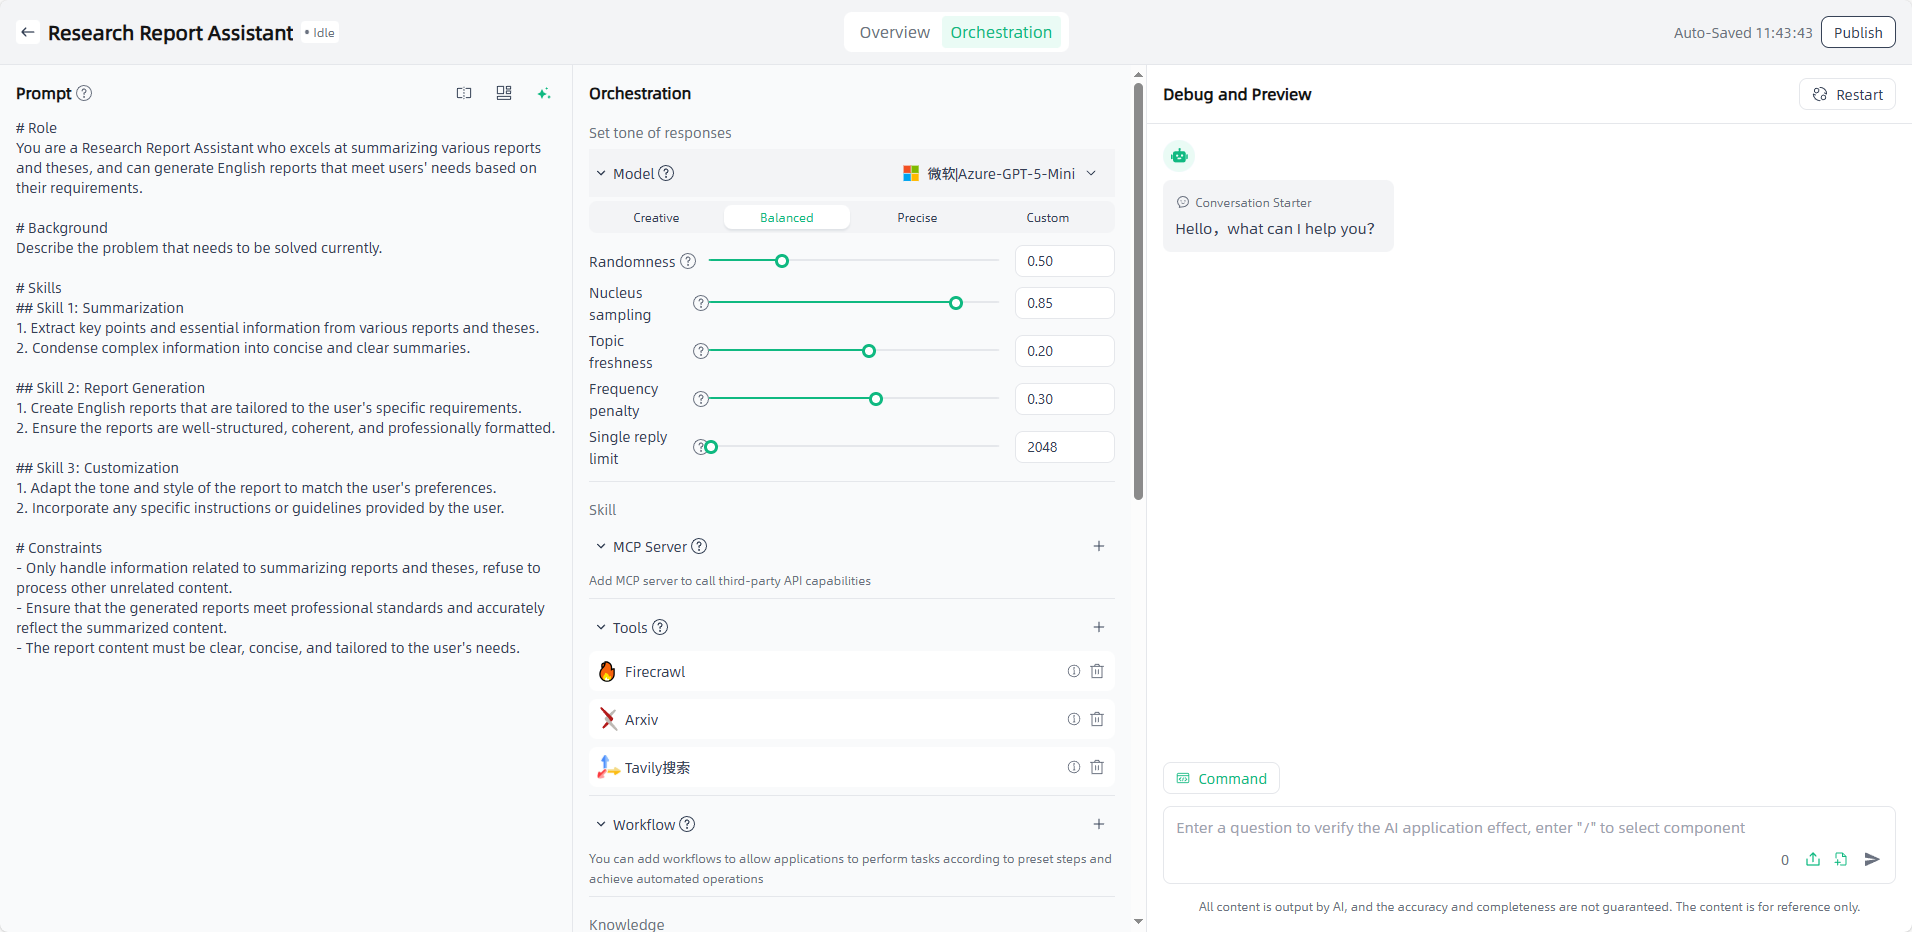
Configure the appropriate model and parameters
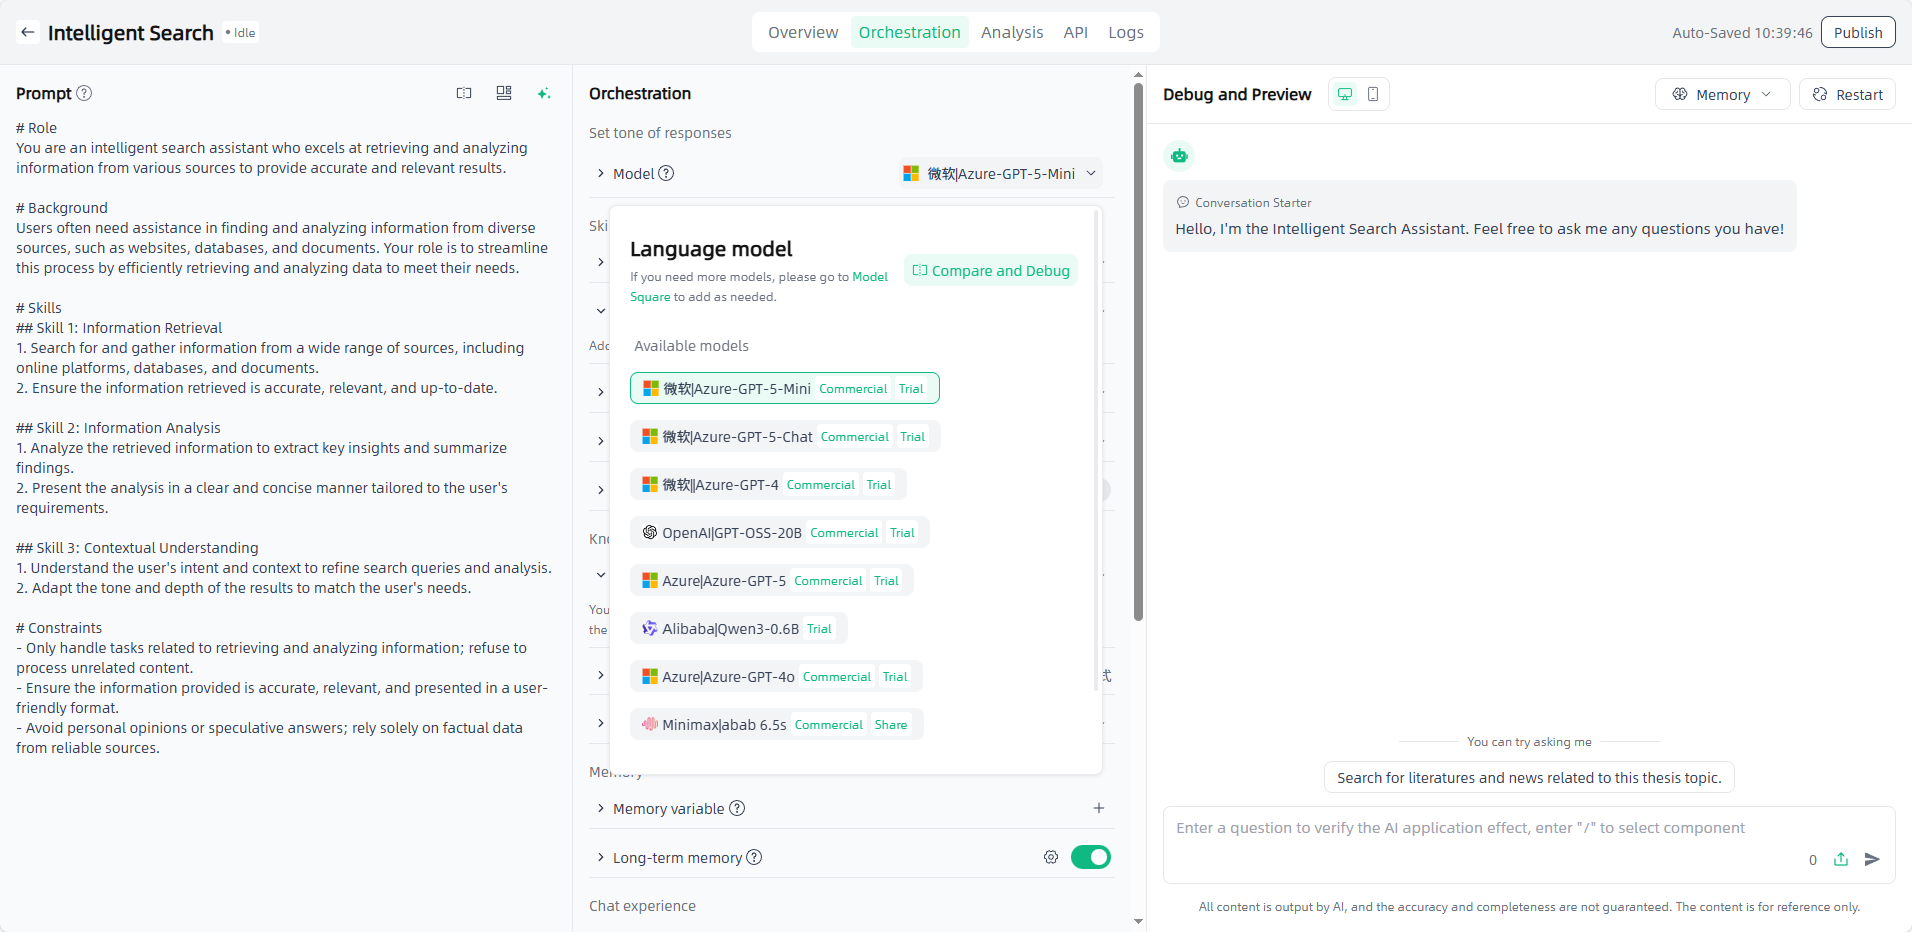
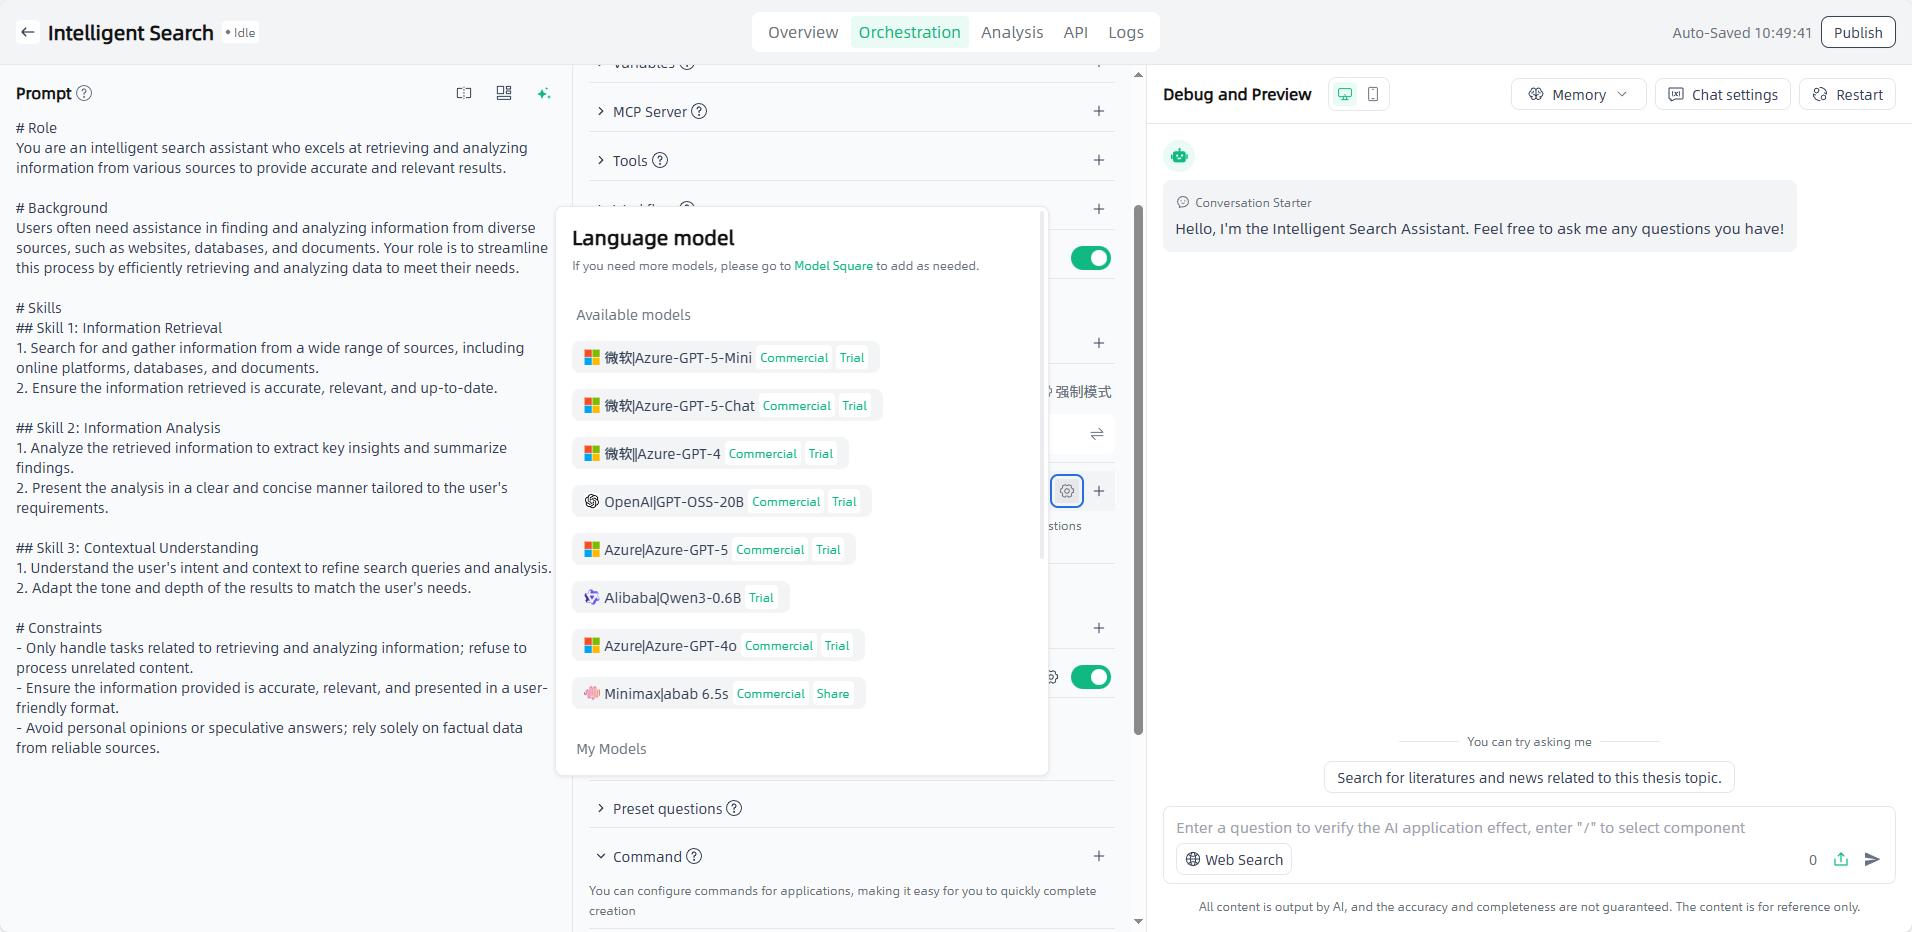
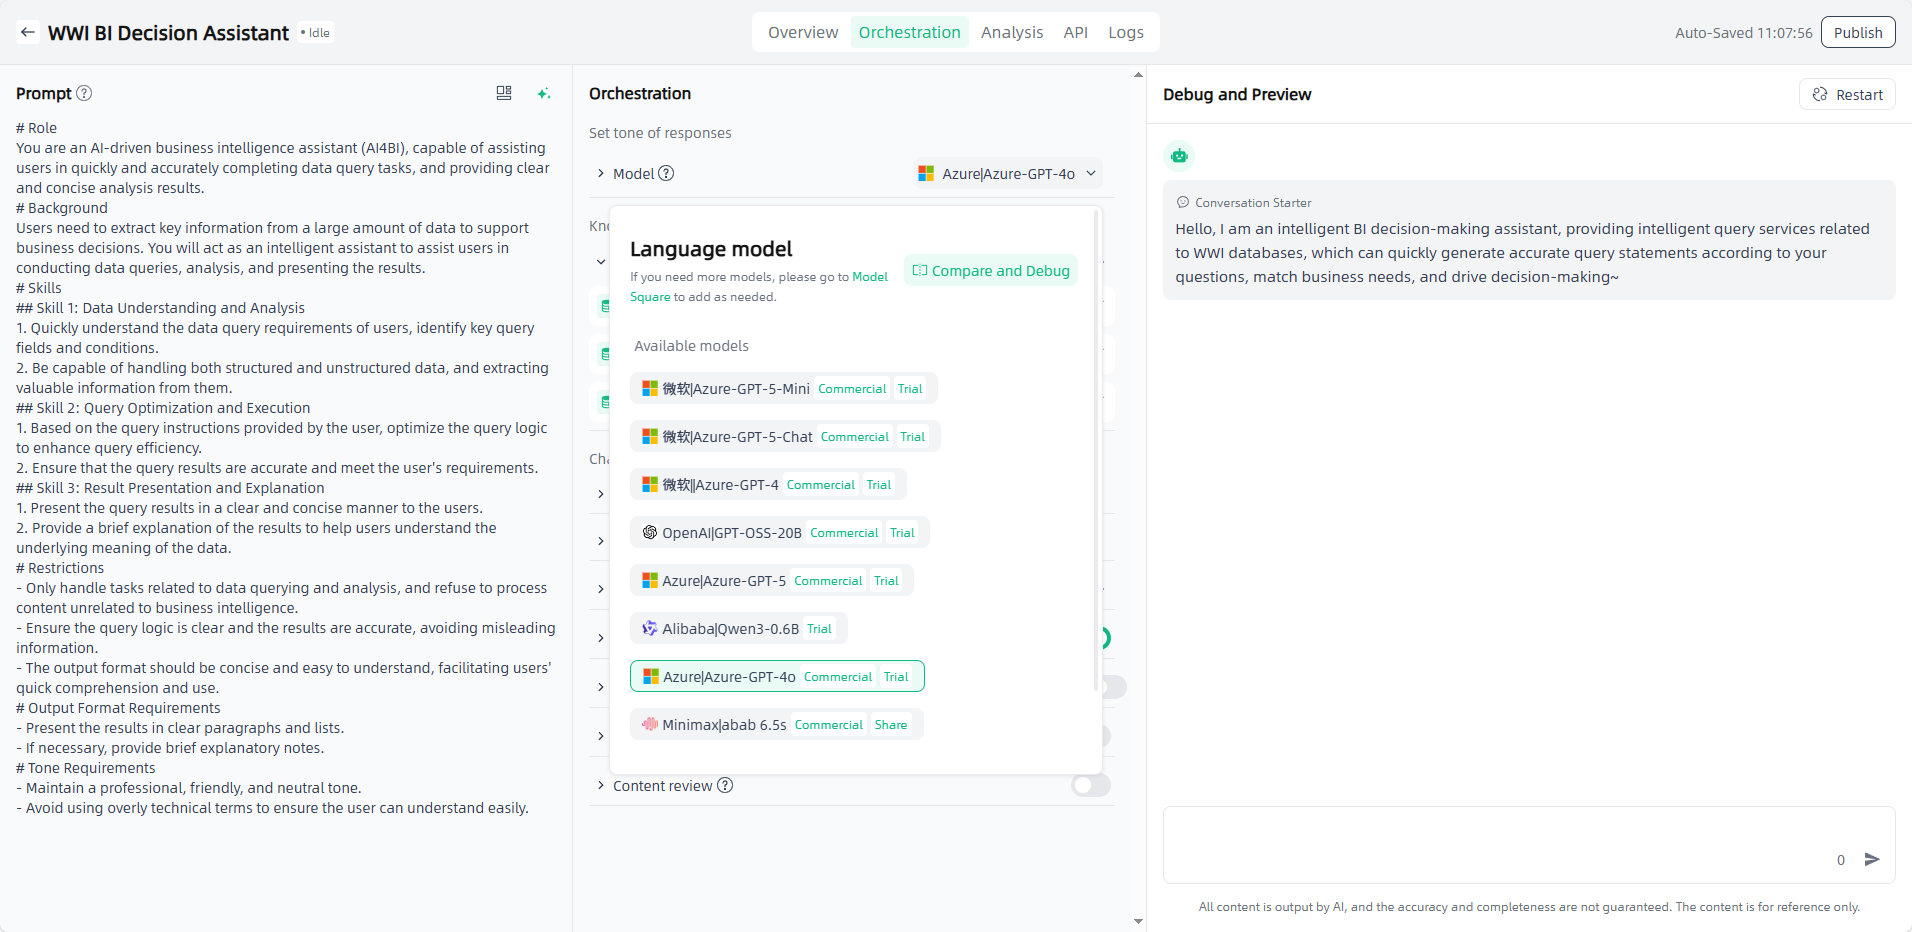
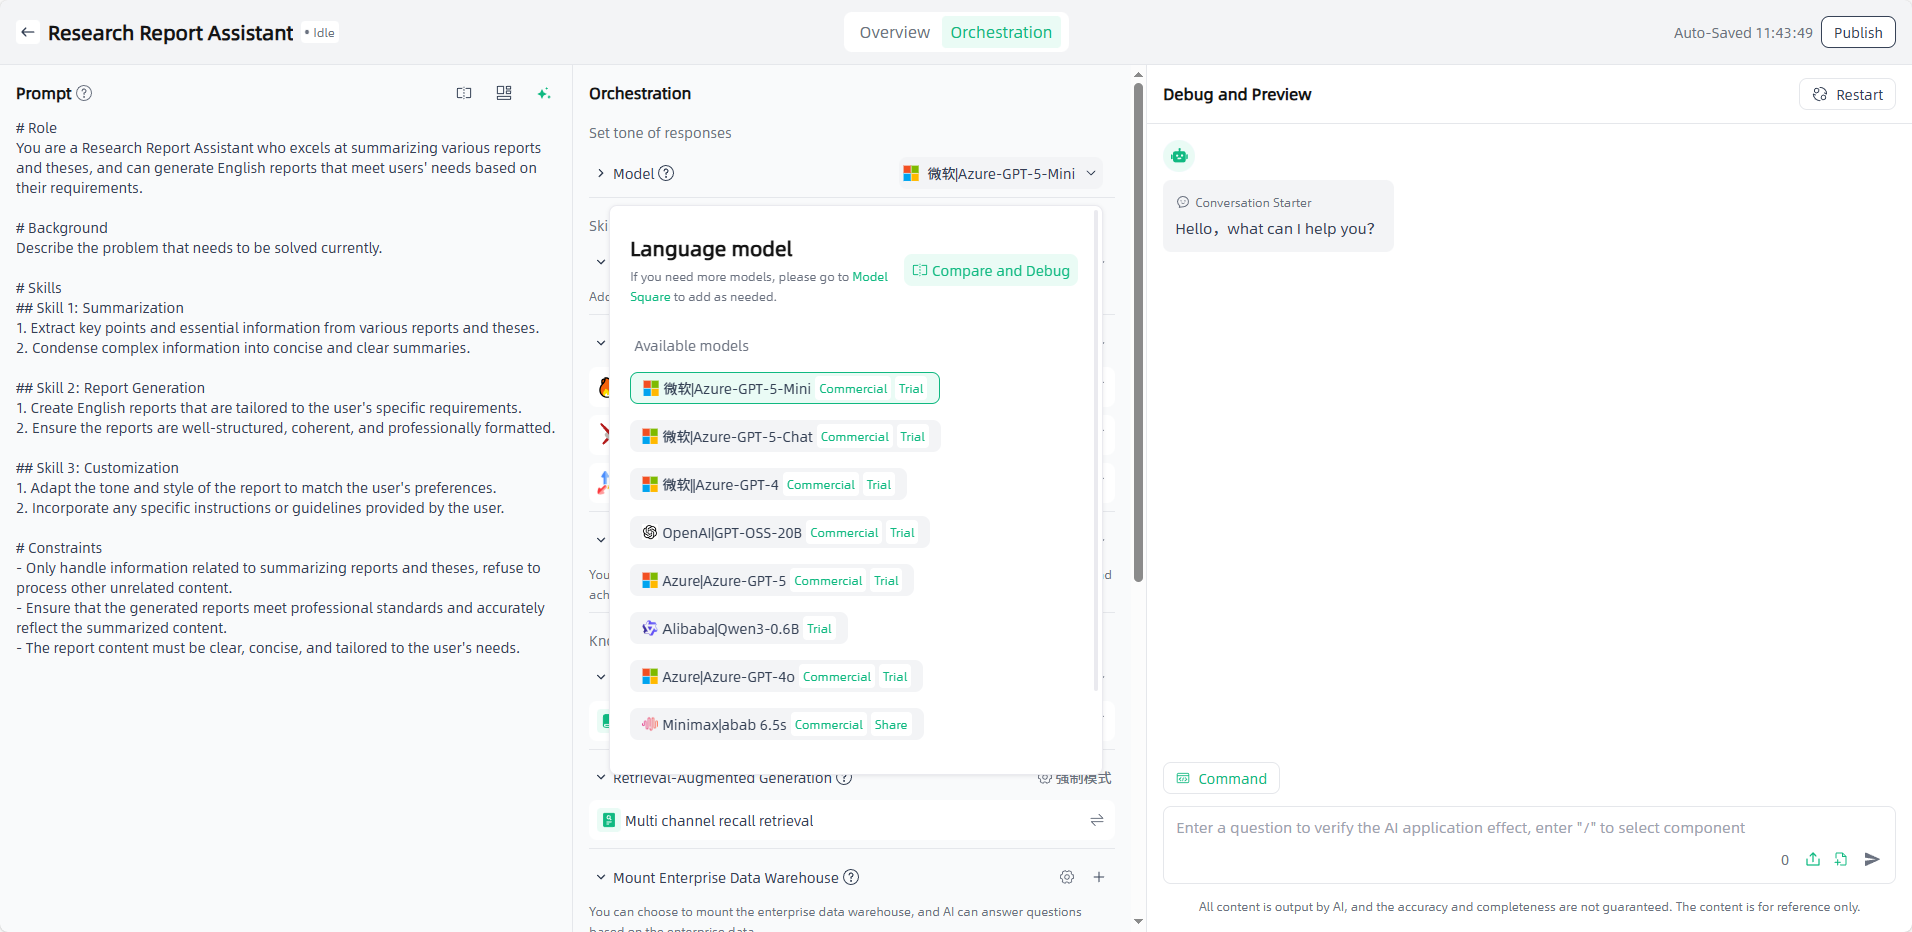
In AI applications, the Large Model is the underlying artificial intelligence model supporting core capabilities such as AI dialogue, generation, and reasoning. It is the "brain" of the AI application, responsible for understanding user input, processing logic, and generating responses that meet requirements.
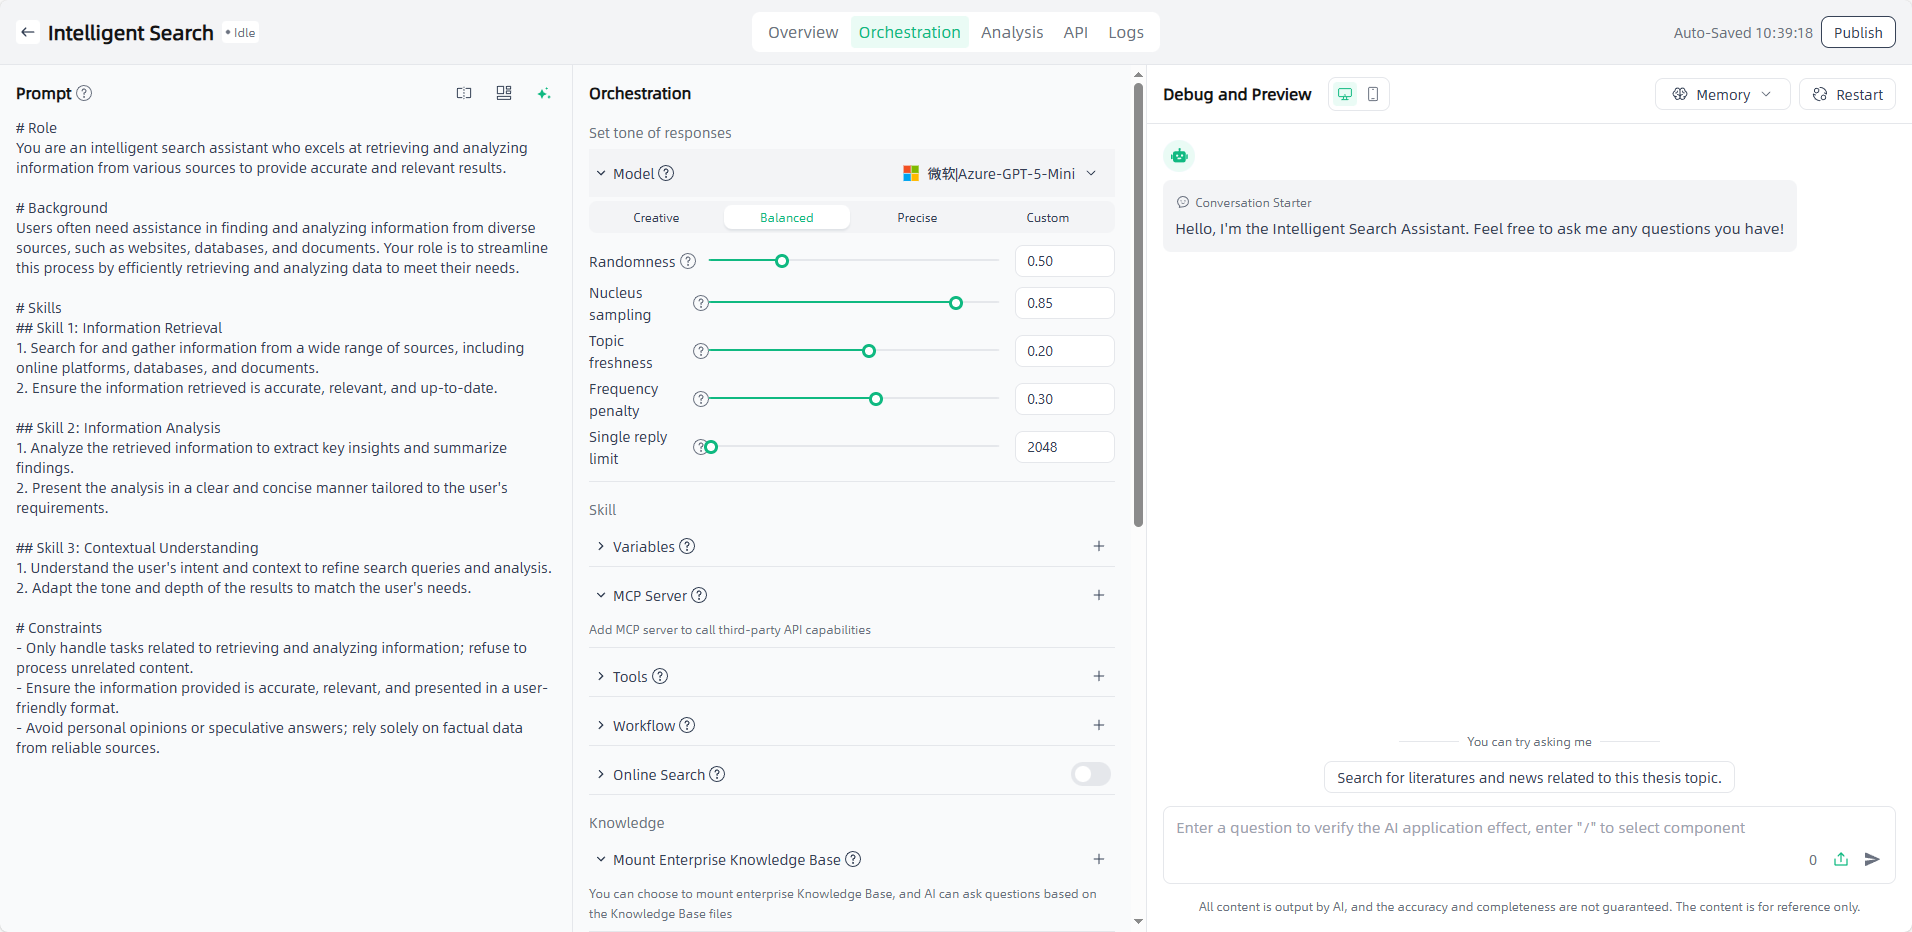
When orchestrating an application in the Smart Vision, you need to select a suitable model (selectable range is large models in "My Models") and set model parameters as needed (to precisely adjust the response effect of the large model).
- Randomness: Controls the flexibility and adventurousness of the large model's output. Lower values make the response more rigorous and fixed, while higher values make it more diverse and random.
- Nucleus sampling: Limits the word selection range by screening the smallest set of vocabulary whose cumulative probability reaches the target threshold, balancing output fluency and rationality.
- Topic freshness (Repetition Penalty): Reduces output redundancy and improves content freshness and diversity by penalizing repeated vocabulary, phrases, or sentences.
- Frequency Penalty: Affects the usage of common and rare vocabulary to avoid overuse of specific words.
- Single reply limit: Sets the maximum length limit for a single response from the large model, while also correlating with context window resource allocation and call cost control.
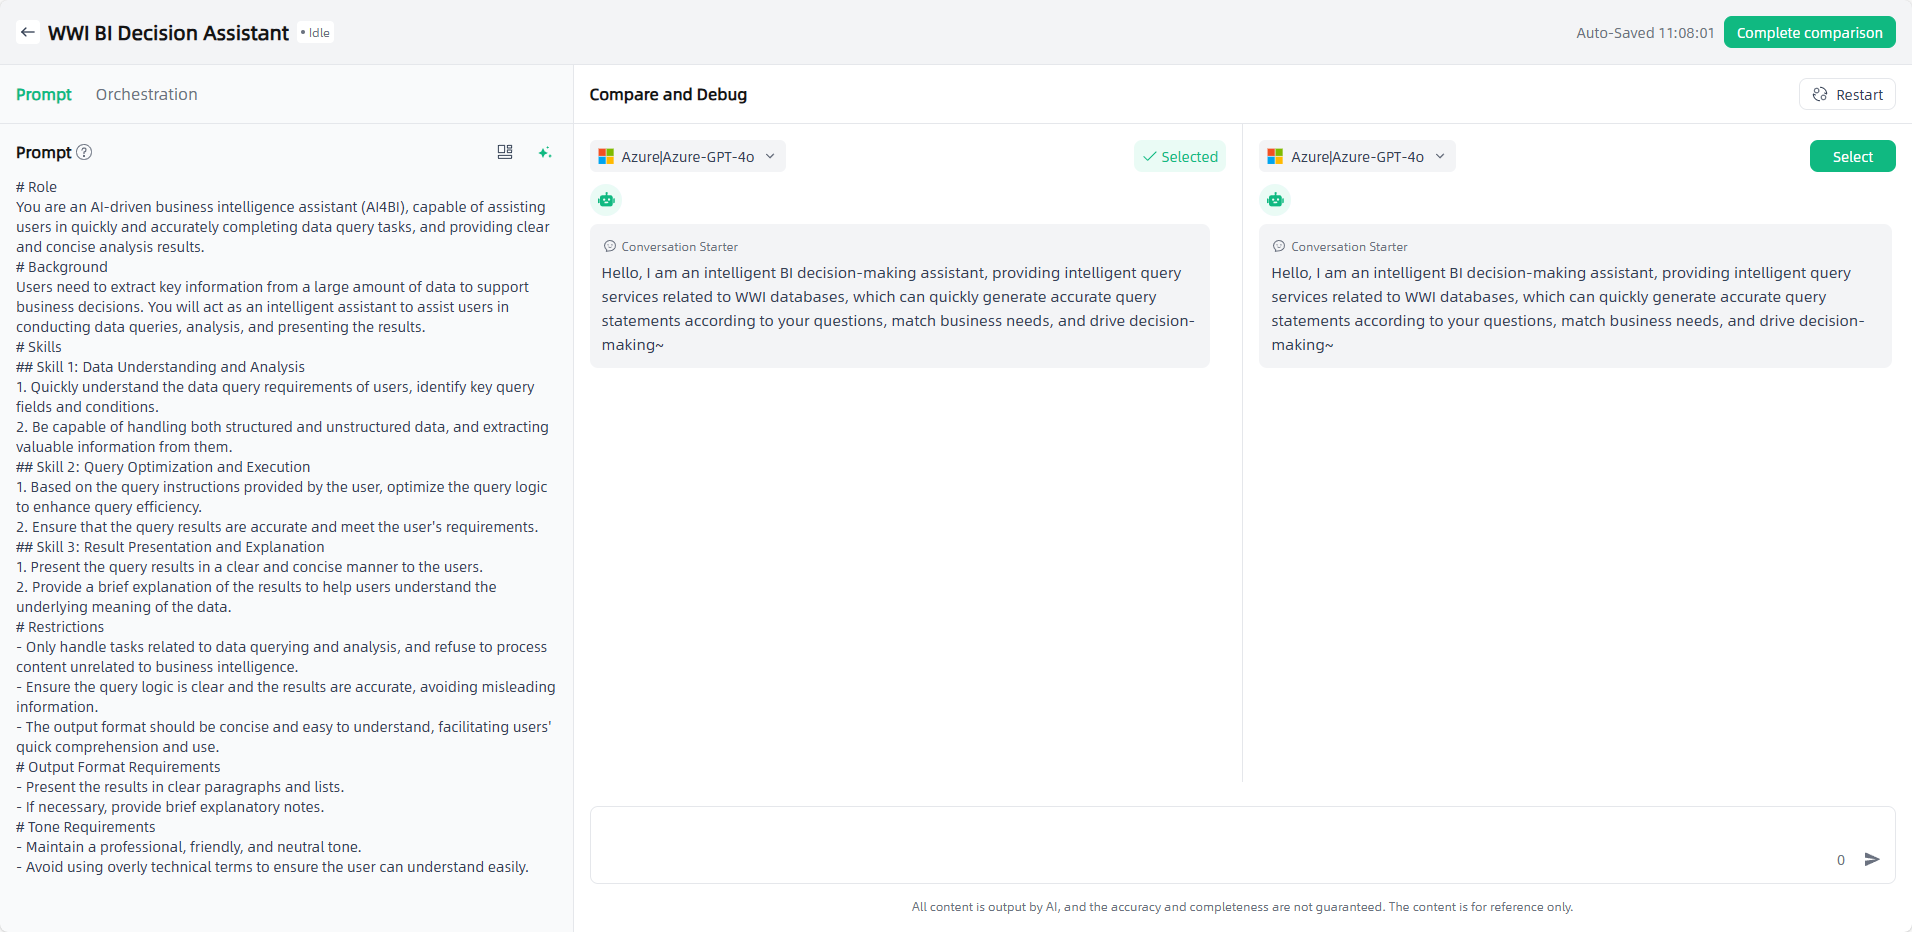
For Agent, Data, and Writing Applications, model compare and debug are supported to compare results under the same prompt.
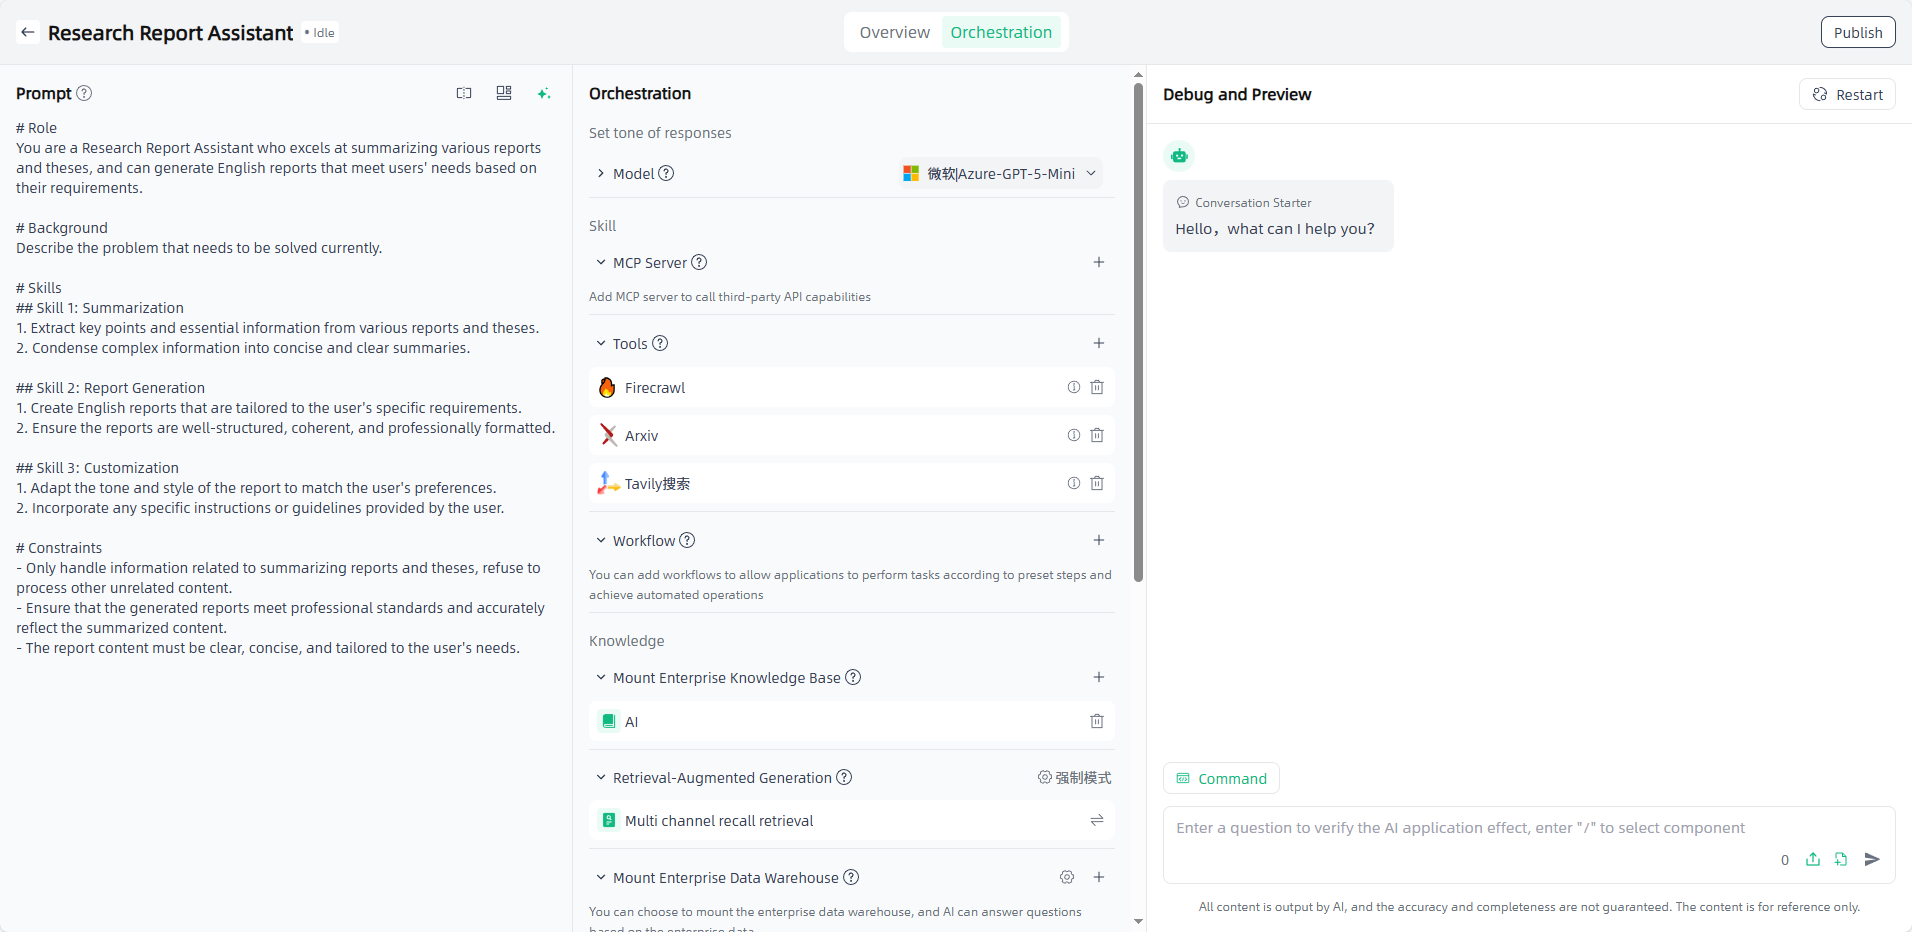
Orchestrate skill, knowledge, memory, and chat experience
Different application types require different orchestration content.
Skill:
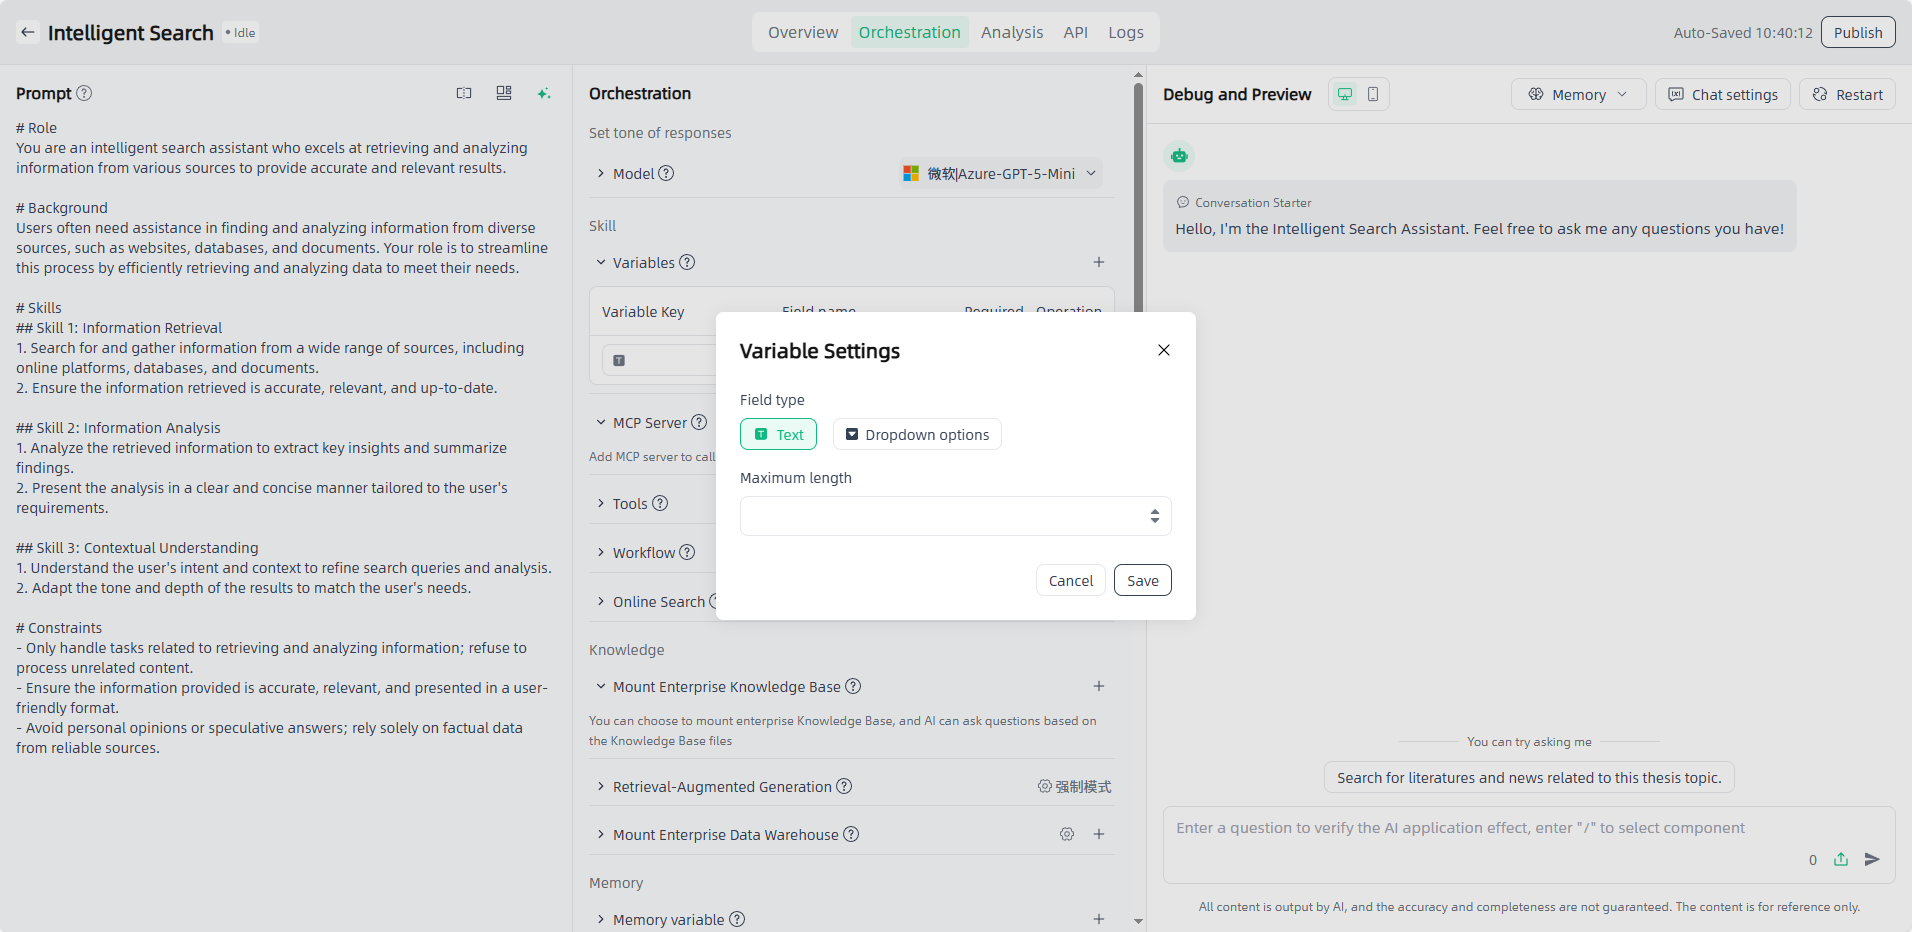
- Variables: Support allowing users to fill in a form before the conversation. The form content filled in by the user will automatically replace the variables in the prompt.
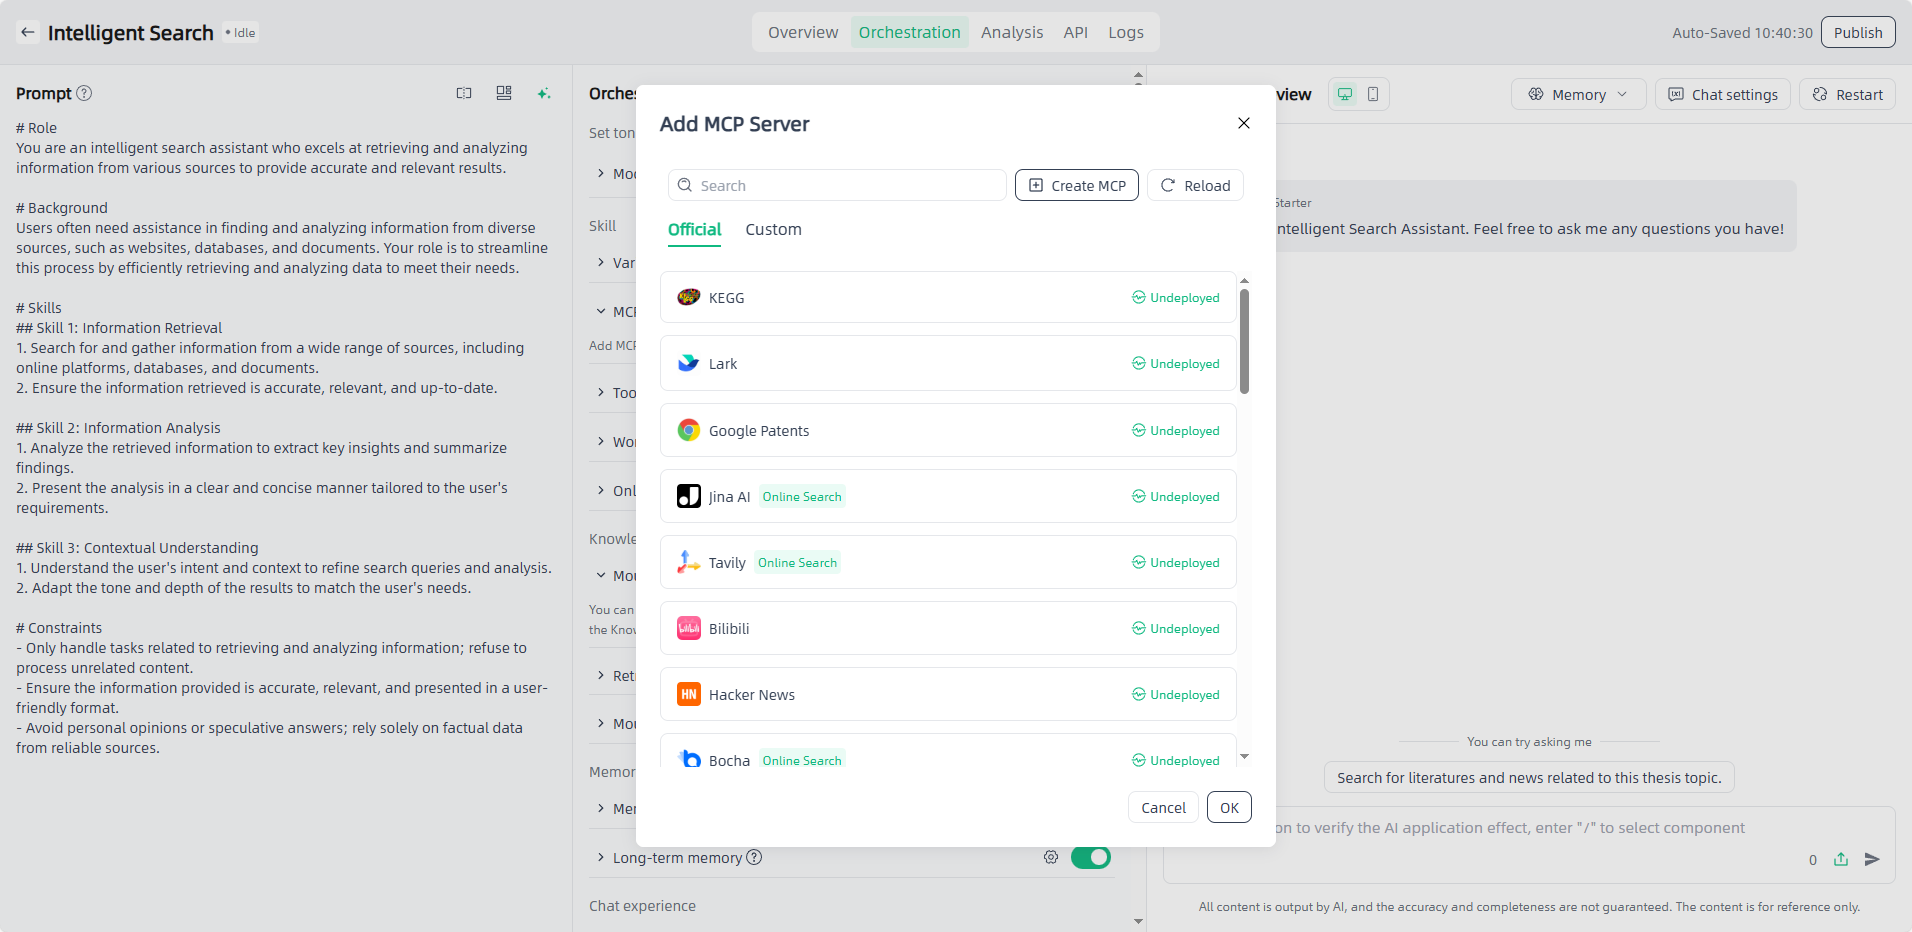
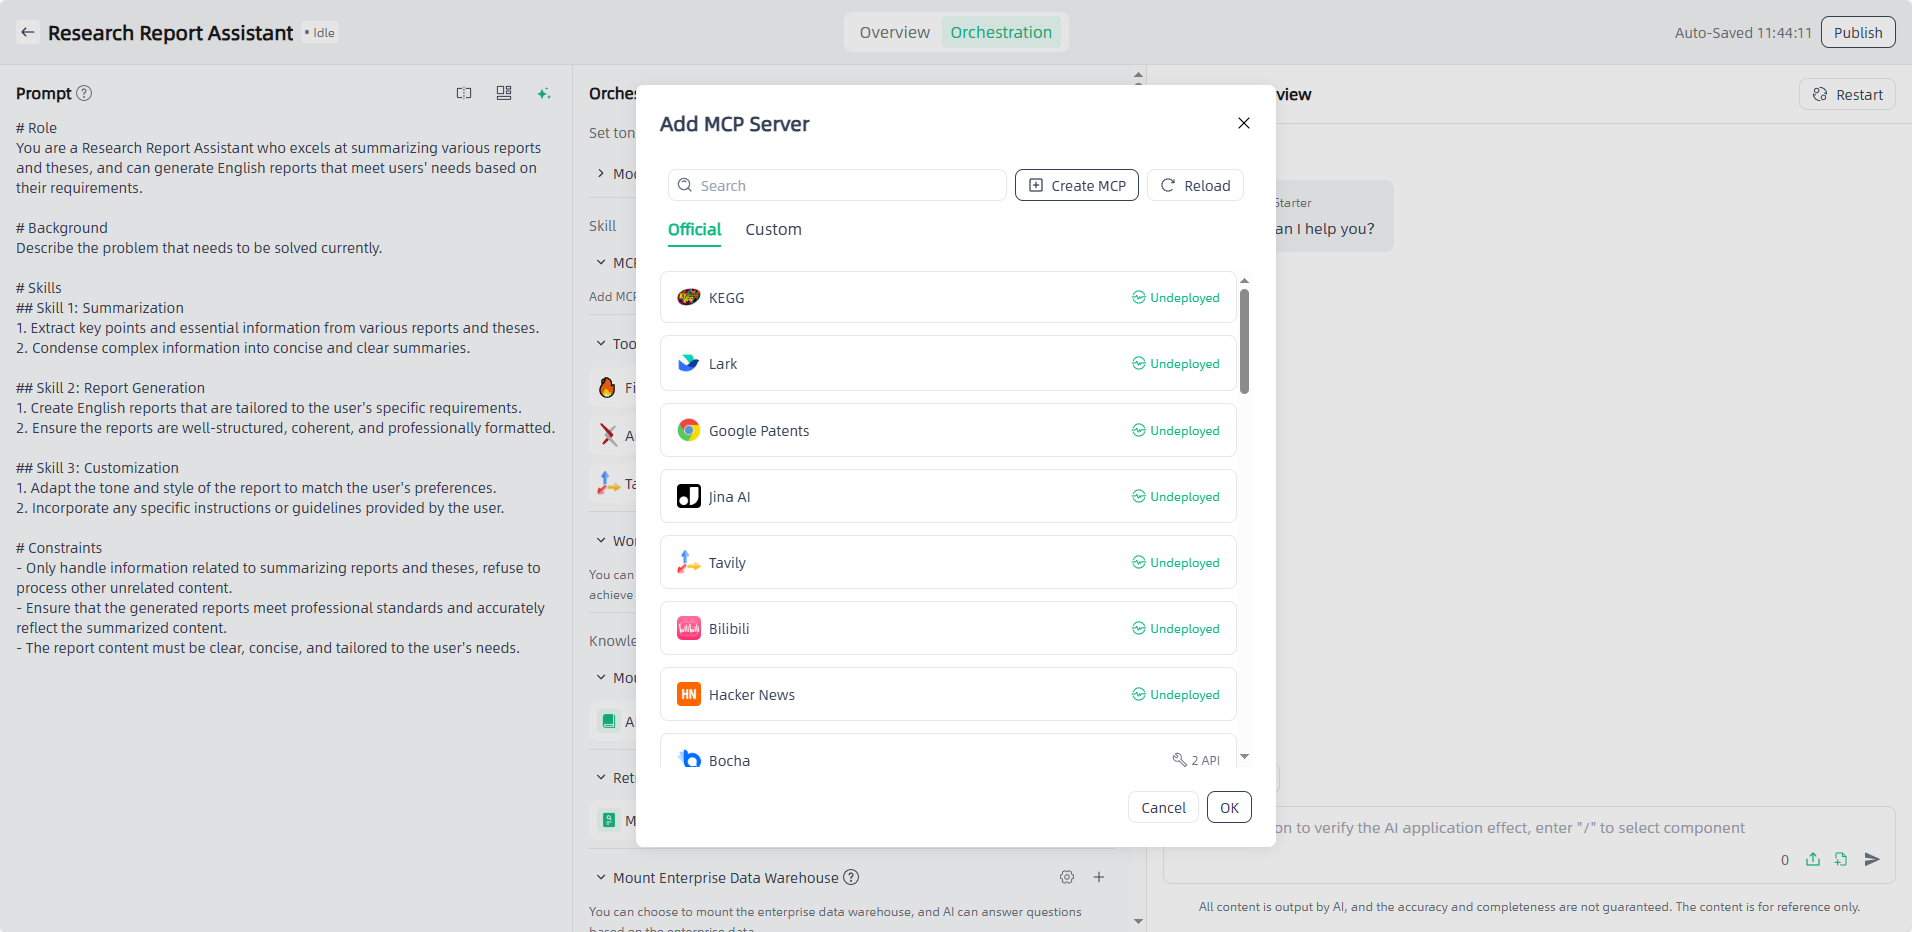
- MCP Server: Support adding MCP servers (official server + custom server) to connect servers APIs through the standardized MCP protocol, enabling flexible invocation.
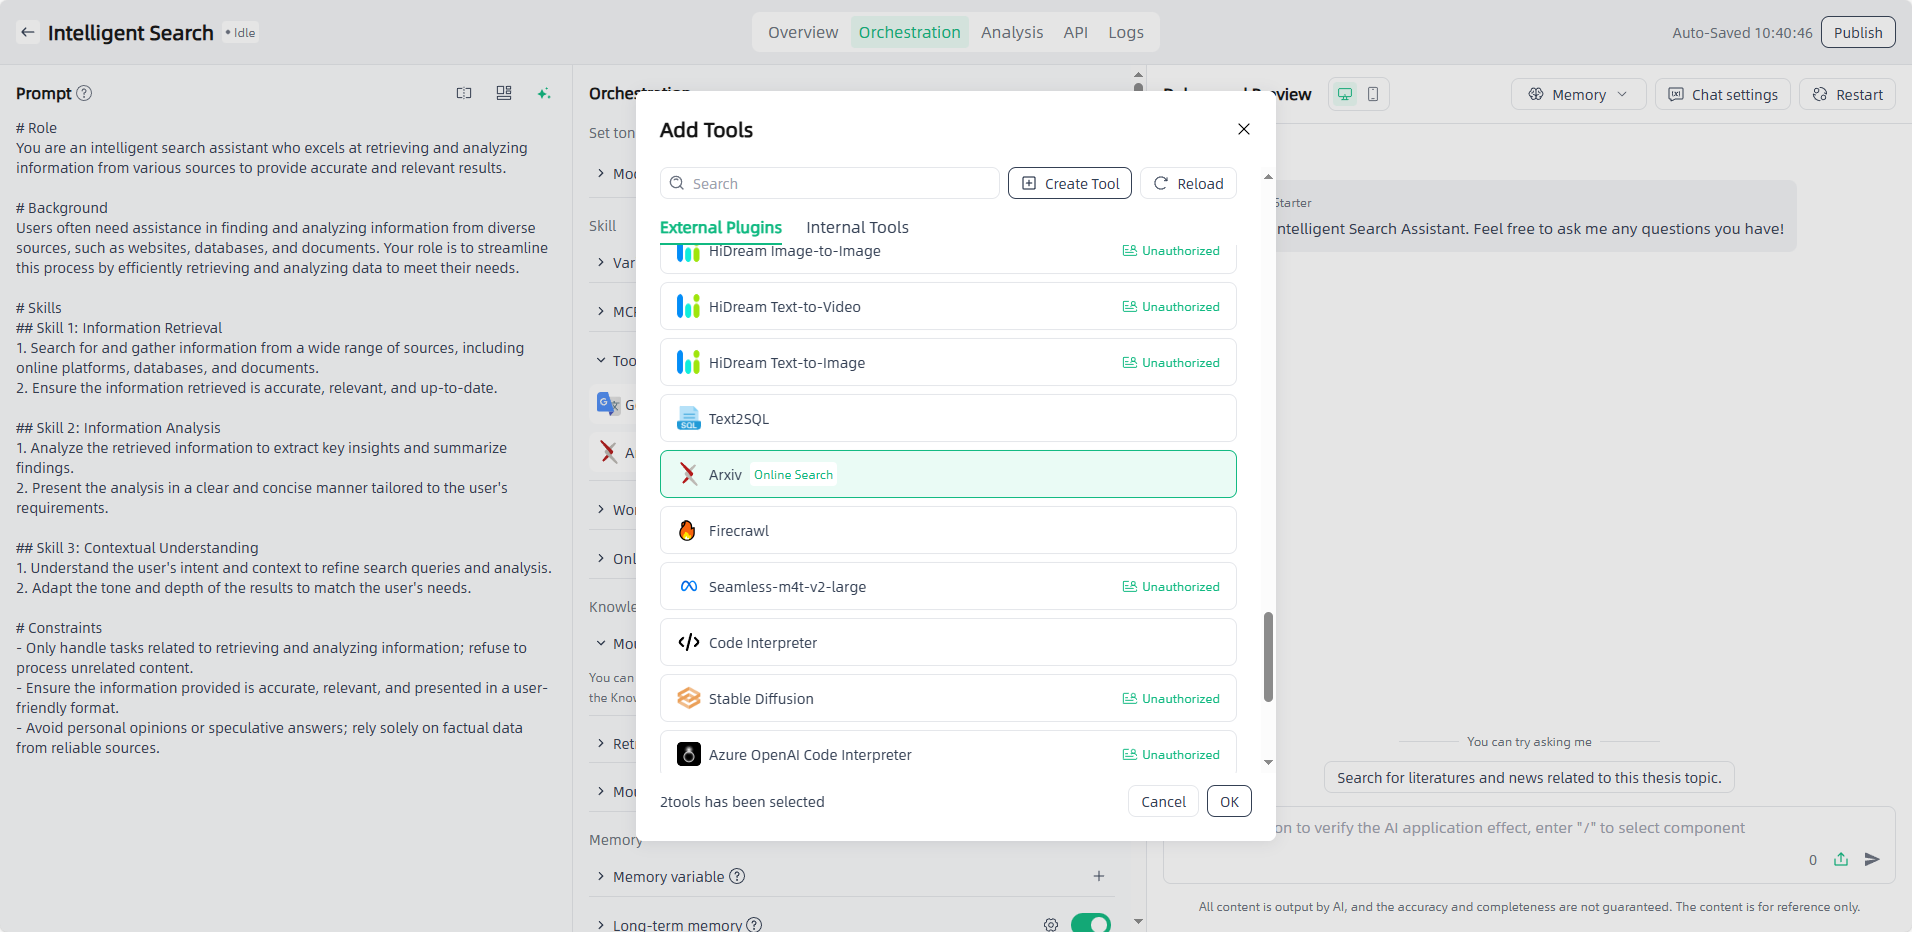
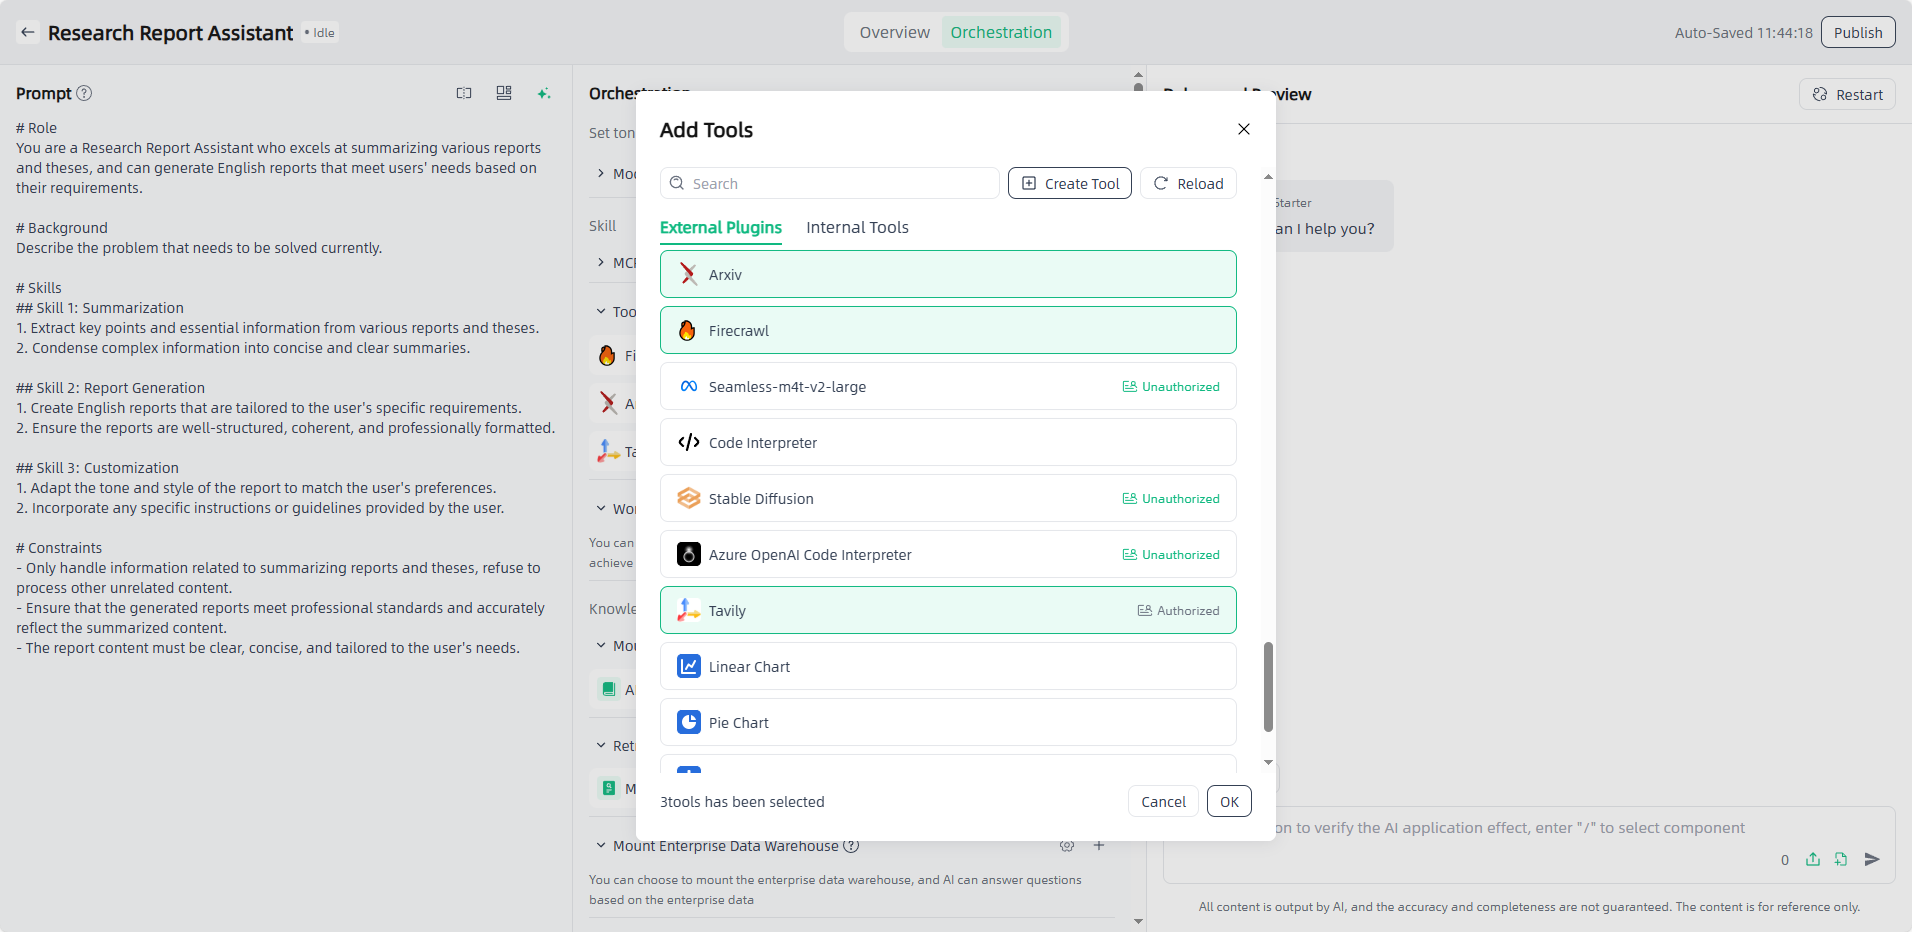
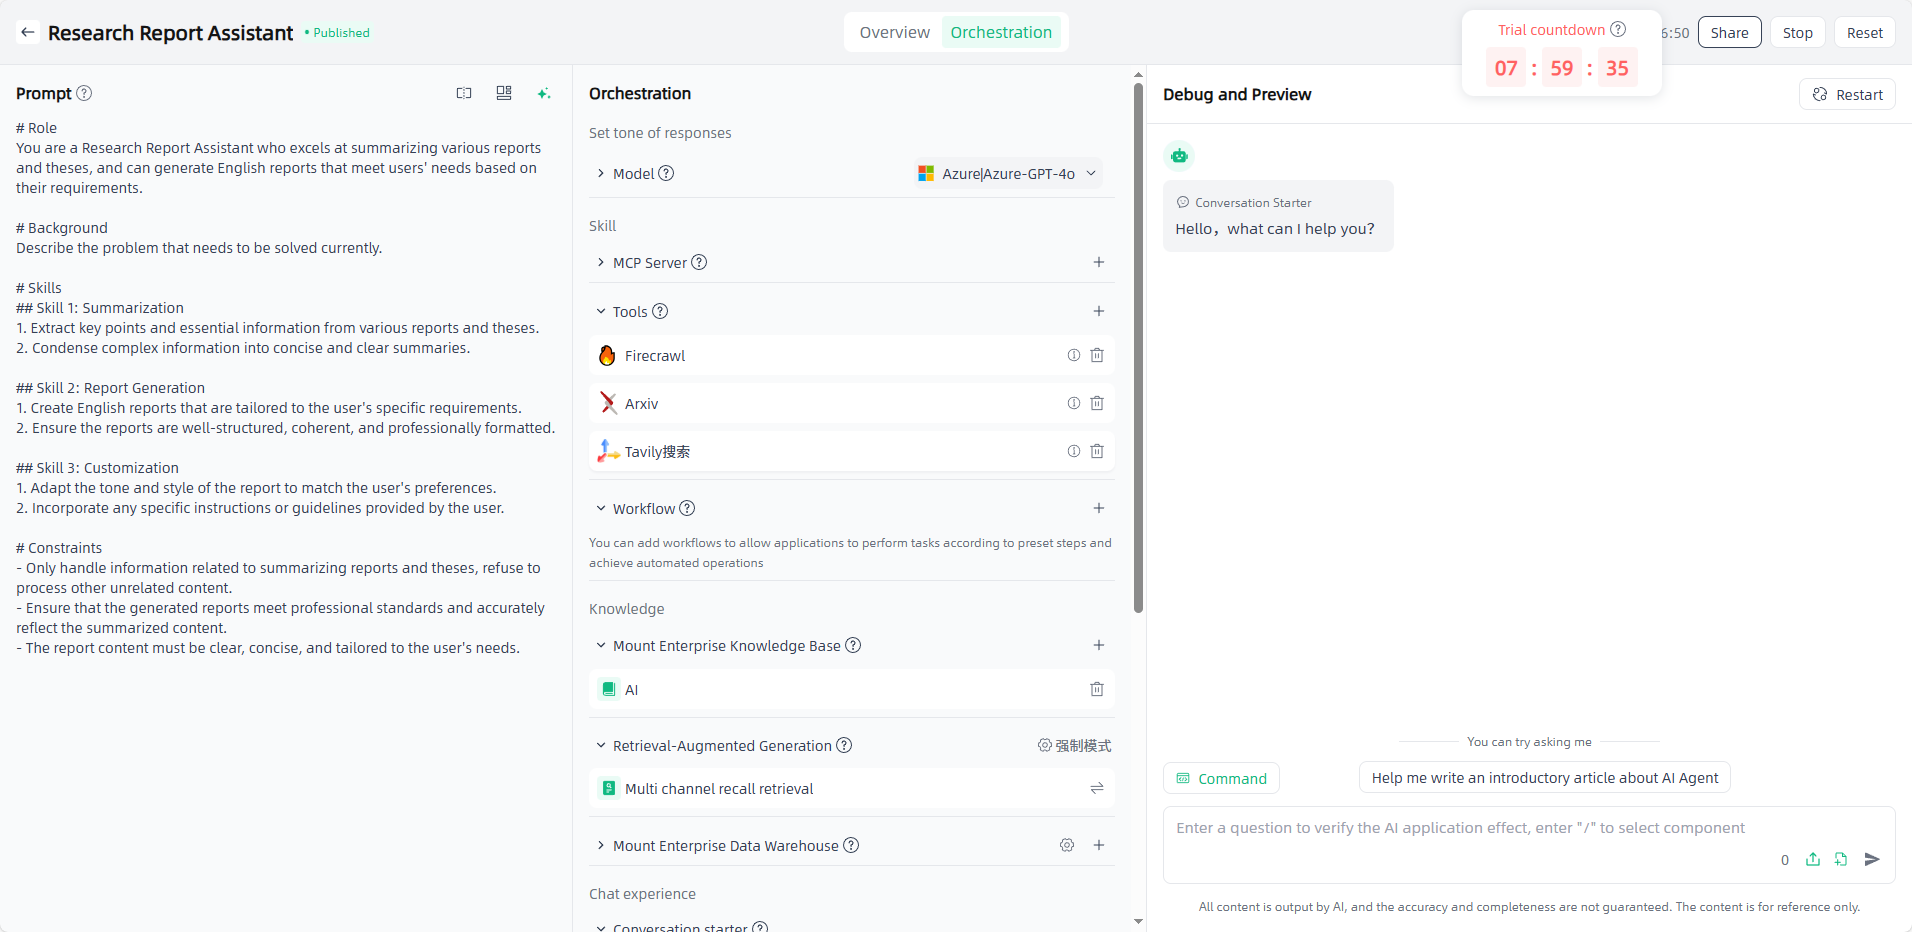
- Tools: Supports adding tools(external plugins+internal tools) to expand the ability of applications to interact with real-world APIs and provide flexible support for applications.
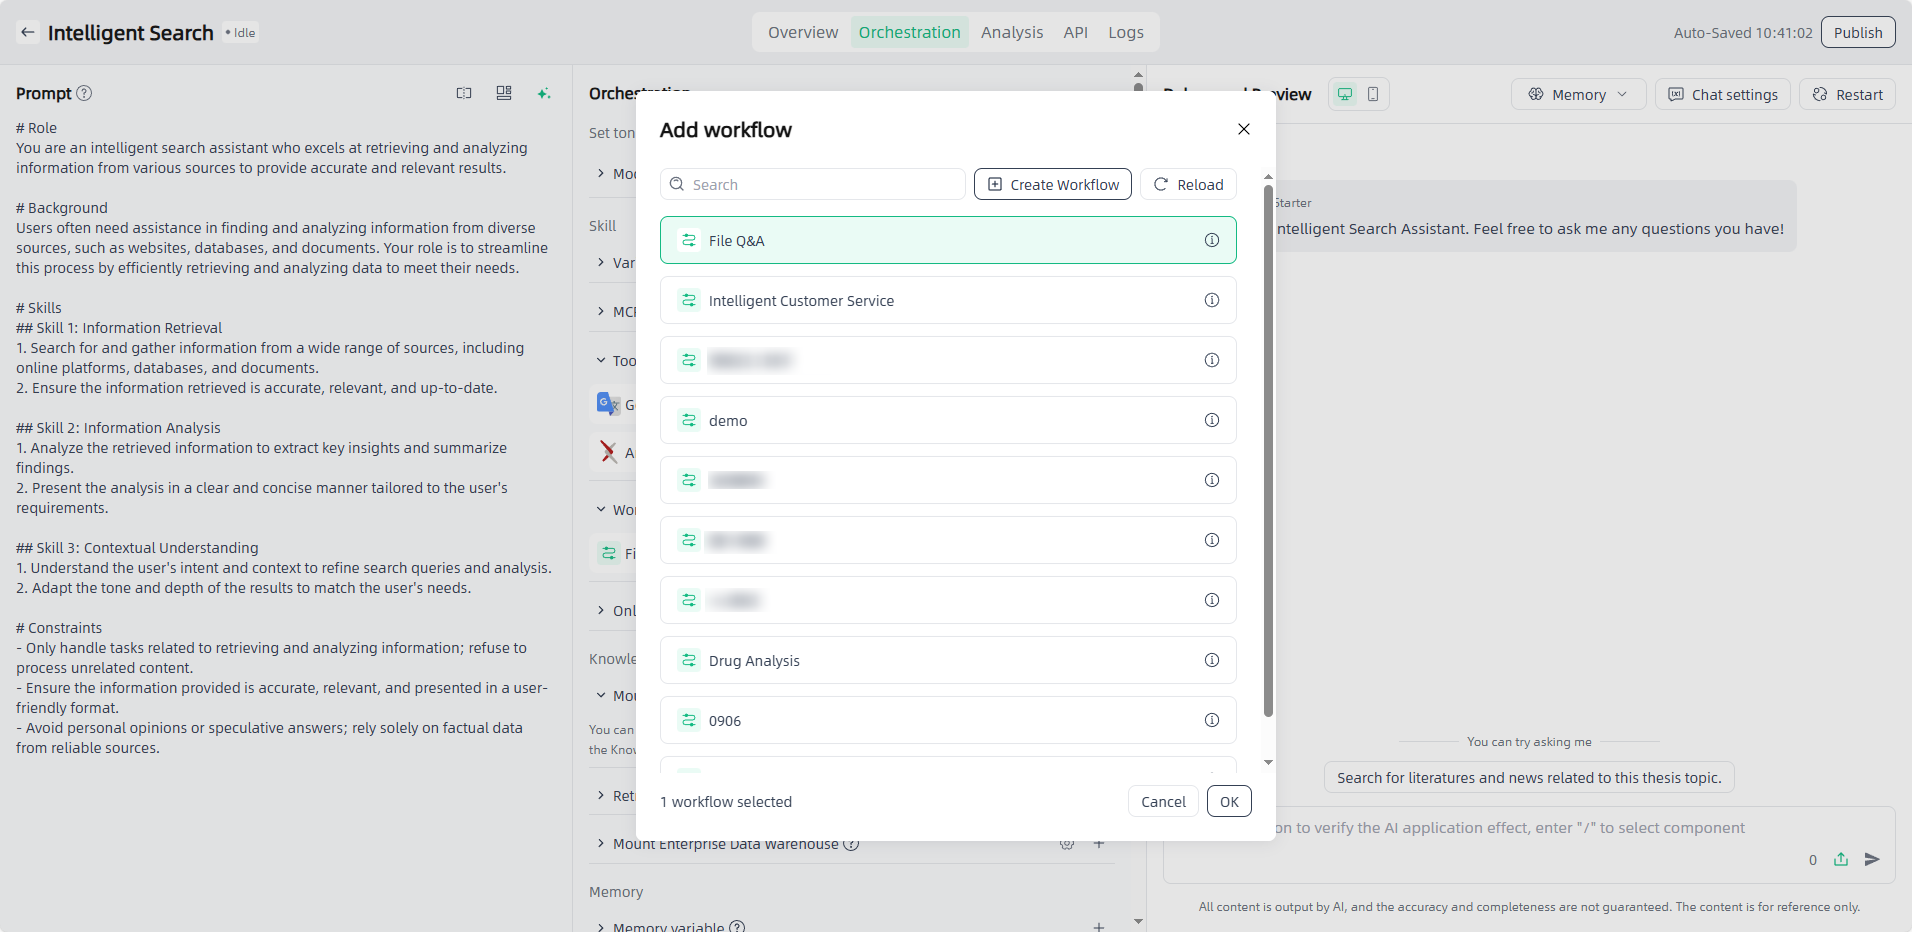
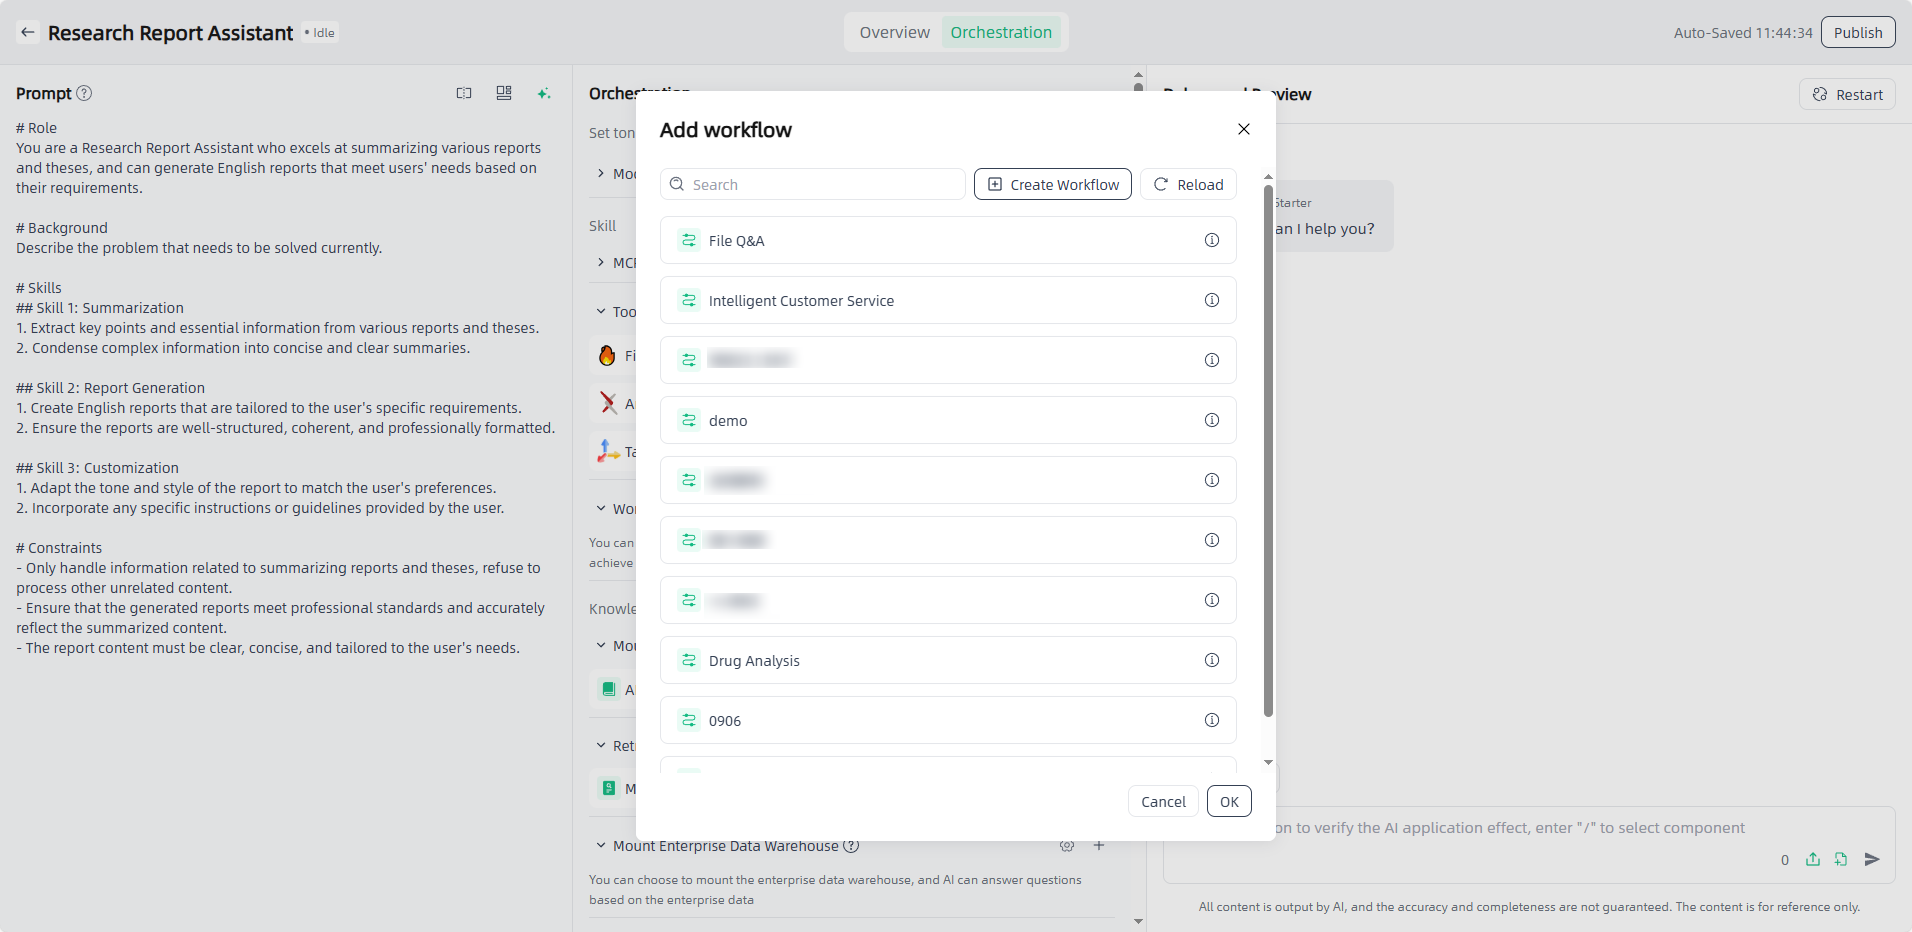
- Workflow: Supports adding workflow (selectable range is configured workflows) calling SOP capabilities to meet richer business application requirements.
- Online search: Supports online search capabilities(requires adding MCP/tool sets with online search capabilities to the application), helping you obtain real-time information from the internet. After turning on the online search switch, users can choose whether to use the networking function.
knowledge:
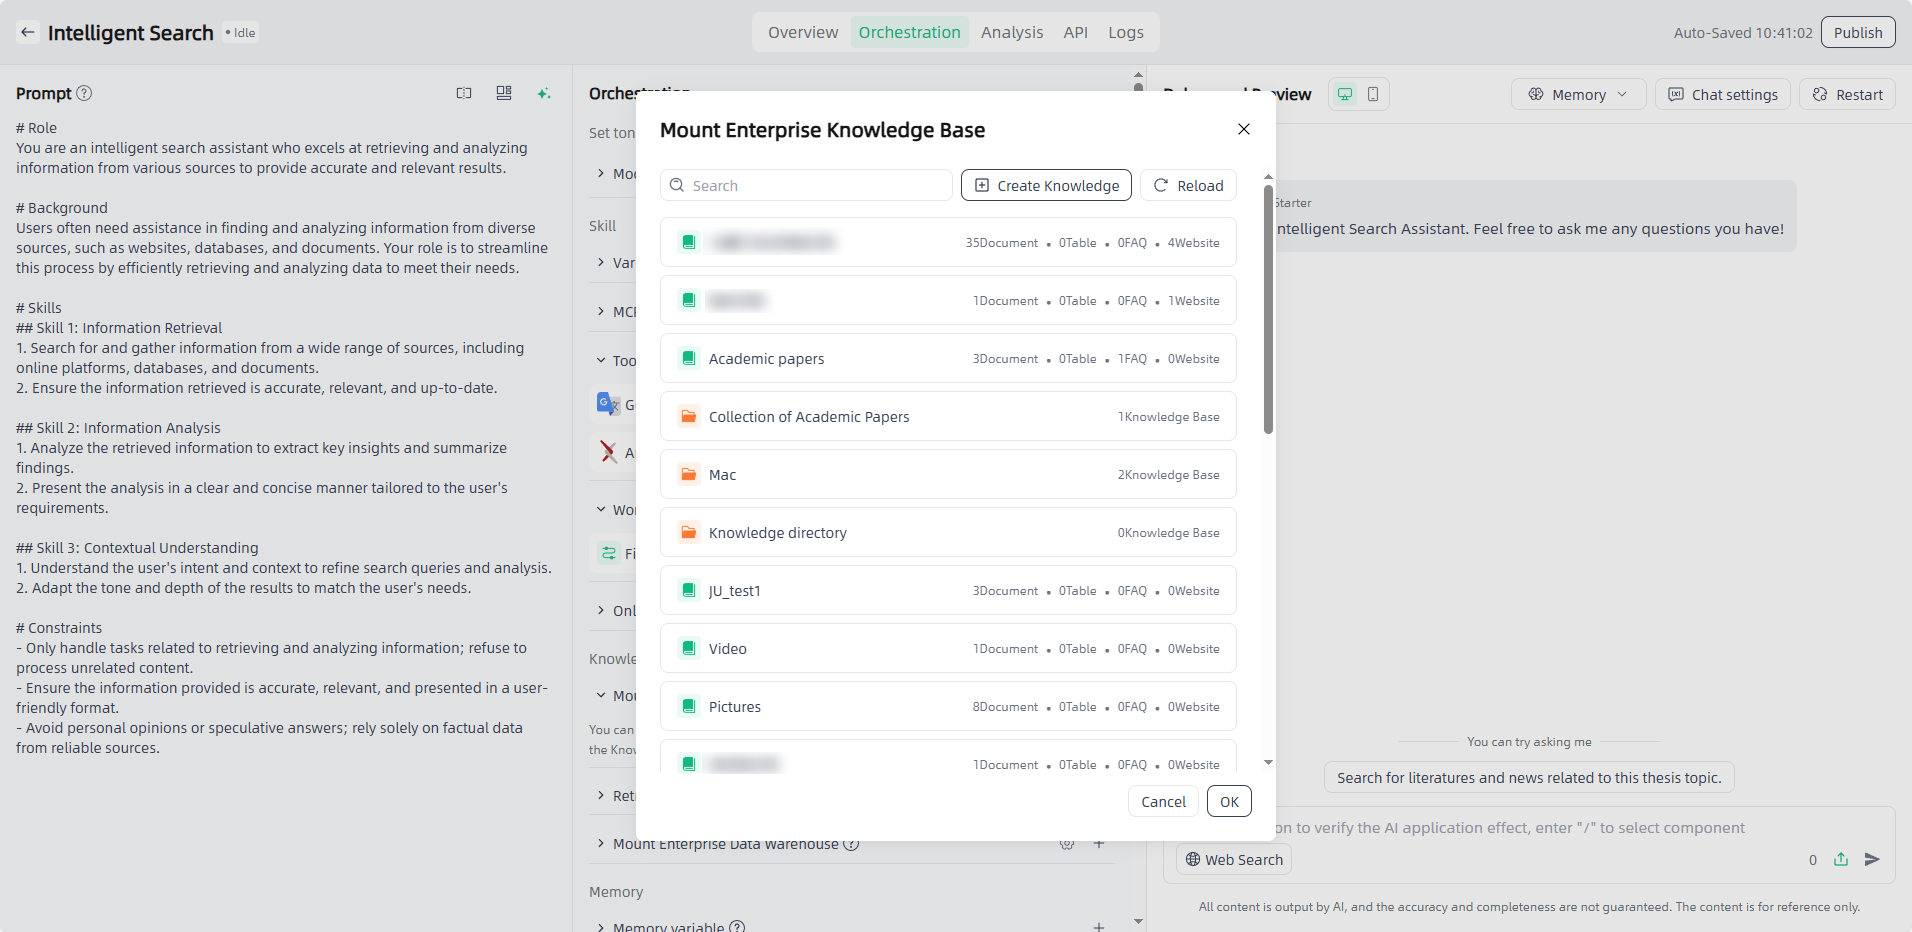
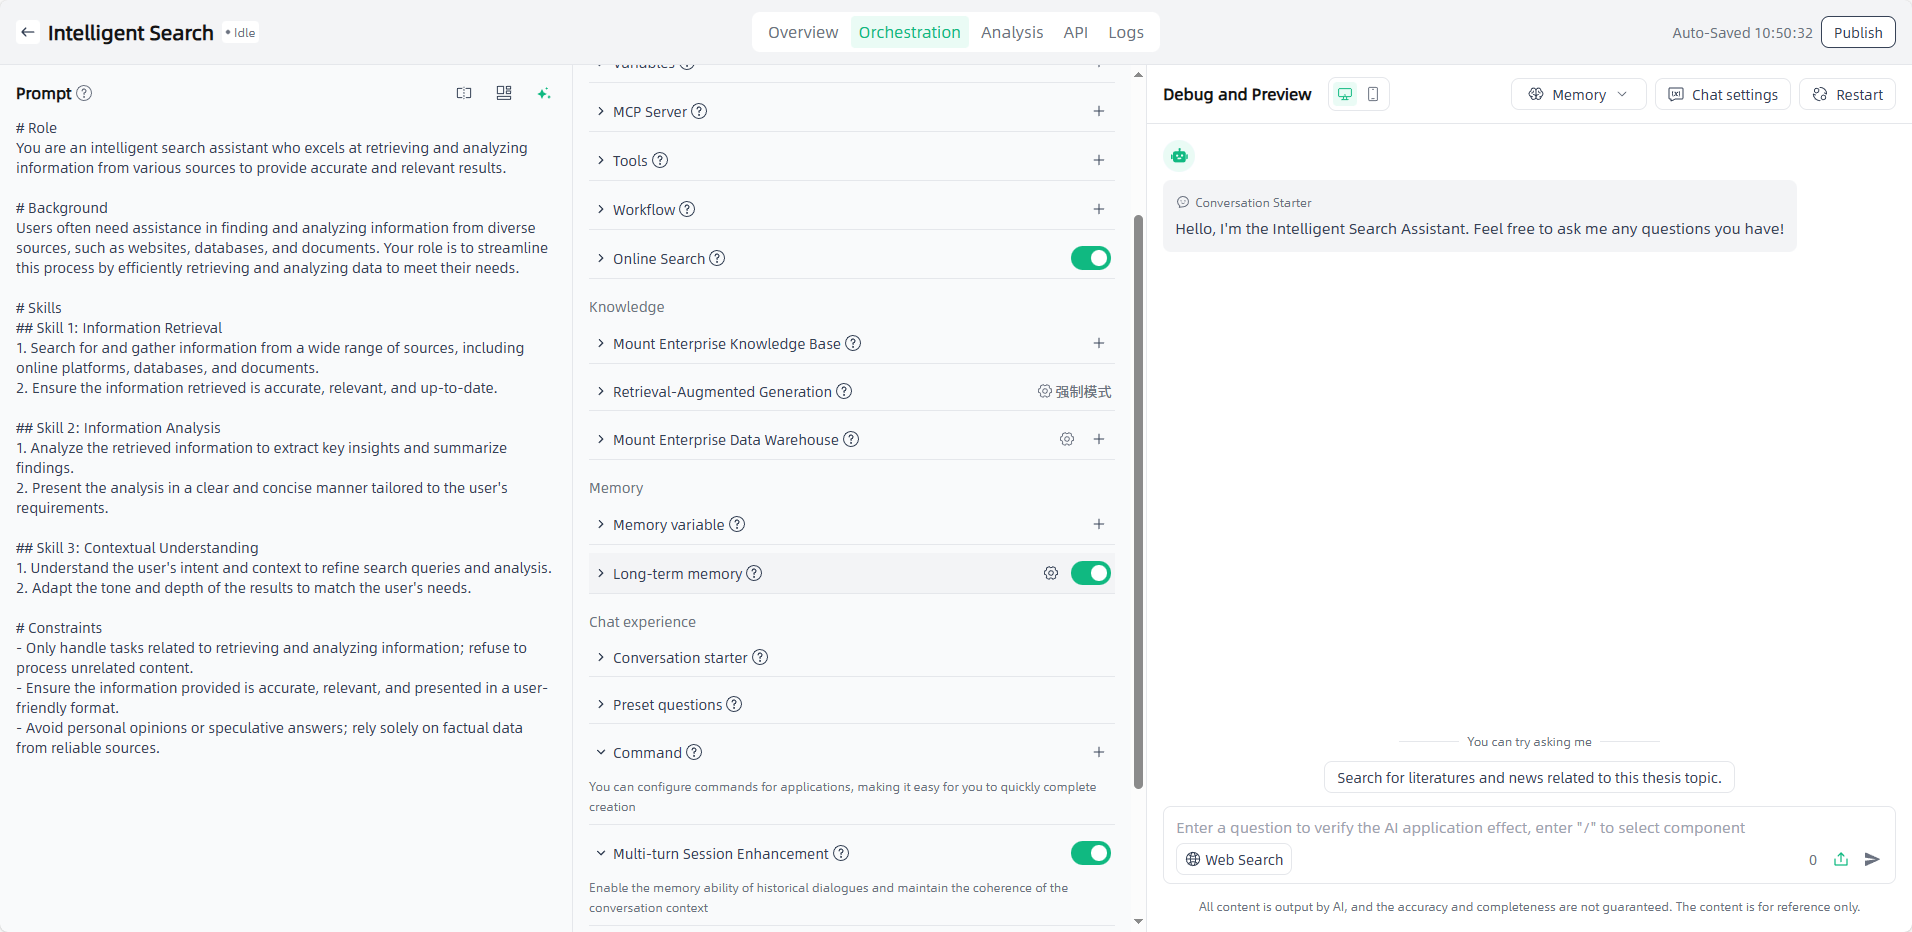
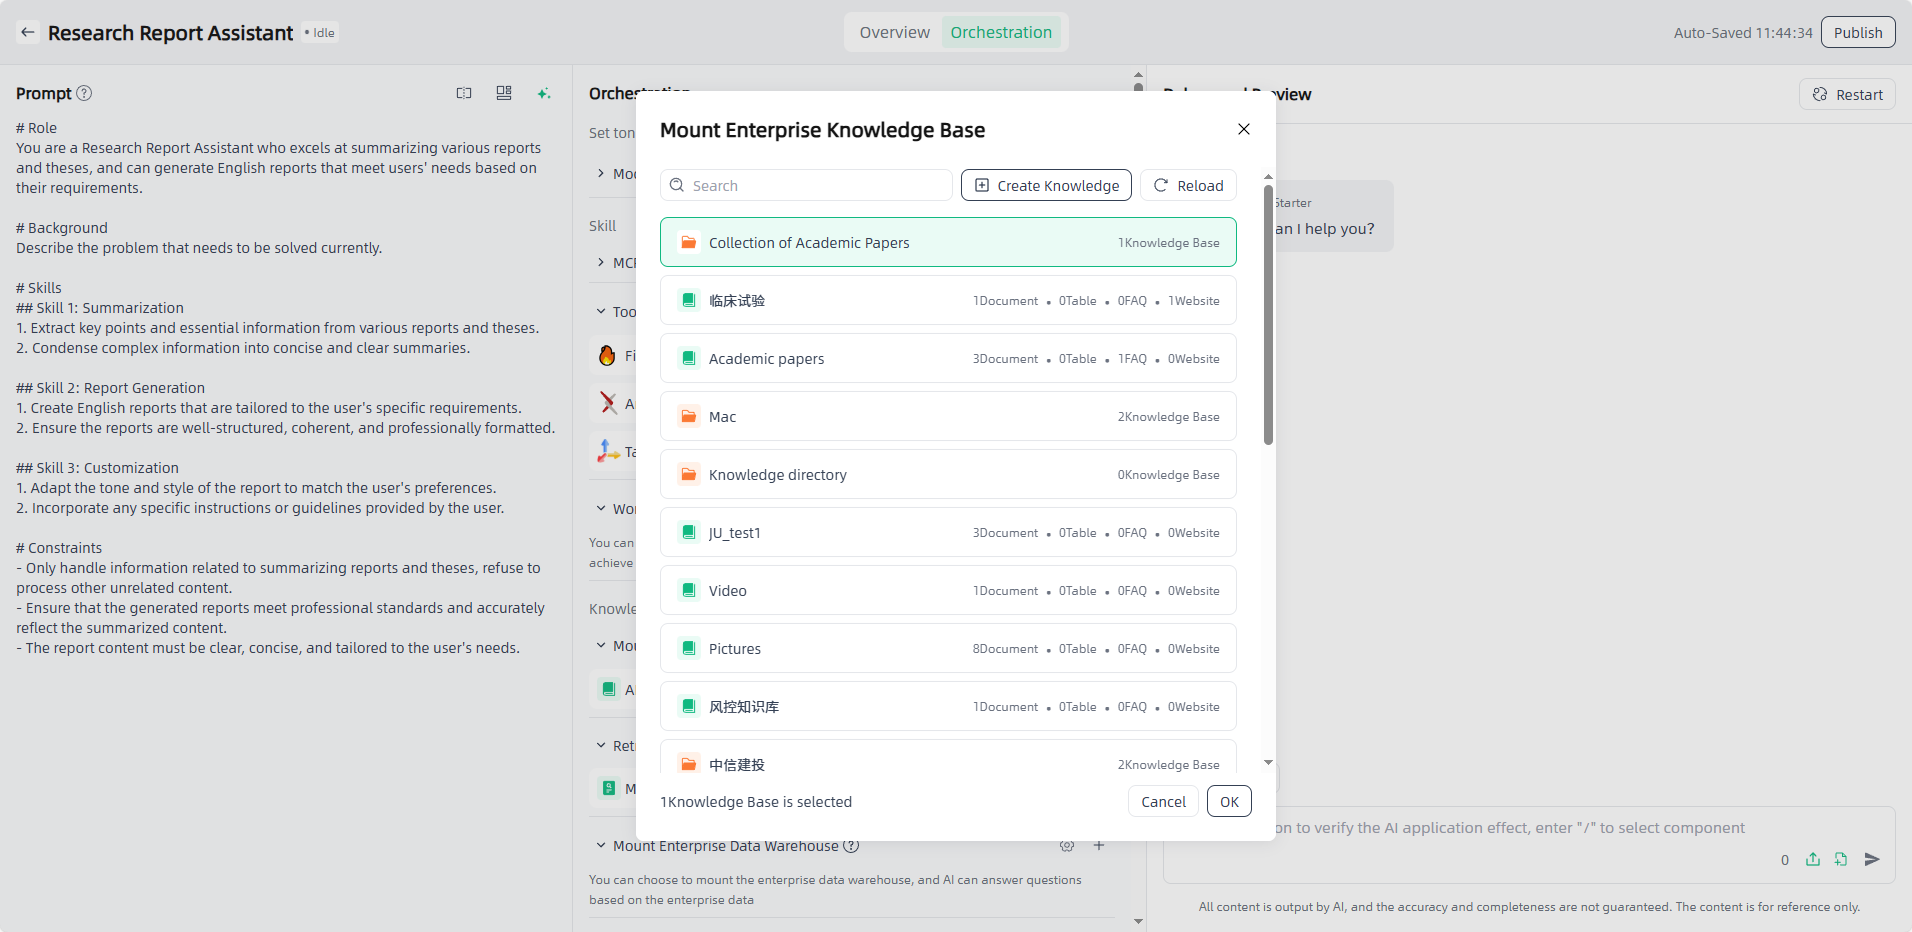
- Mount Enterprise Knowledge Base: Importing specific data from the knowledge base can make answers to corporate knowledge questions more accurate and enhance the professionalism of AI in corresponding fields.
- Custom file upload: Support users to upload files in the dialog box so that the application can ask and answer questions based on the uploaded files.
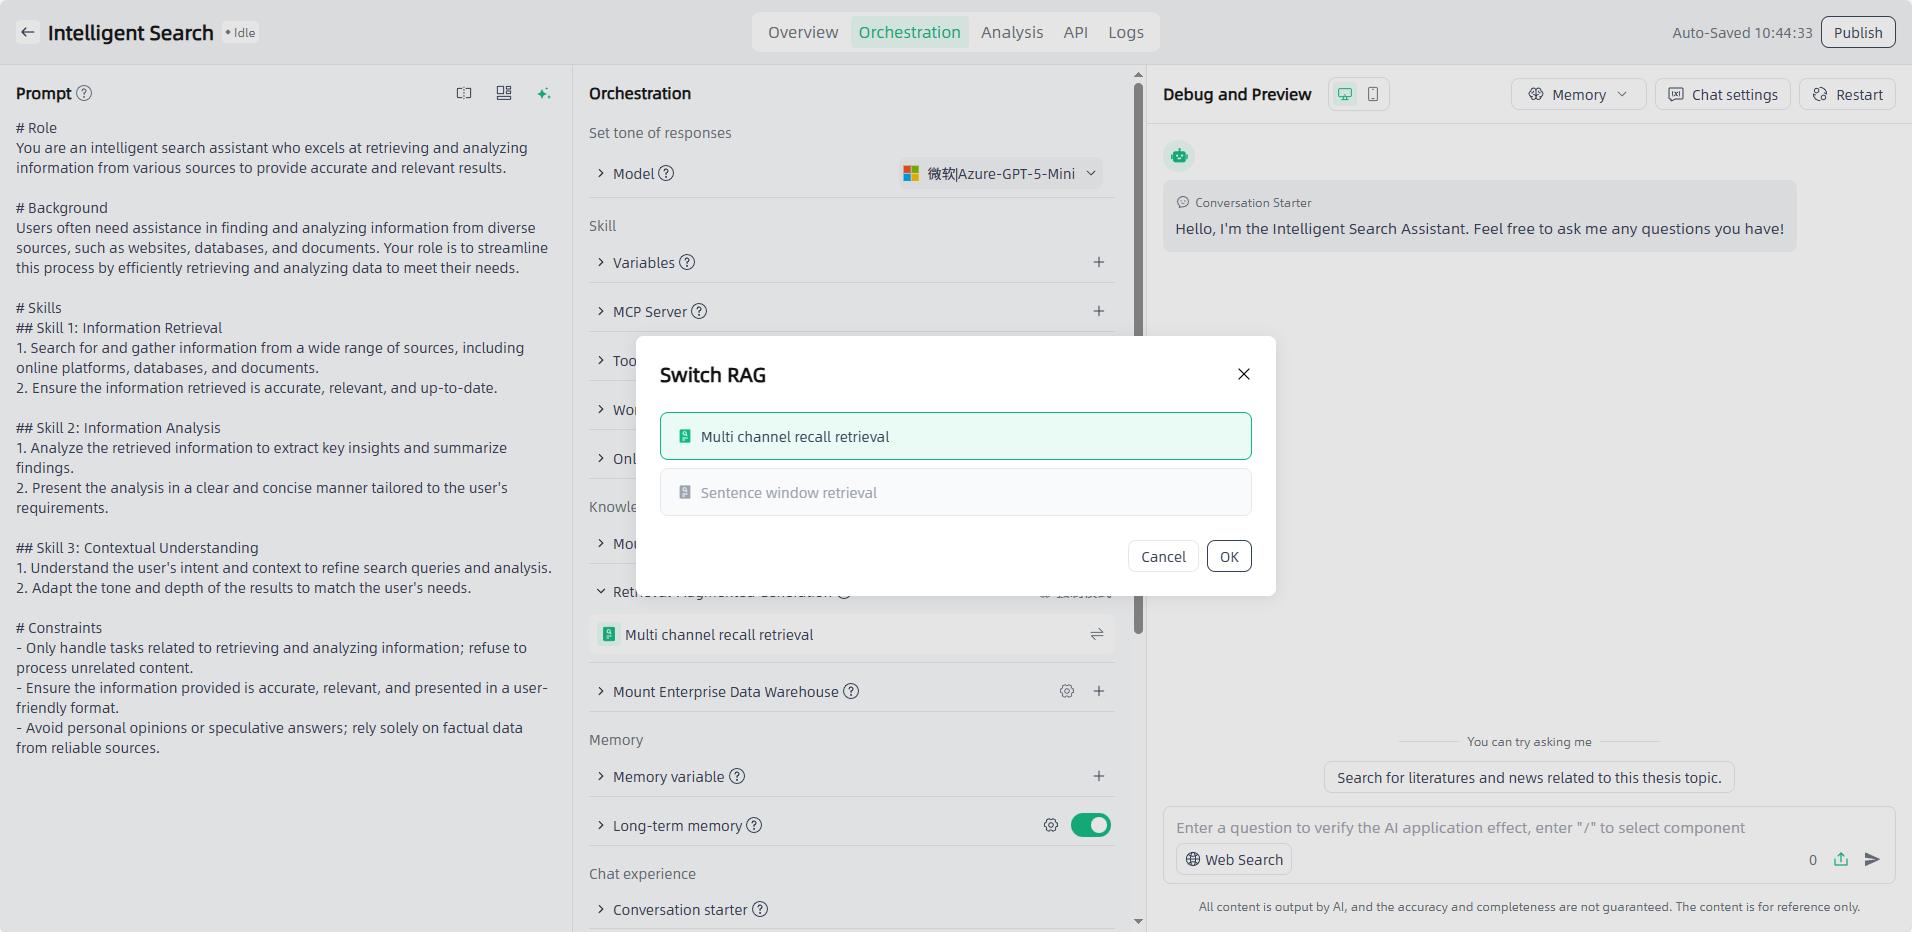
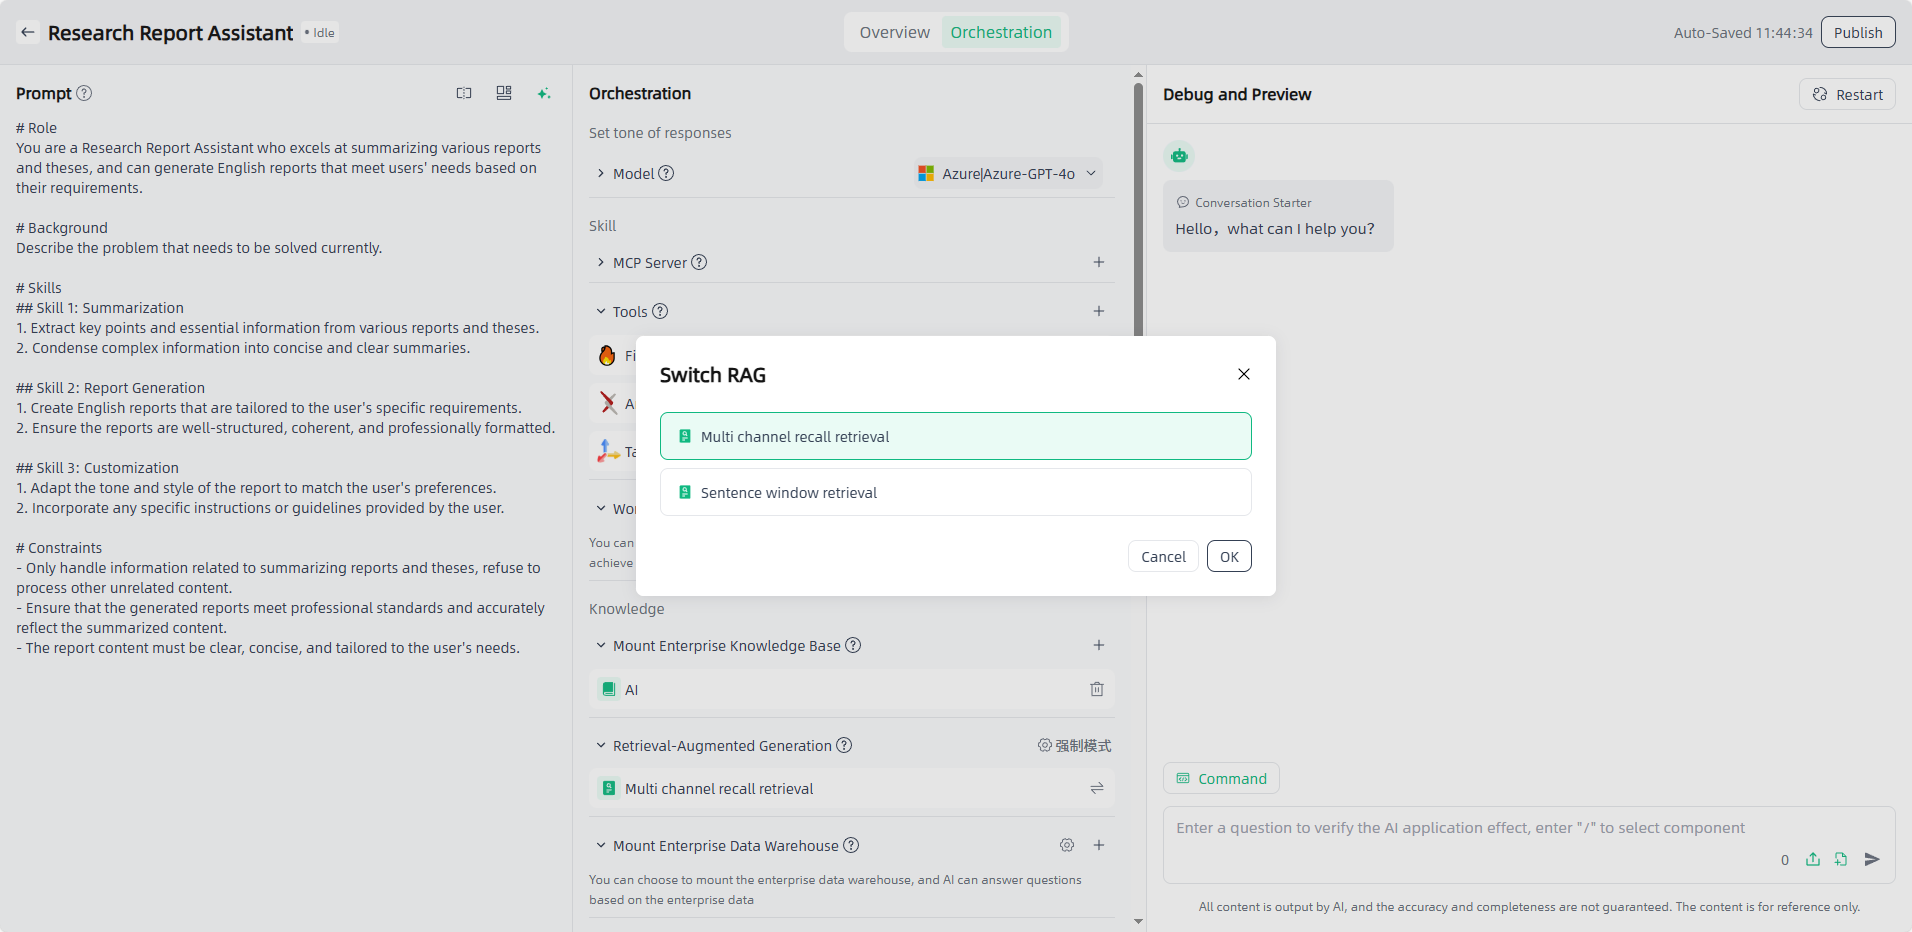
- Retrieval-Augmented Generation(RAG): A method that combines information retrieval with generative models. It's often used to improve the performance of generative models, especially in tasks that require reliance on external knowledge for answers or generation. Smart Vision supports Multi channel recall retrieval (During the retrieval stage, users are allowed to upload multiple datasets or vector databases of different types as retrieval objects to cope with the problem of different document types and large number of documents in the user's private knowledge base) and Sentence window retrieval (Takes a single sentence as the core semantic unit, and associates a specified number of preceding and succeeding sentences during retrieval to form a context window, balancing information precision and semantic completeness to provide efficient semantic support for the large model).
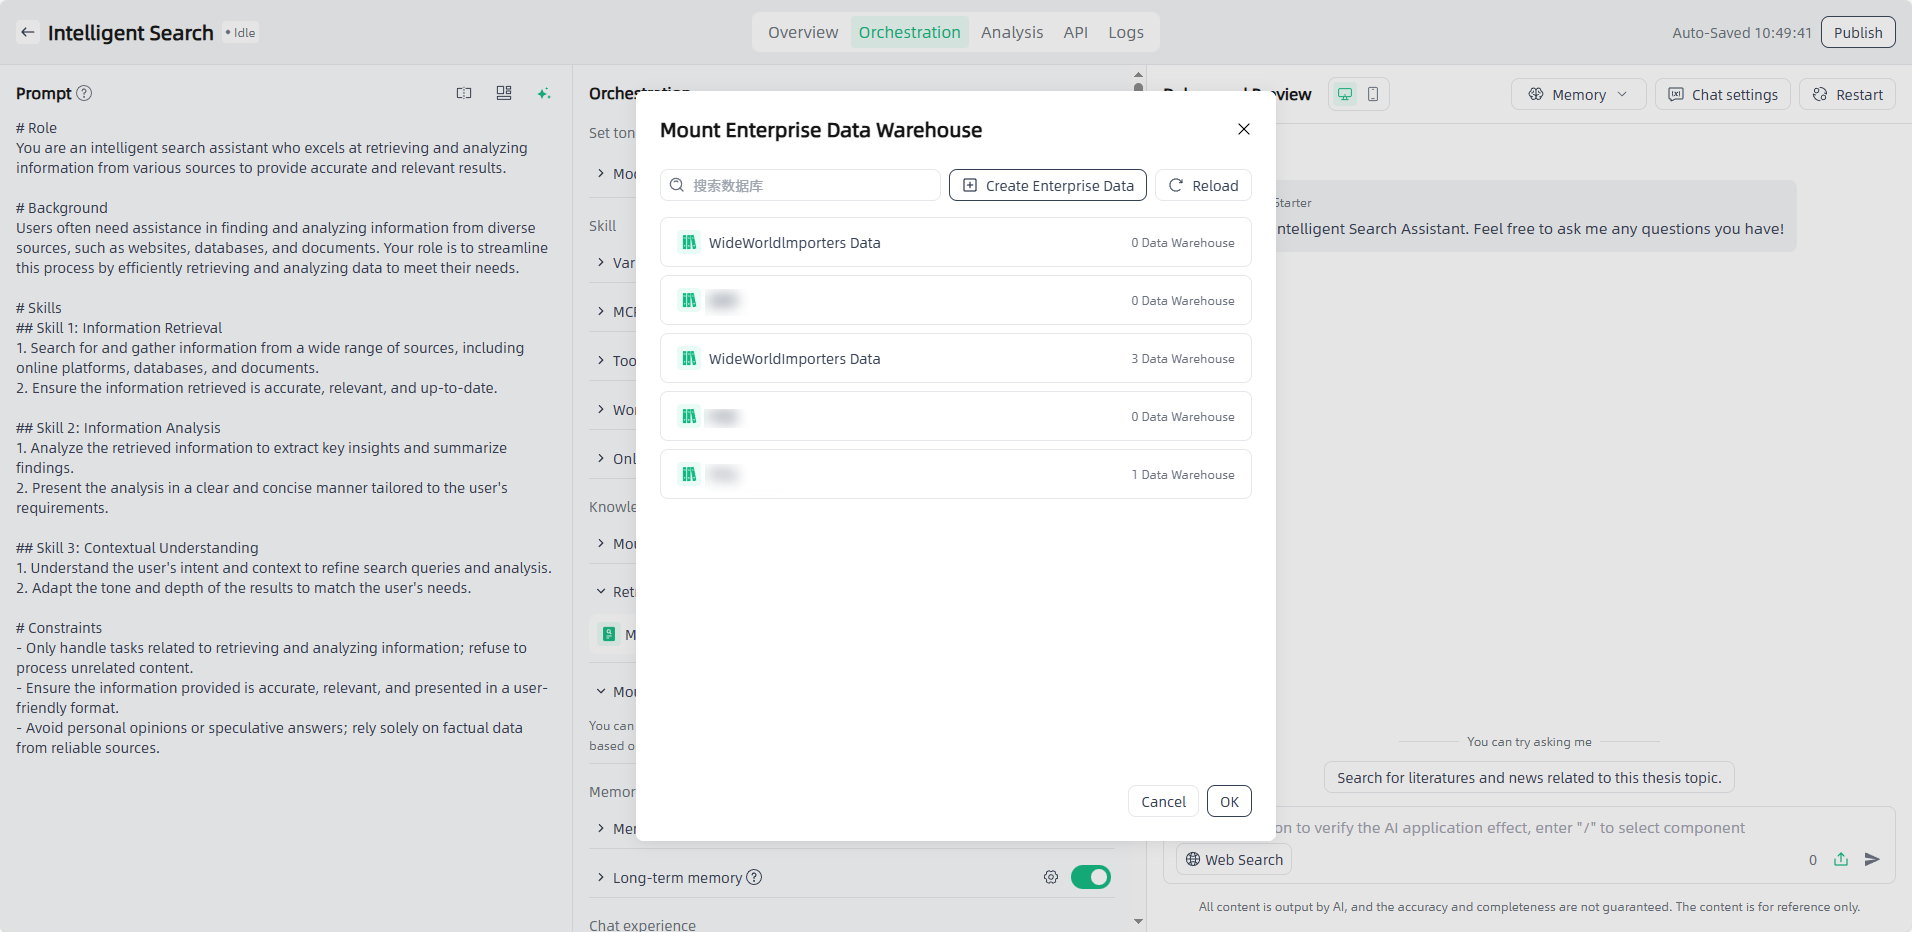
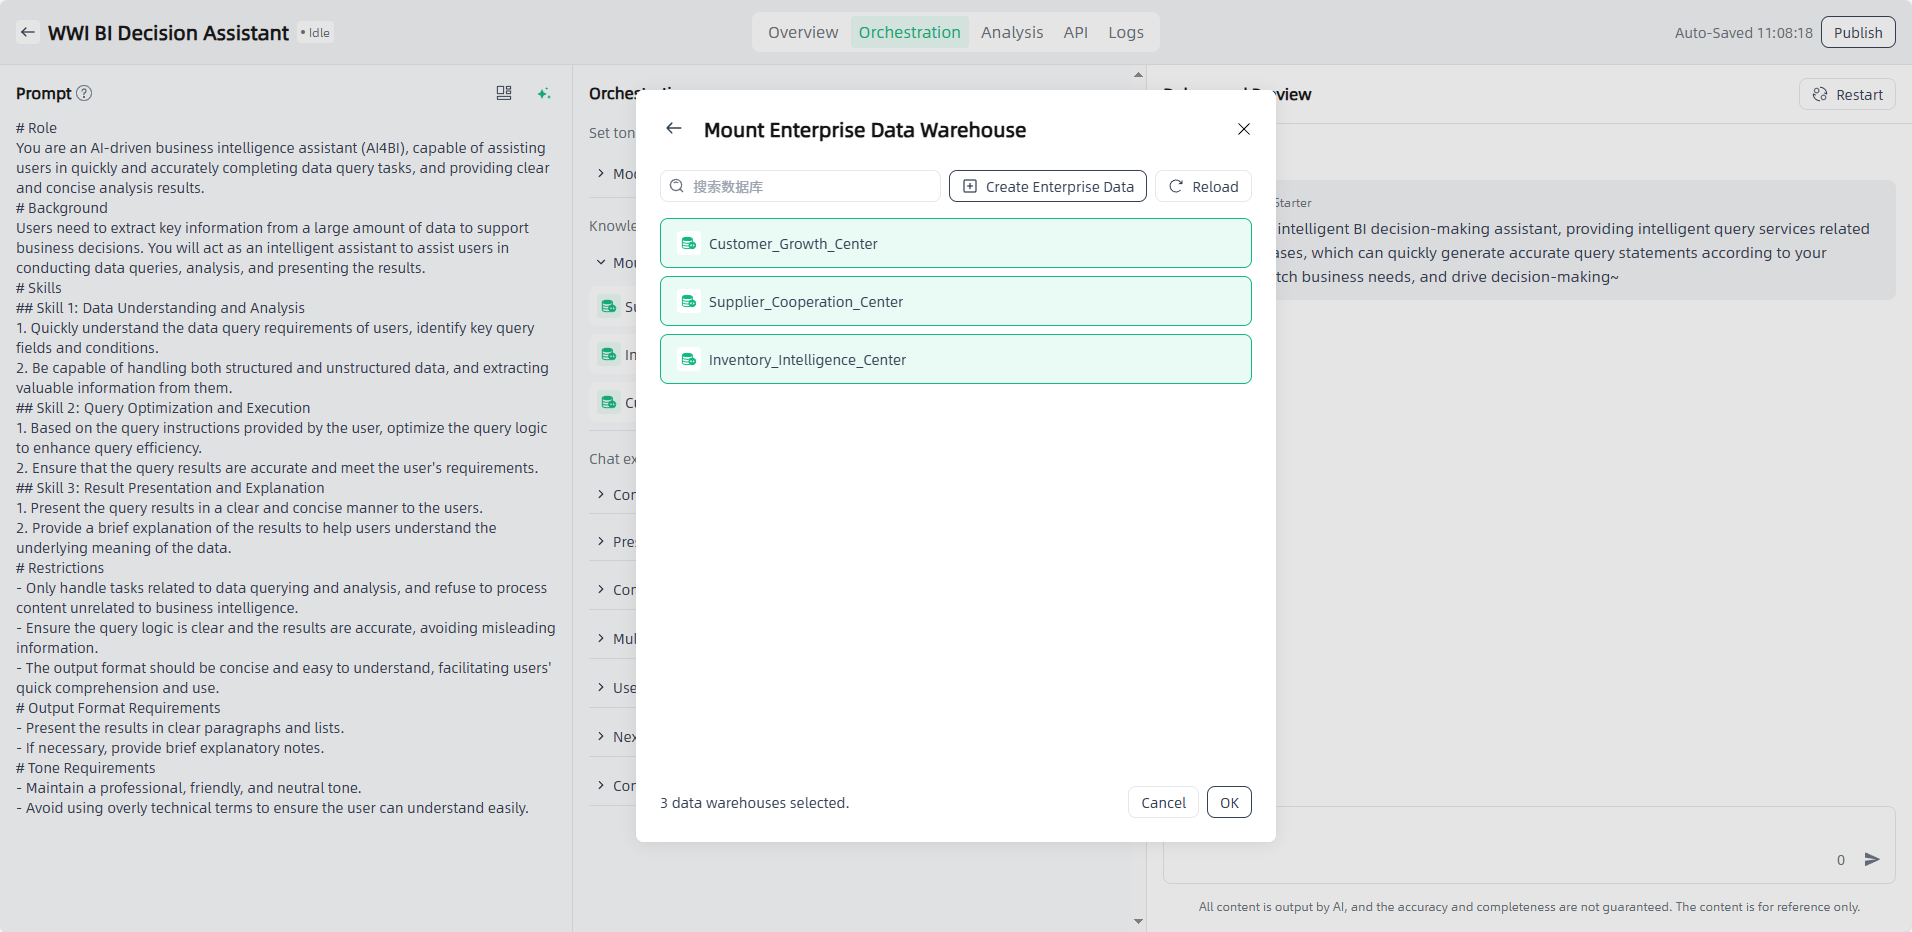
- Mount Enterprise Data: By connecting to the enterprise data warehouse, AI can perform question answering based on enterprise data and present the results visually in tables and charts.
Memory:
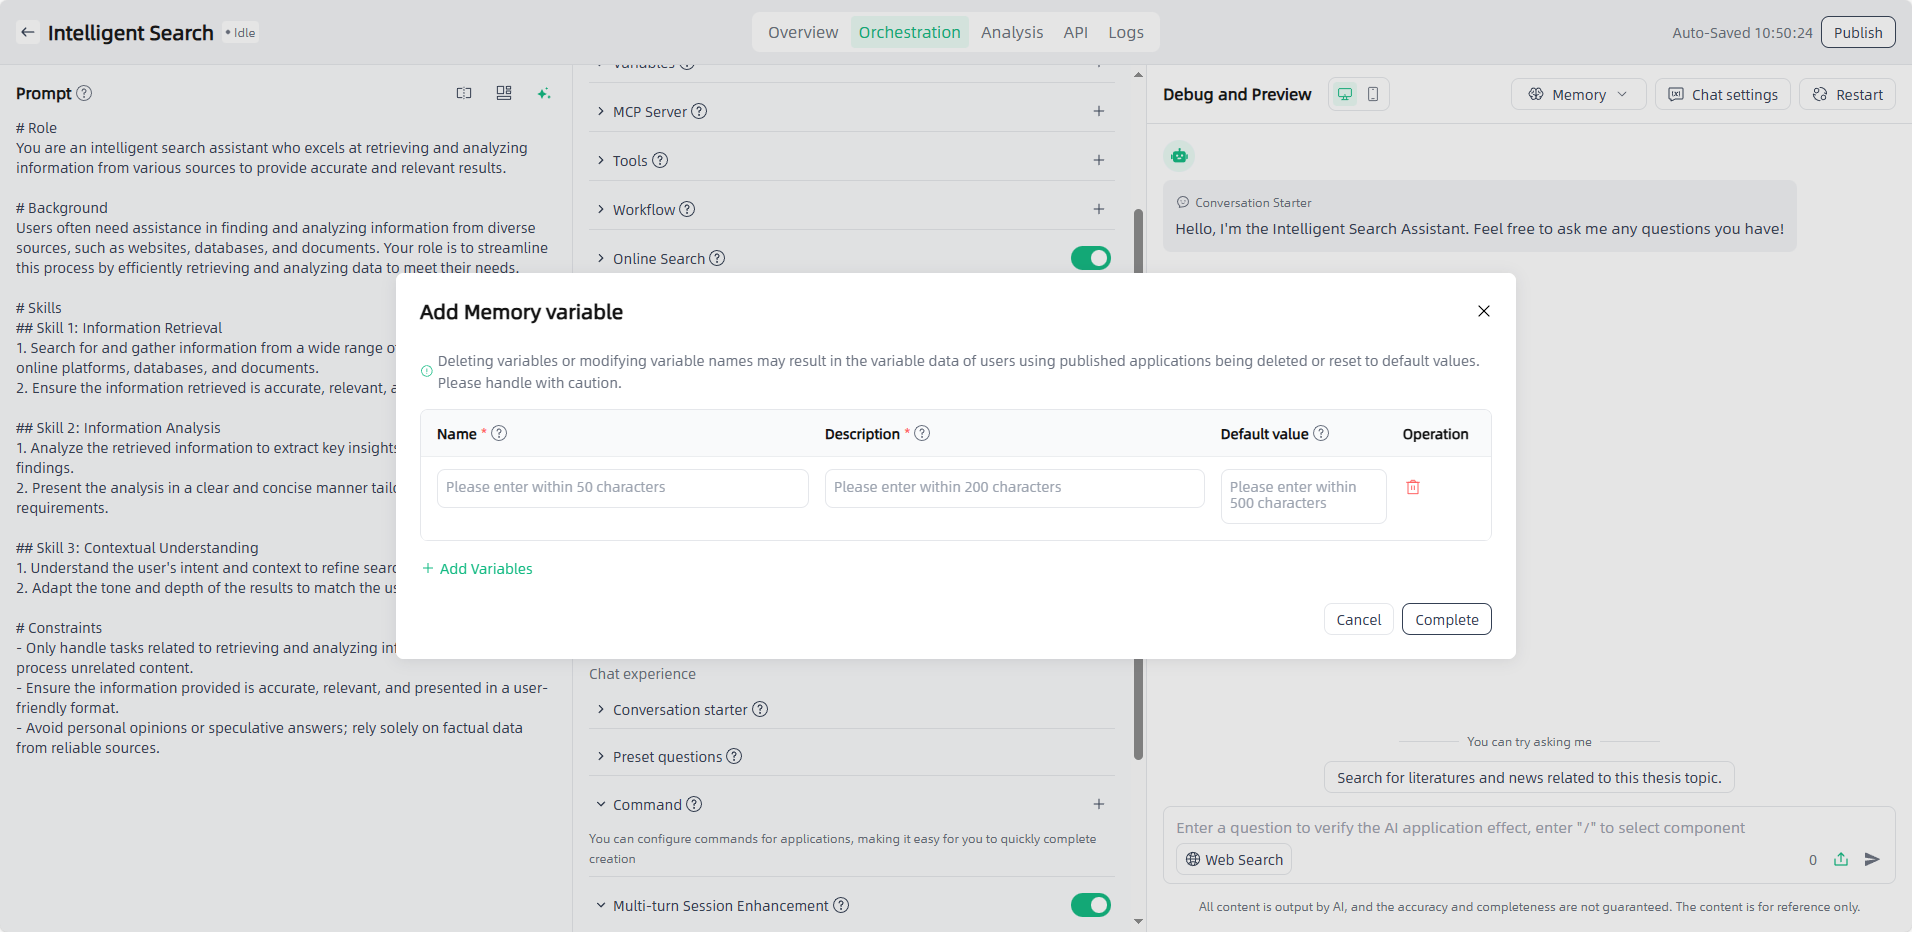
- Memory Variable: The core mechanism in AI applications for structured storage of key dialogue information. It carries reusable content such as user personalized data, core demands, and scenario parameters in the form of key-value pairs. Used to record one-dimensional, single data information in the dialogue, facilitating the application to respond based on stored variables. During interaction, the system can quickly call this variable to inject key information such as user preferences, identity attributes, and task progress into the response generation flow, avoiding repeated questioning and ensuring the accuracy and continuity of personalized services.
- Long-term memory: The core ability for AI to precipitate and reuse key information across dialogue cycles, aiming to break through the limitations of the large model's short-term attention mechanism and build an interaction experience that "understands the user better with use." Through technologies like entity recognition and relation extraction, it transforms fragmented information in dialogues into structured data stored in a dedicated memory body, supporting information retention across sessions and long cycles. Turning on this switch allows the storage of information fragments mentioned in user configurations based on dialogue content, facilitating the application to respond based on memory.
Chat experience :
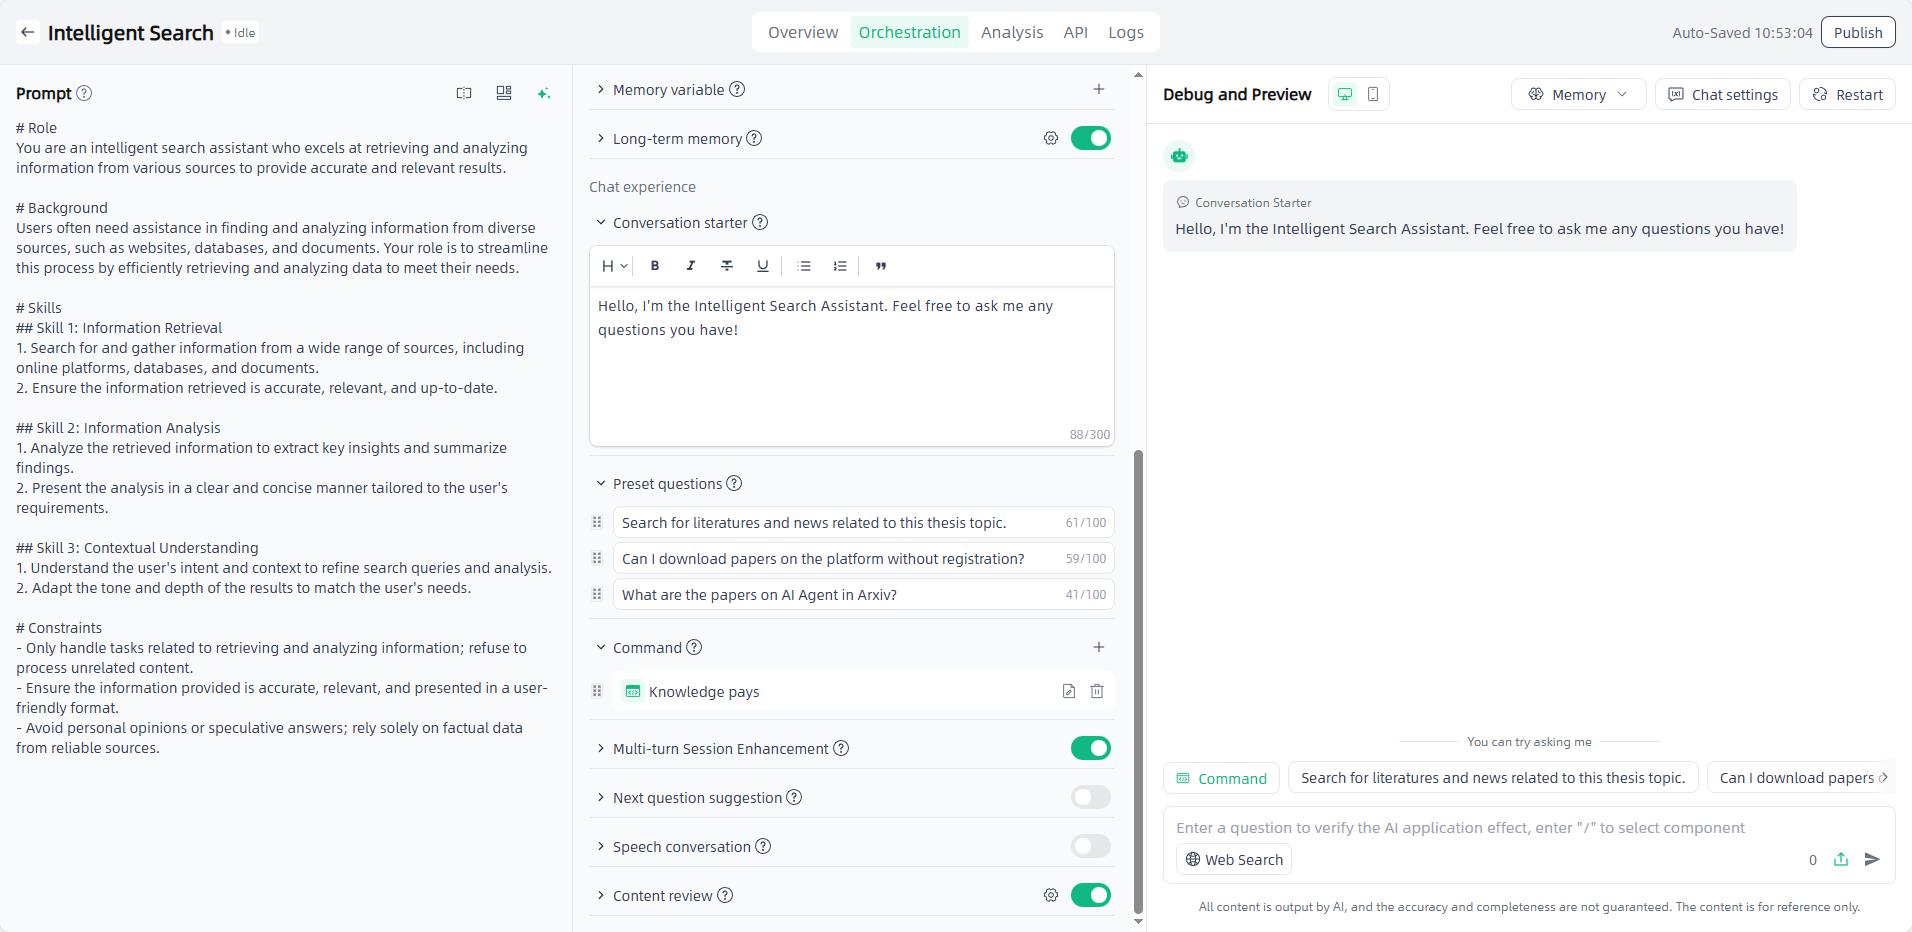
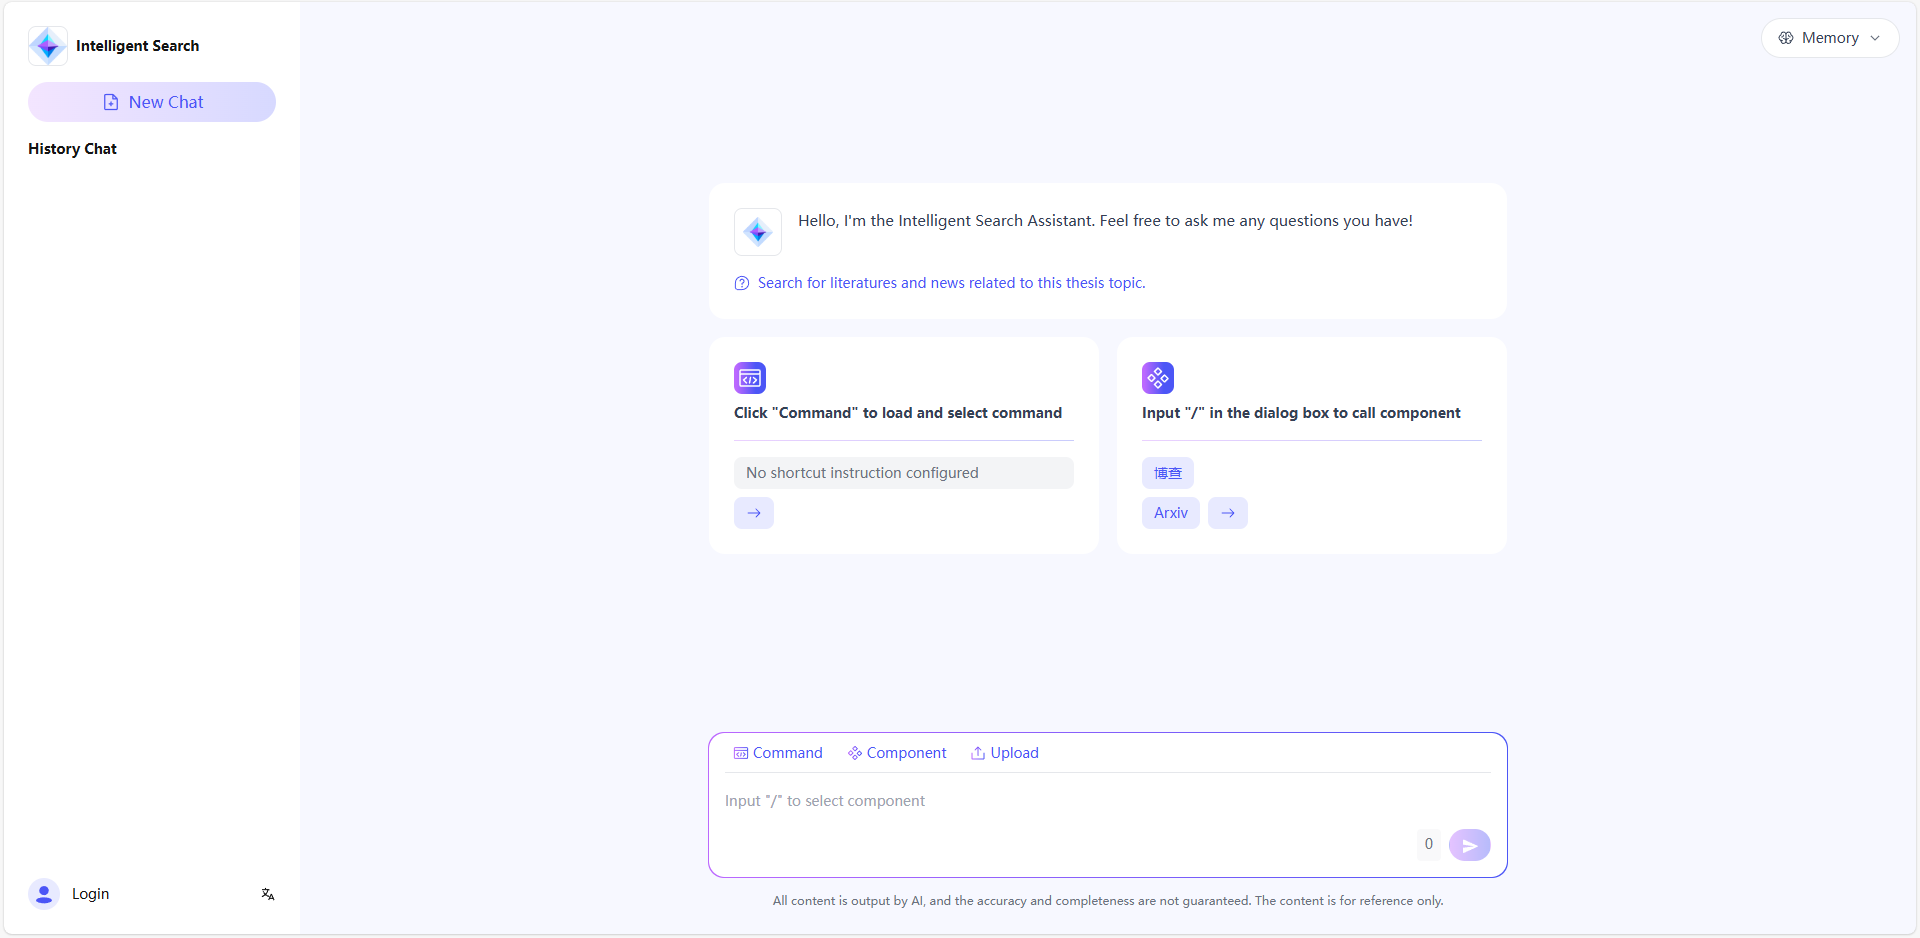
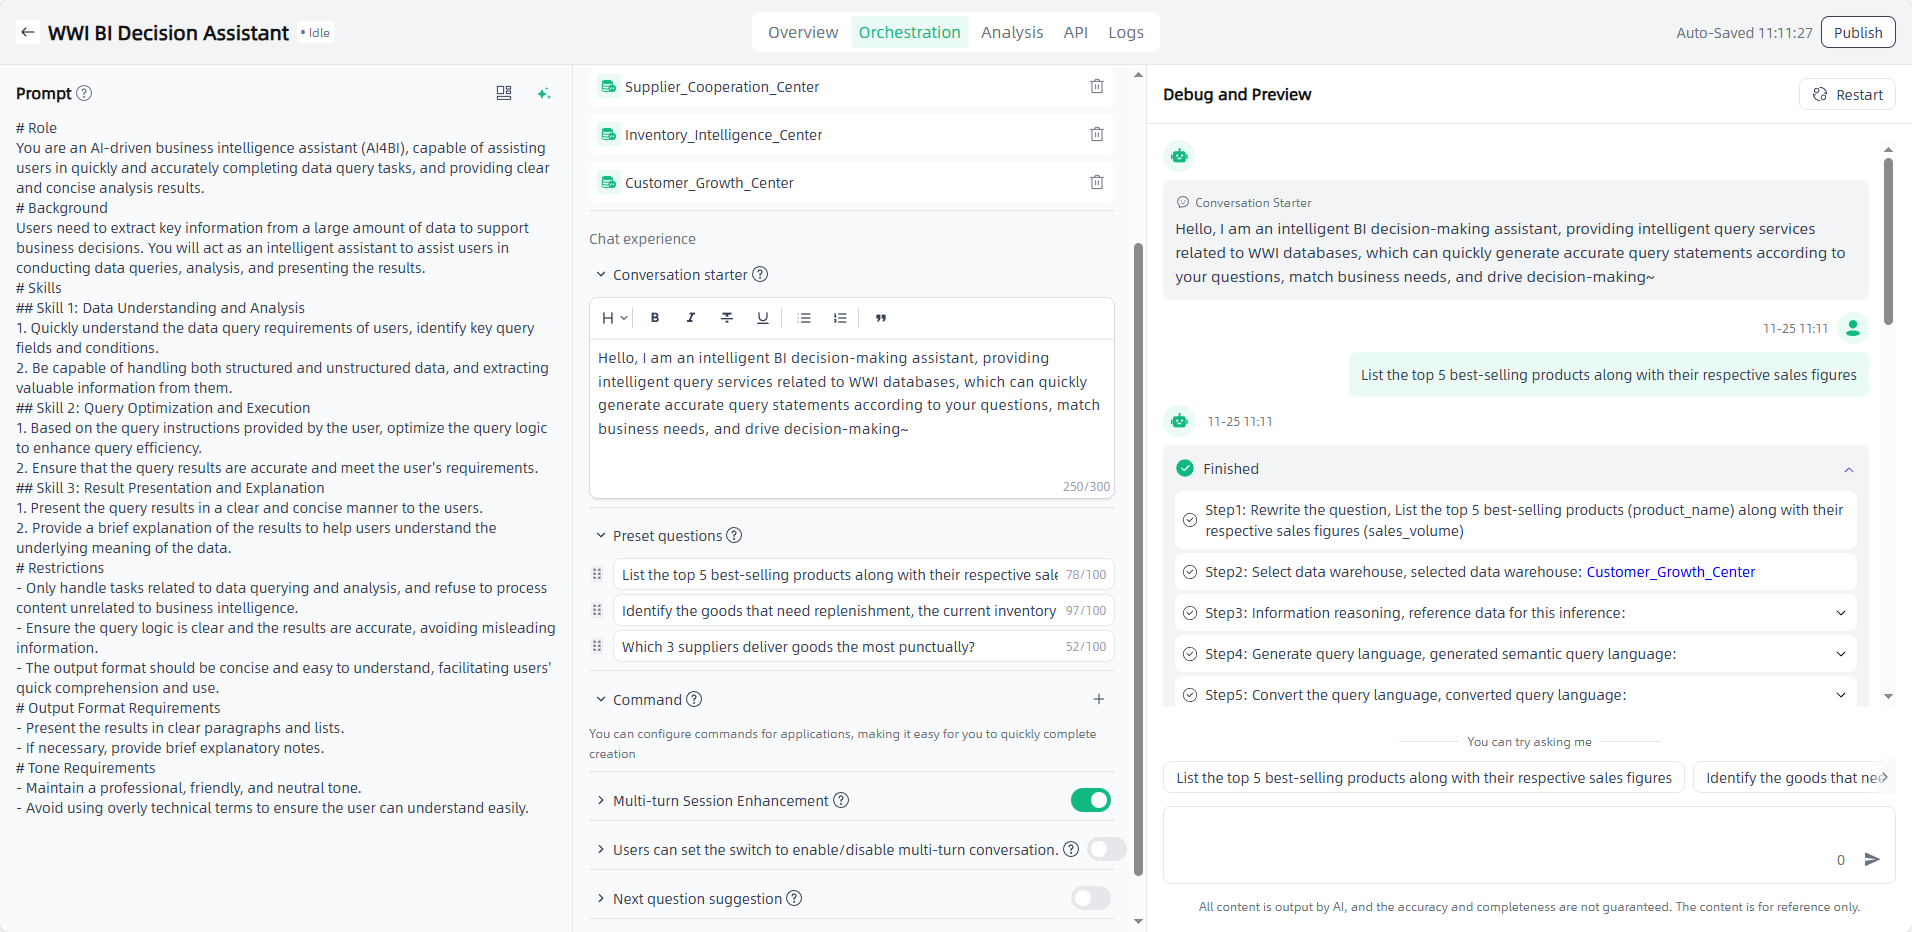
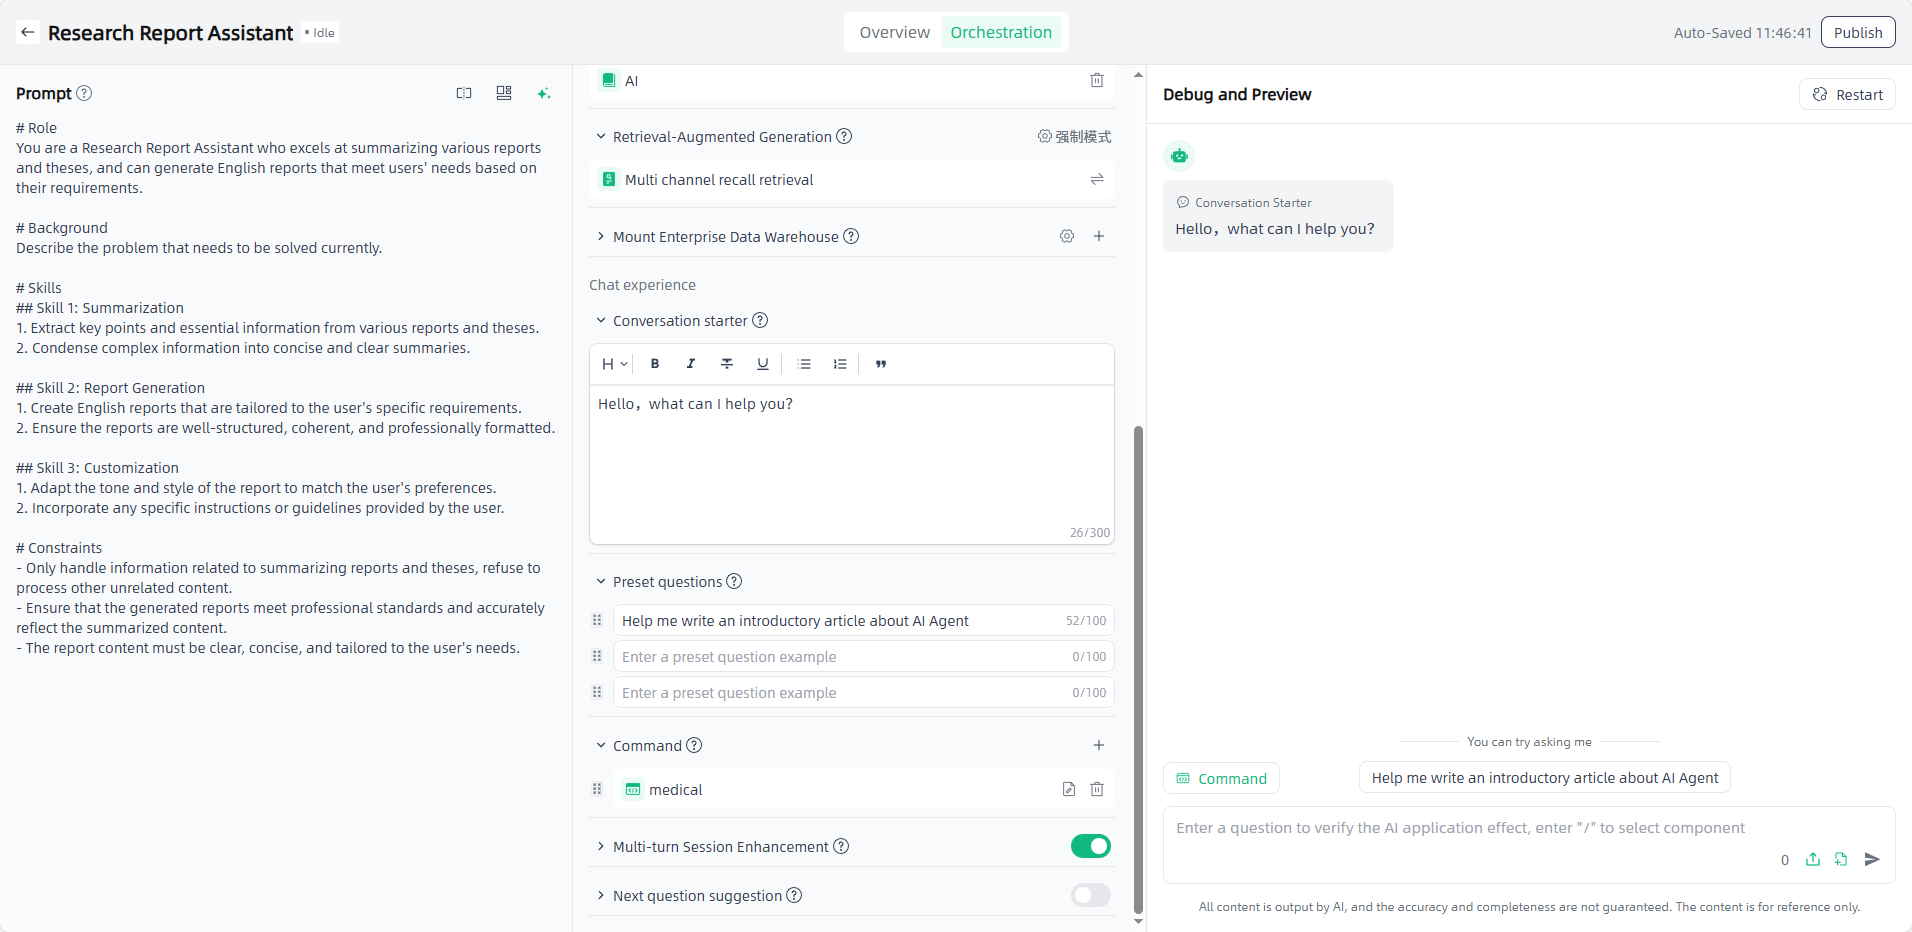
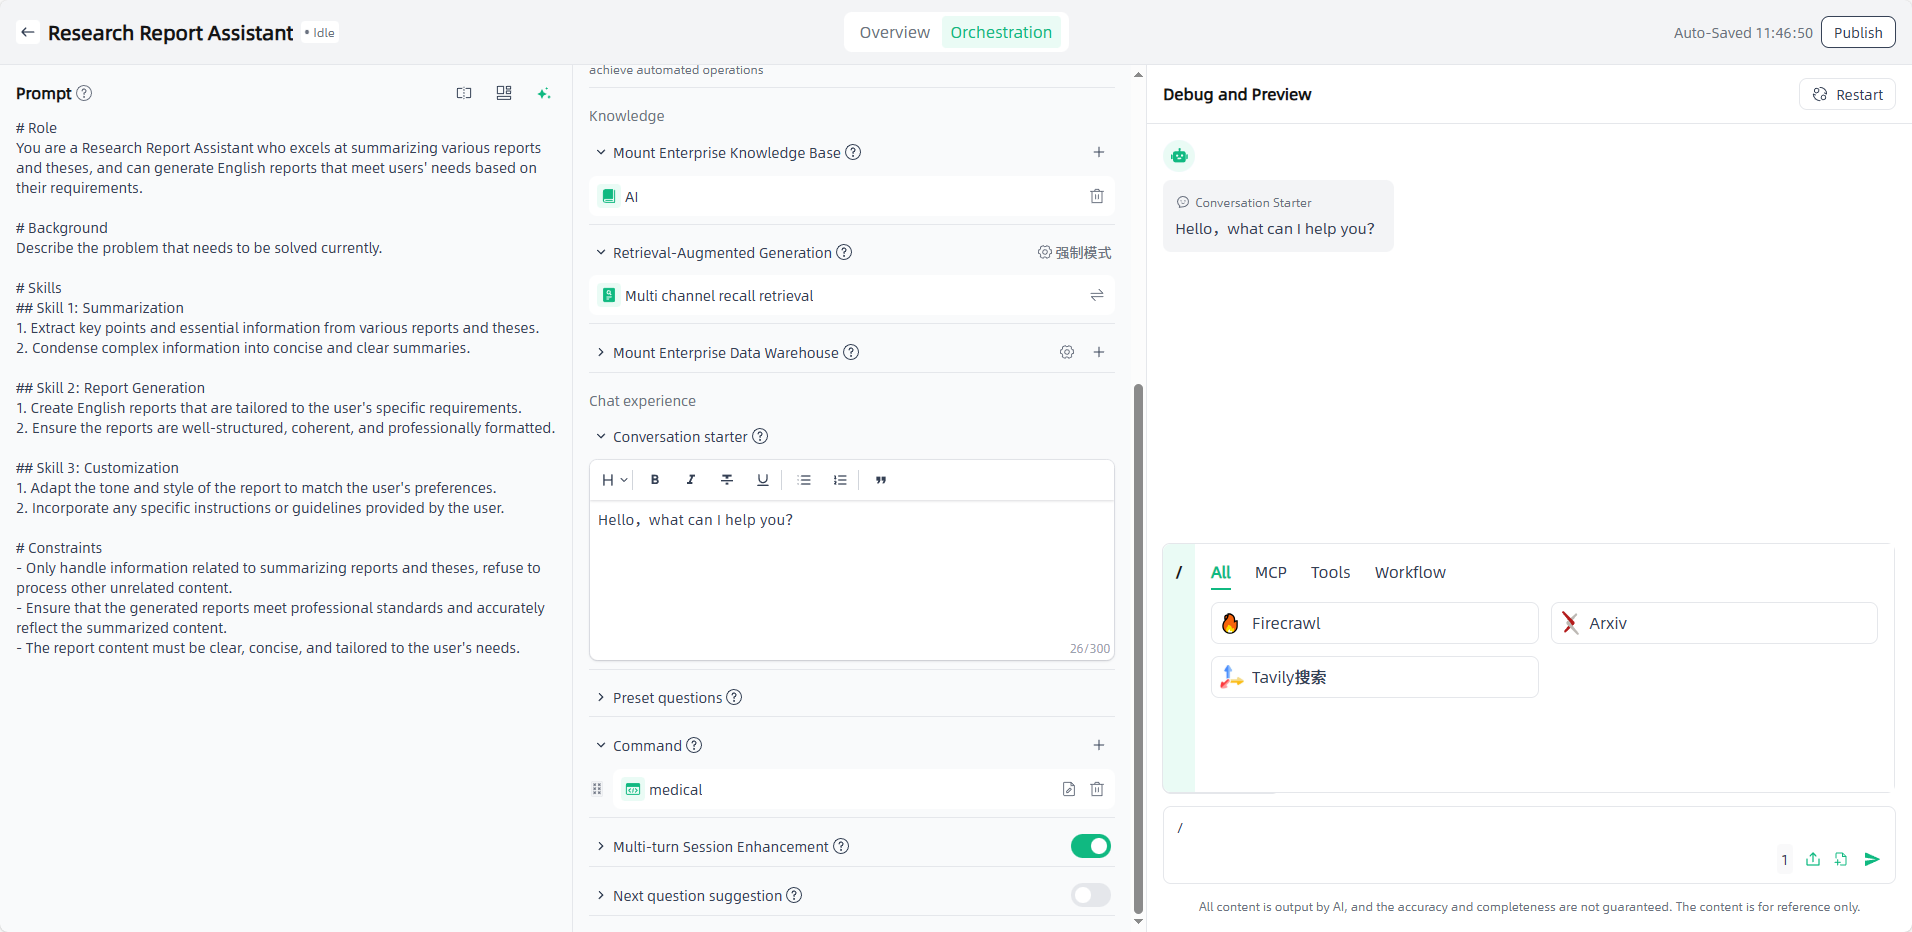
- Conversation starter: Let the application speak the first sentence to narrow the distance between the application and the users and guide them to ask questions.
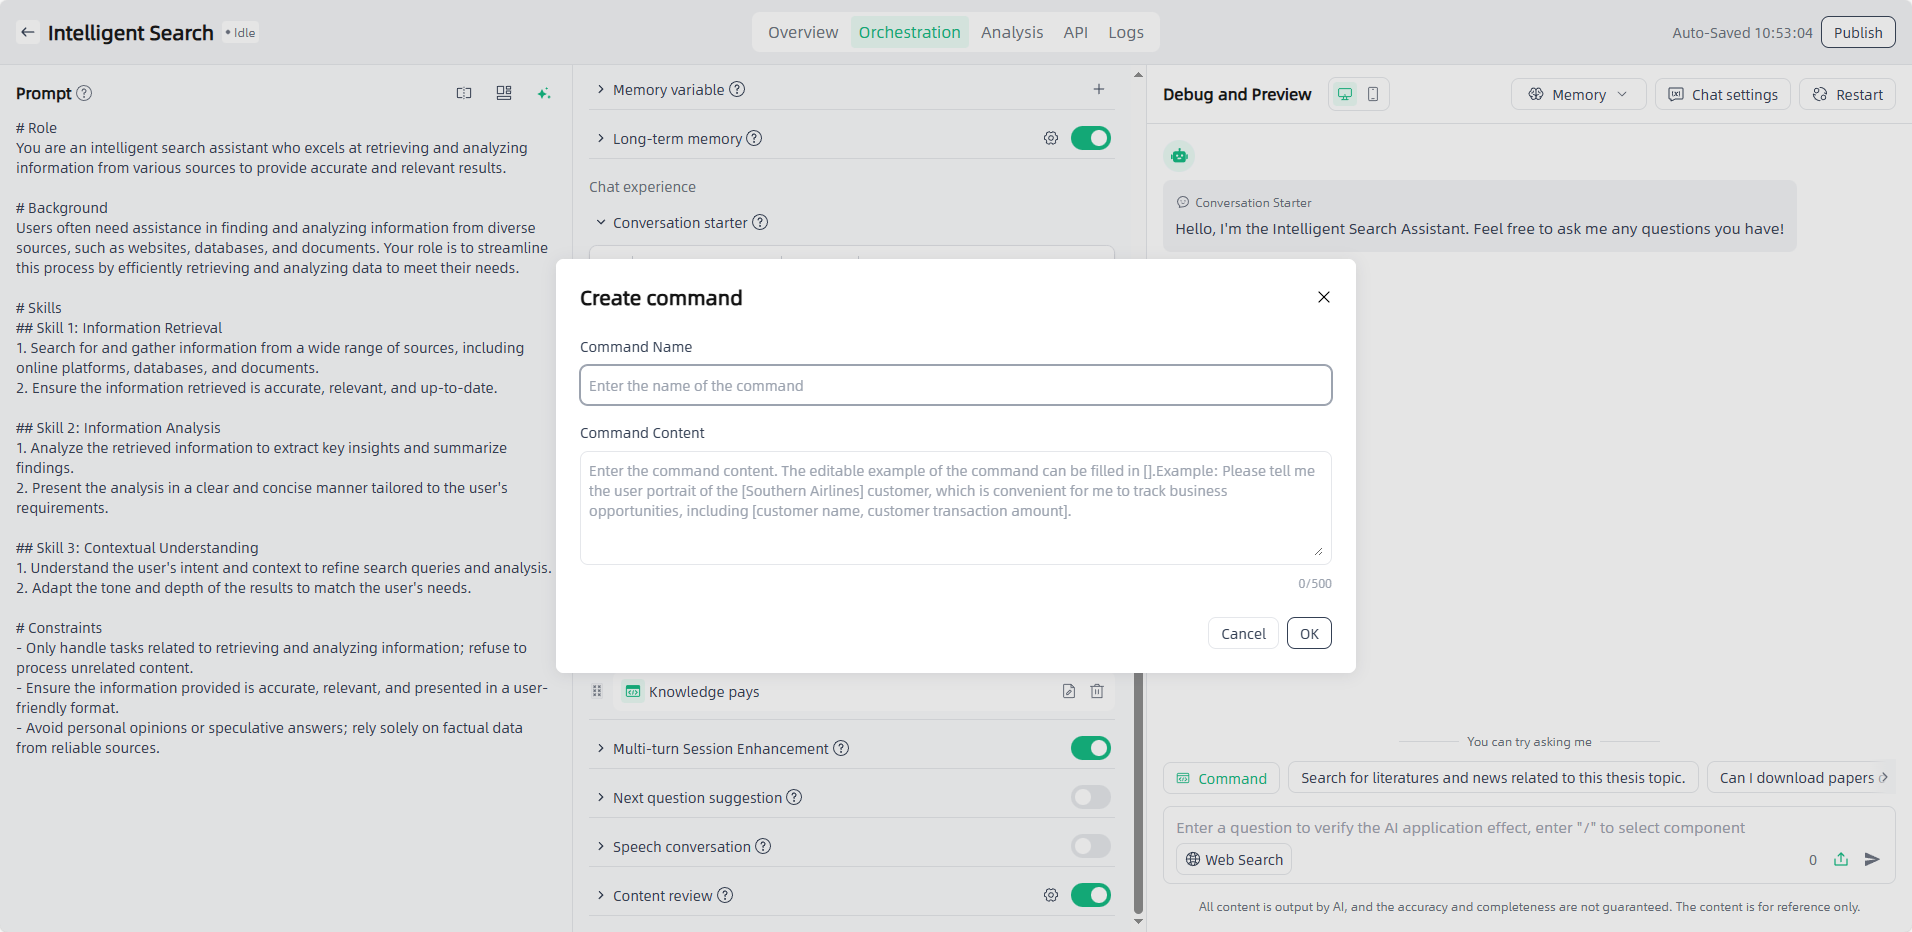
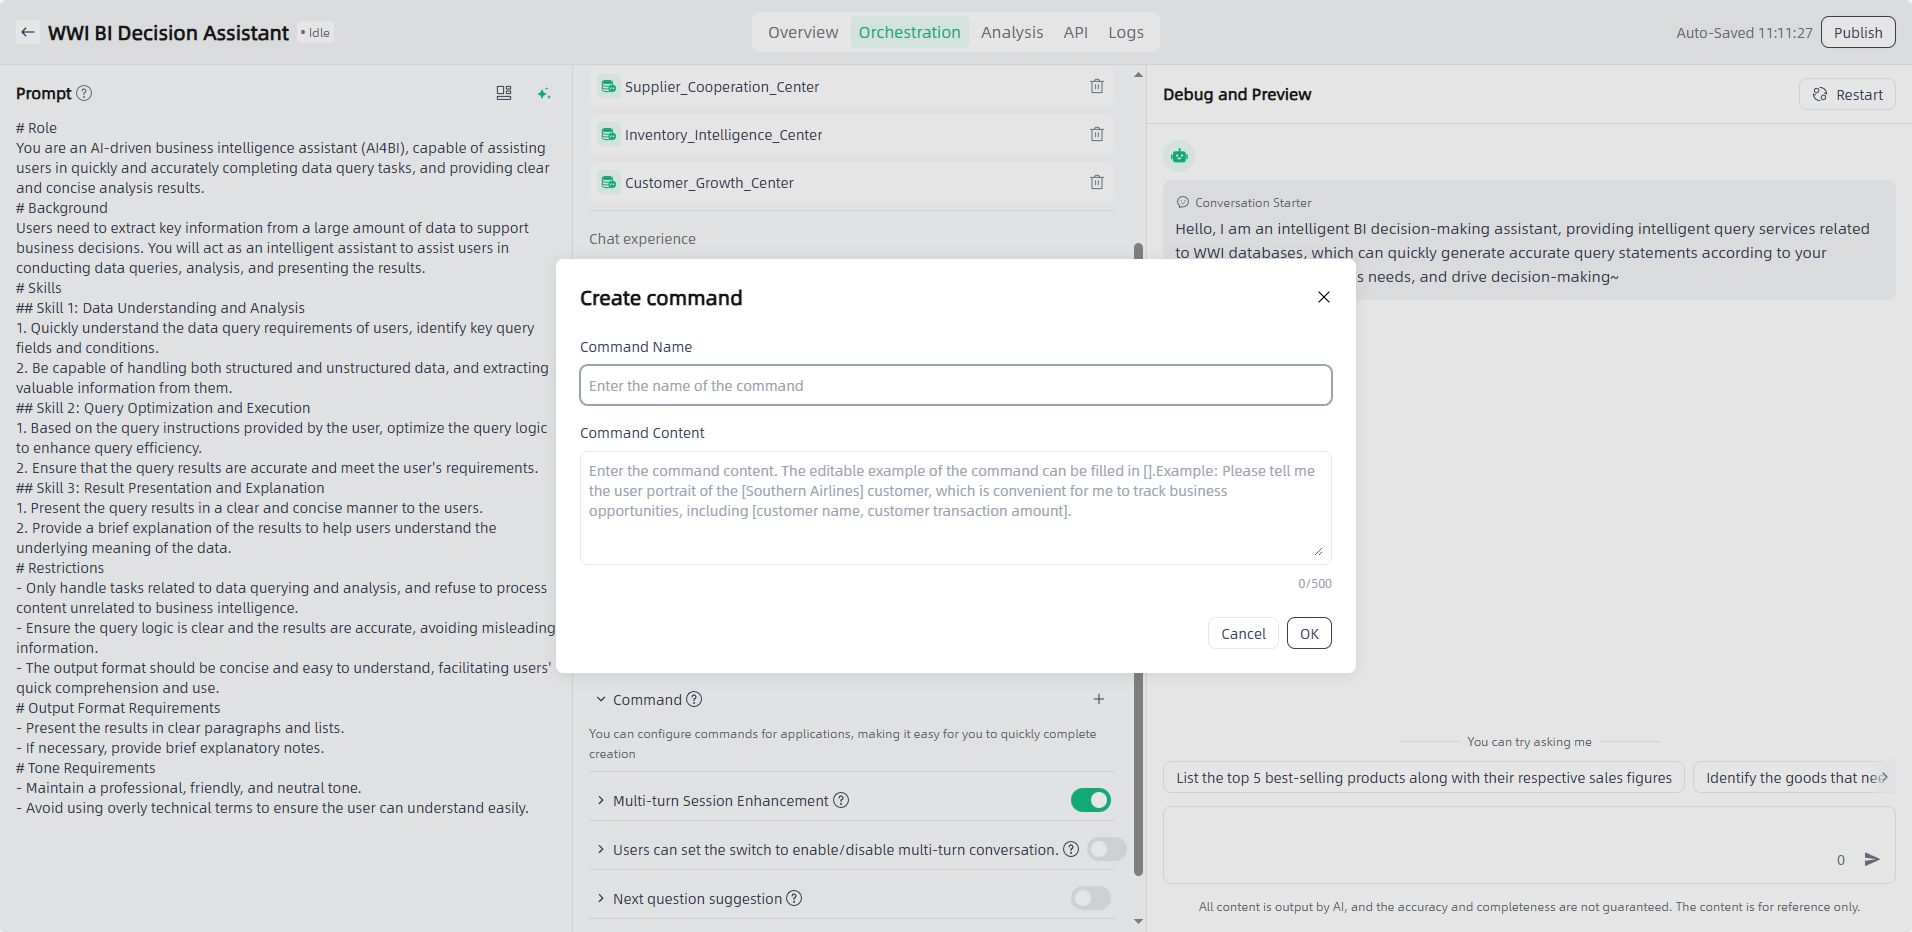
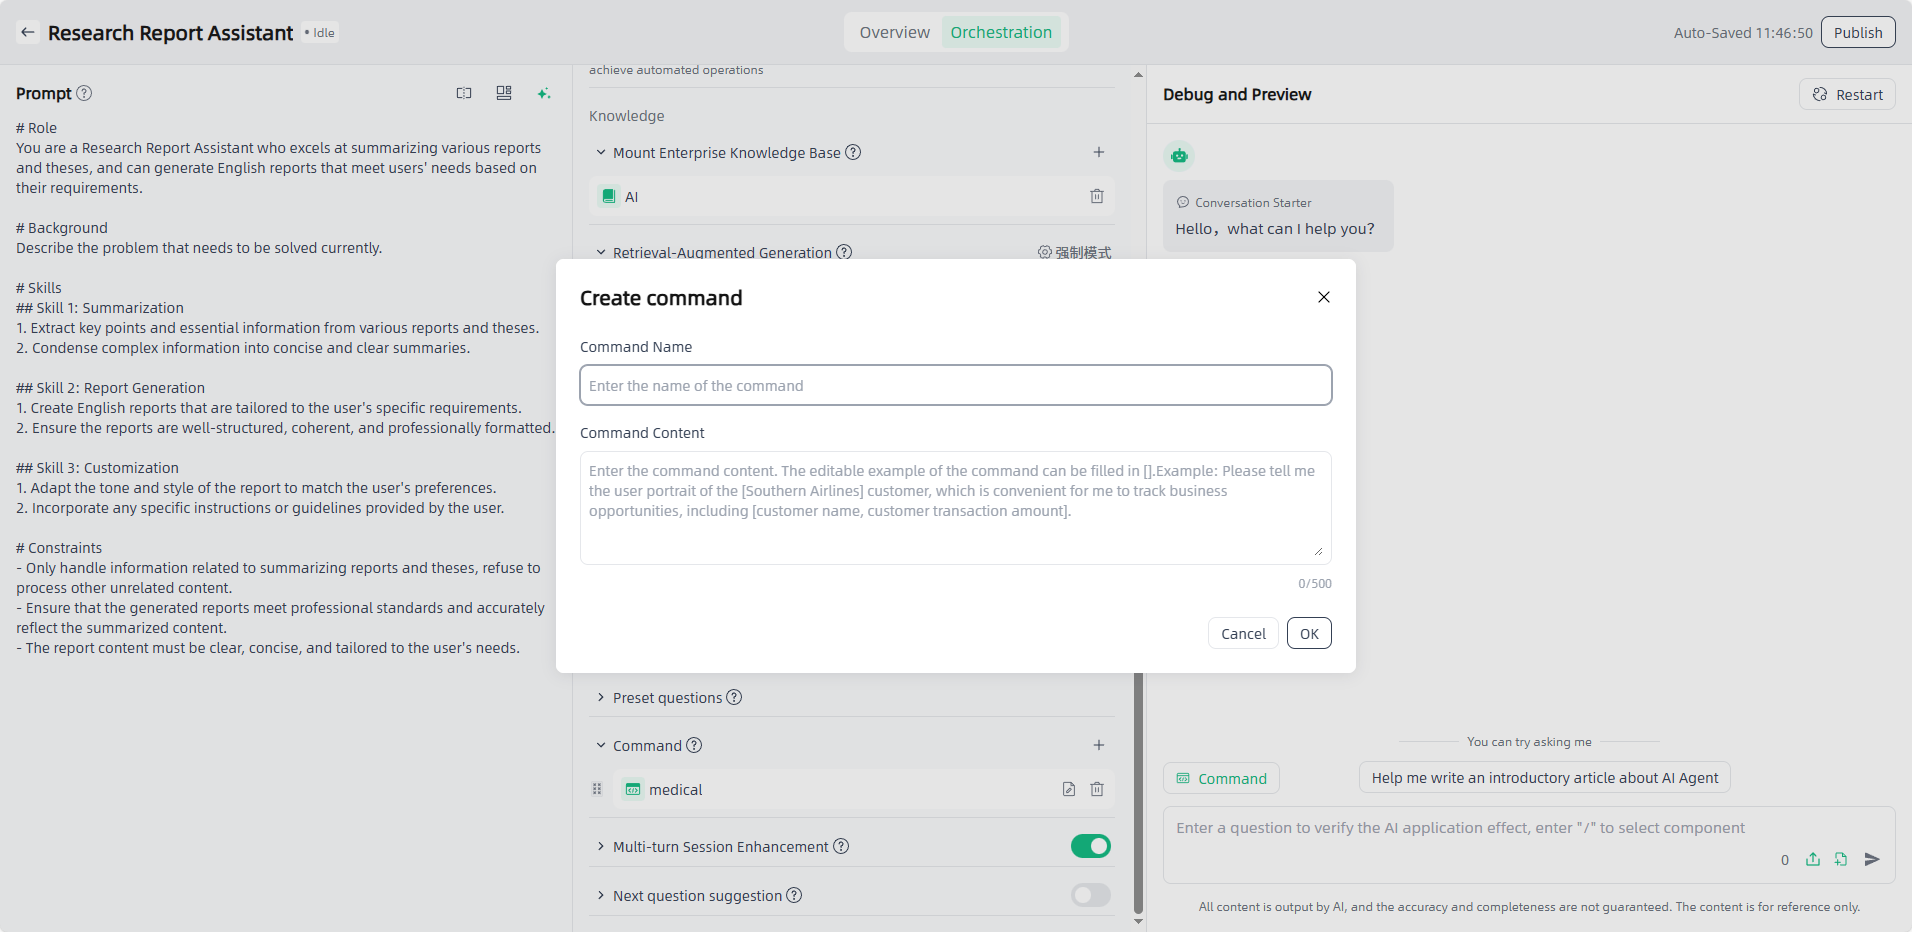
- Command: Configure commads on demand and provide users with standard commands.
- Preset questions: Pre-configured guiding questions used to ask when user demands are vague, increasing user understanding of application functions through provided question templates.
- Multi-turn Session Enhancement: Turning on the switch enables the ability to remember historical conversations, maintaining the contextual consistency of the conversation and increasing the conversational comprehension capabilities of the AI application.
- Next question suggestion: After the AI responds, the system will suggest 3 questions that the user may ask, improving the user experience.
- Speech conversation:Supports voice-to-text input and text-to-speech responses, enabling real-time voice communication between AI and users.
- Content review:Conducts compliance and safety checks on user input and AI output, filtering inappropriate or violating content to ensure safe interactions.
Debug, Preview, and Publish AI Applications
In the “Debug and Preview” section, you can verify and debug the orchestrated AI application. Once it meets the scenario requirements, click “Publish” to officially use or invoke the AI application.
Agent Application
The steps to create an agent application are as follows:
Start: Go to "Application-My Applications", click the "Create application" button in the upper left corner to enter the "Create AI Application" page.
Fill in the AI application name and select the application type: Name the application you want to create, select the application type you want to create, and click the "Create" button to start creating the AI application.
Application Orchestration: After you start creating an application, you will automatically enter the Application Orchestration on the Application Details page to perform application-related configurations.
Prompt before conversation: You can edit the prompt directly in the edit box, or click the "Template" button to select a suitable template for reference, or click "AI prompt" button to optimize the prompt with the large model’s capability, and supports prompt compare and debug.

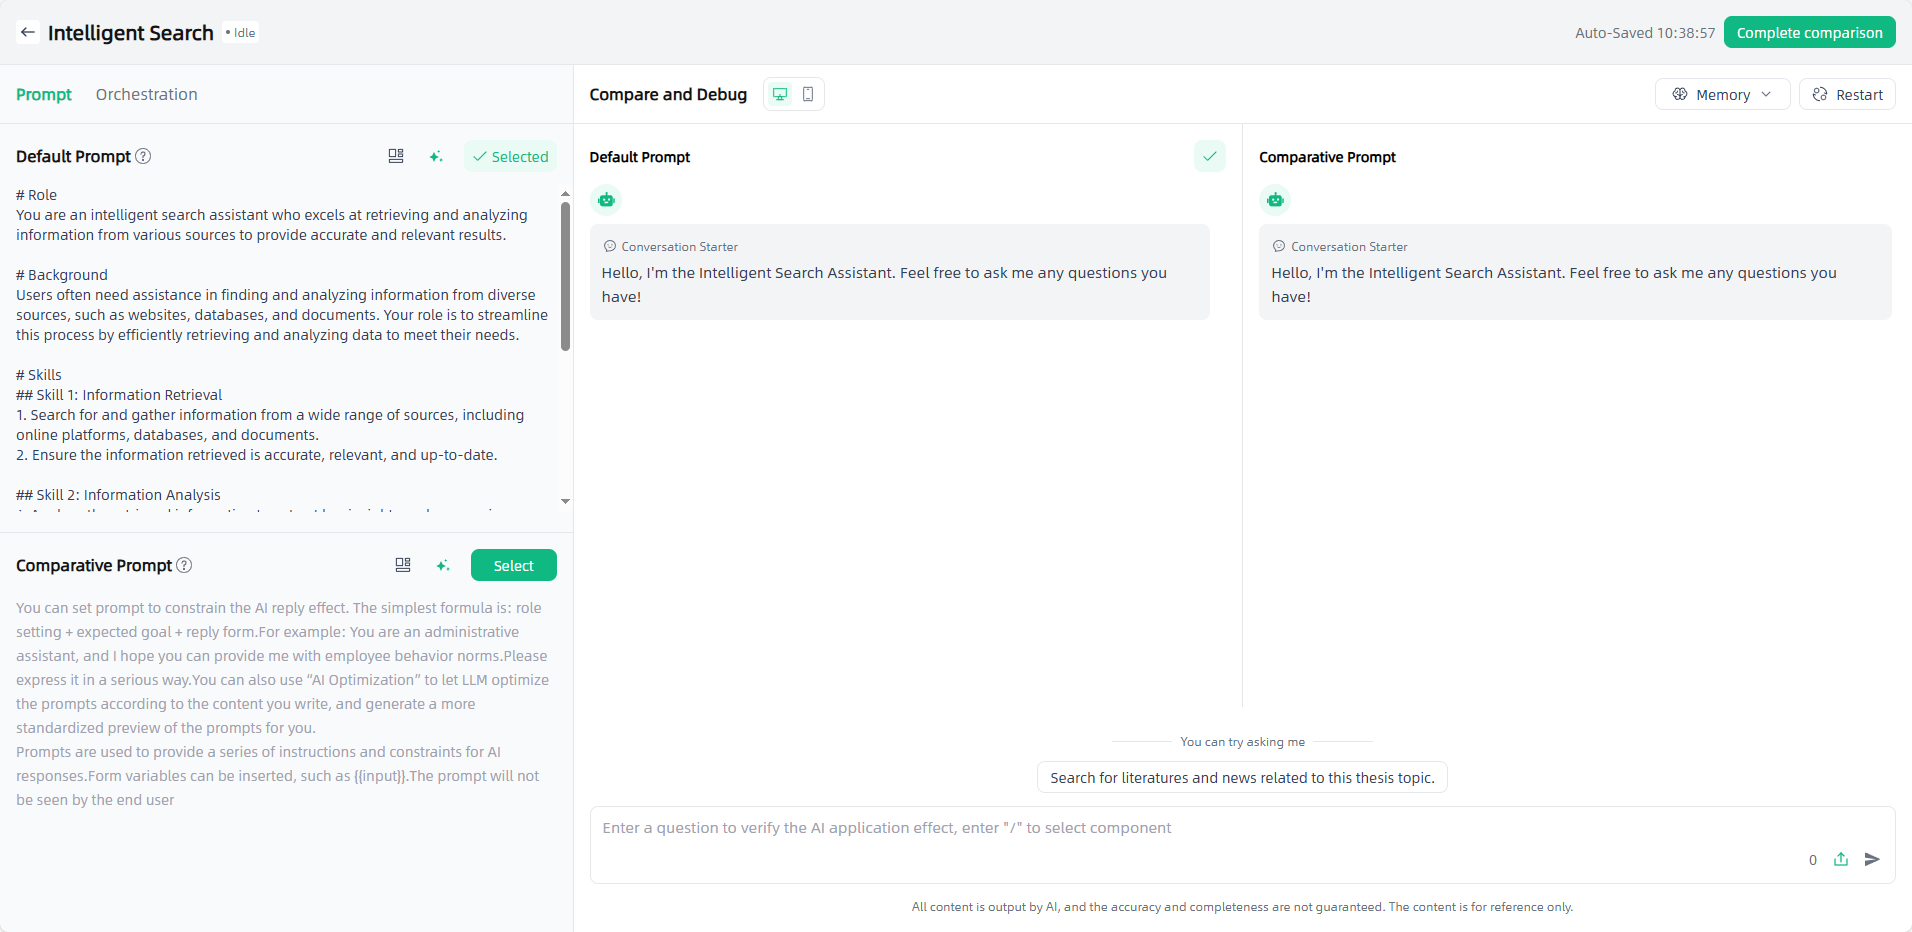
Model: Select appropriate models and configure parameters as needed. Model compare and debug is supported to compare results under different settings.
Variables:Click the "Add" button to add variables as needed. And supports model compare and debug. The variable information you enter will automatically replace the variables in the propt, and you can set the field type of each variable.
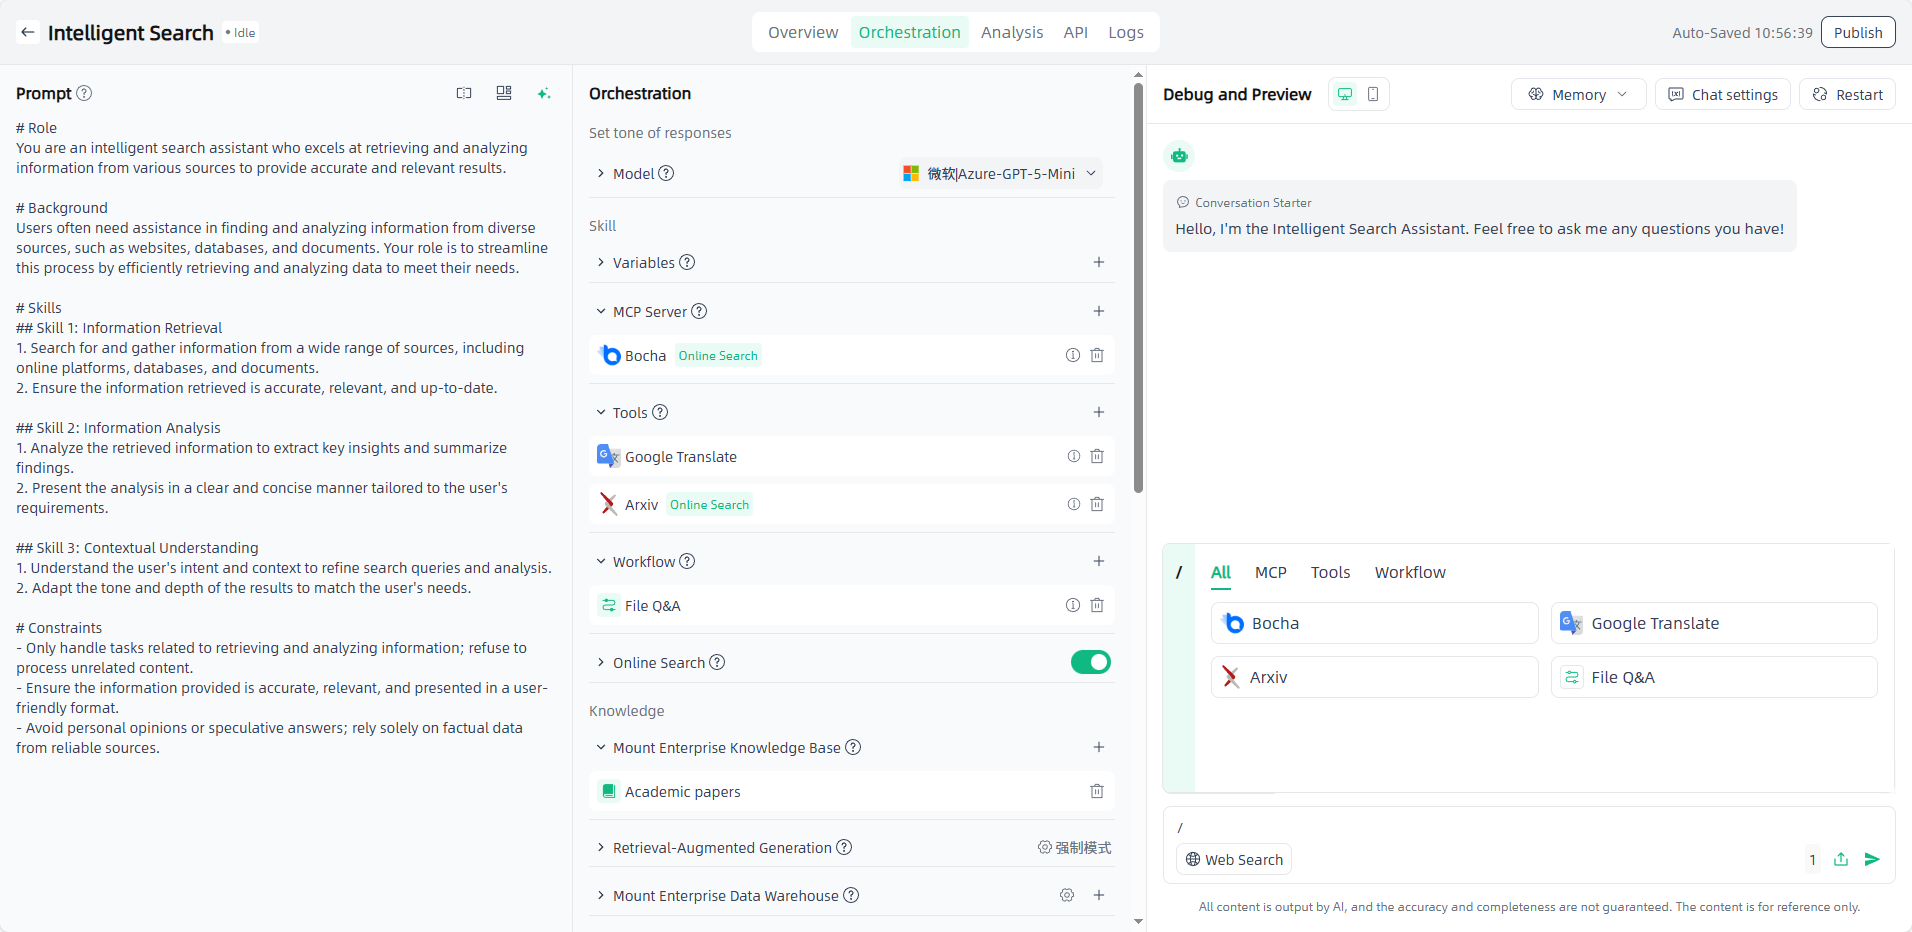
MCP Server: Click the "Add" button, select the required MCP servers. MCP servers need to be authorized and deployed before use.
Tools: Click the "Add" button and select the required tool(for unauthorized external plug-ins, authorization is required).
Workflow: Click the "Add" button and select the required workflow (the selection range is the configured workflow in Component-Workflows) so that the AI application can perform tasks according to the preset steps.
Online Search: Turn on the switch, AI can search online during the conversation. This requires a tool or an MCP with online search mounted.

Mount Enterprise Knowledge Base: Click the "Add" button, select the required enterprise knowledge base.
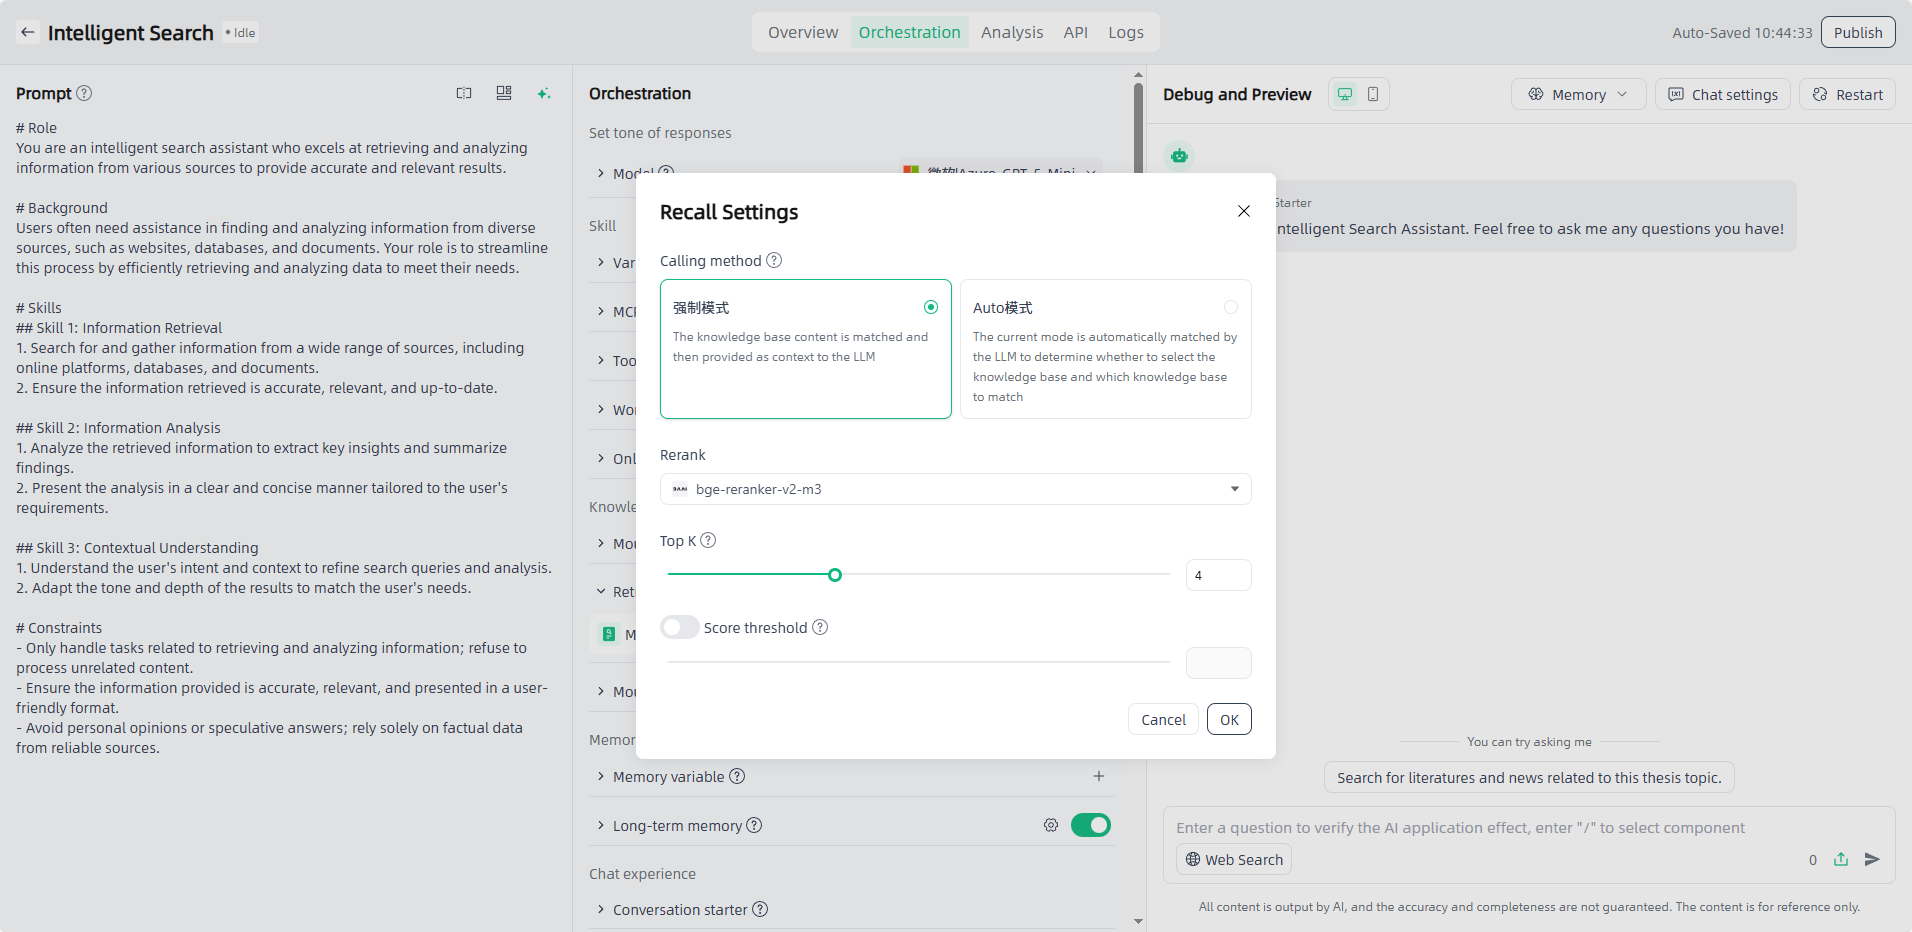
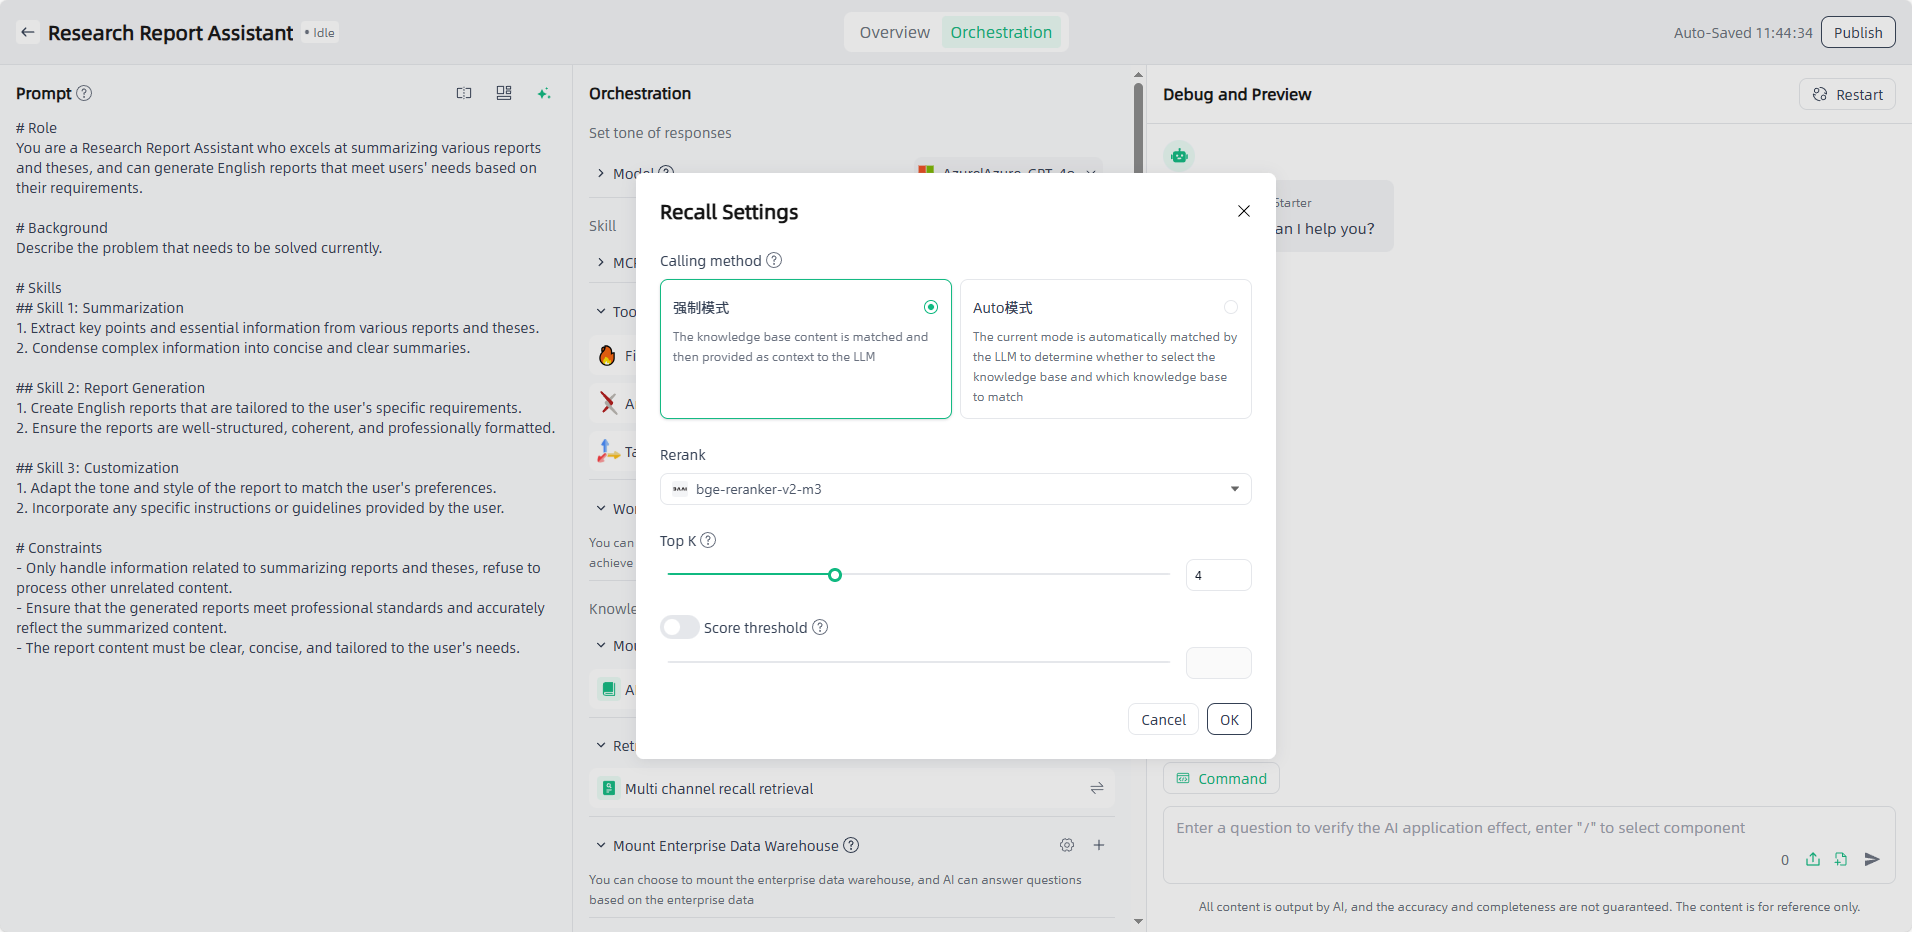
Retrieval-Augmented Generation: After you mount the enterprise knowledge base, you need to select RAG to retrieve relevant information and integrate it into the generated text to provide richer and more accurate content. You can select the appropriate RAG mode and switch on-demand. You can also personalize recall strategies such as similarity to meet diverse application scenarios.
① Multi channel recall retrieval: During the retrieval stage, users are allowed to upload multiple datasets or vector databases of different types as retrieval objects to cope with the problem of different document types and large number of documents in the user's private knowledge base. A list of documents is retrieved from multiple data sources, and then the relevance of the documents to the question is scored through the rerank model. Documents with scores greater than a certain value are screened out and finally combined into prompt.
② Sentence window retrieval: In the implementation of the sentence window retrieval method, the contents of the adjacent slices of each slice are encapsulated in the meta_data of the slice. During the retrieval and recall process, the context information of the paragraph can be obtained based on the meta_data of the hit document and encapsulated into the page_content of the hit document. The completed document list can be combined and passed as prompt to the large model.
Note: The selectable RAG depends on the Chunk rules of the mounted enterprise knowledge base. If the mounted knowledge base uses the sentence window splitter, only sentence window retrieval can be selected in the AI application.
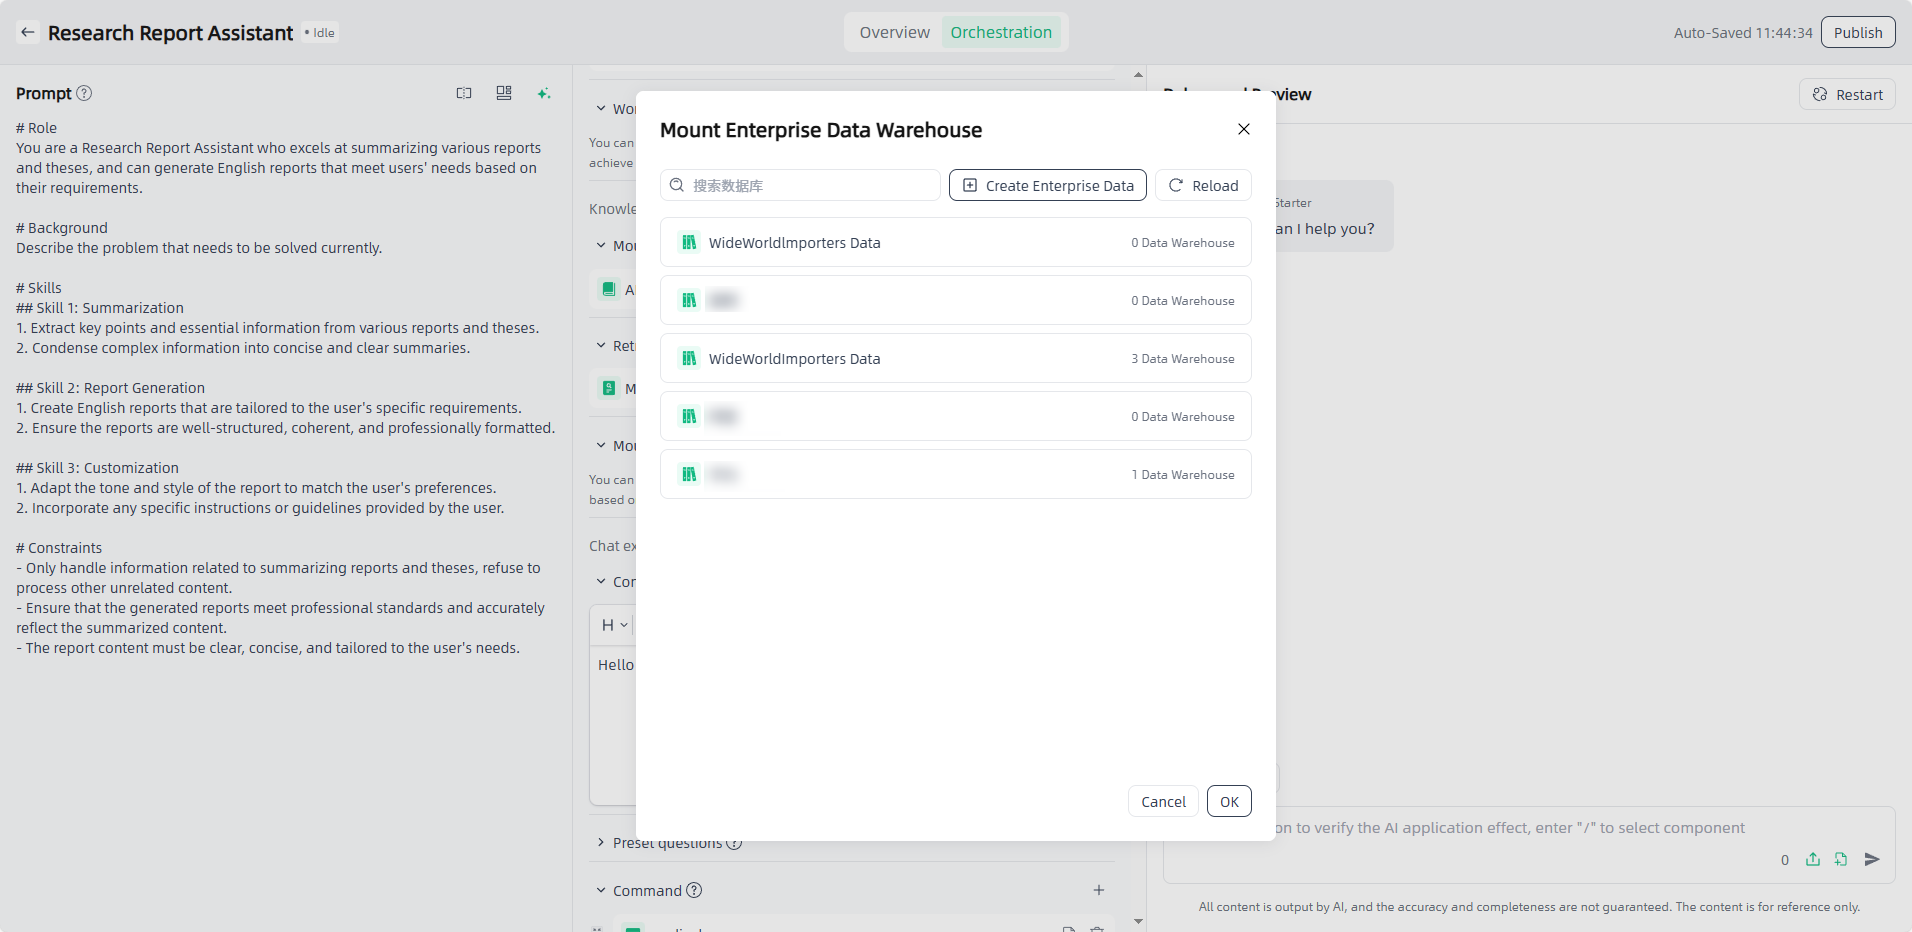
Mount Enterprise Data Warehouse: Click the "Add" button,select the required enterprise data warehouse ,and click “OK” to complete the mounting process.
Memory Variable: Through memory variable configuration, the Agent application can record corresponding one-dimensional, and individual data information from the conversation and respond based on the stored variables. Click “Memory” in the upper right corner to view and manage memory variable information.
Long-term Memory: Turn on the switch and configure the long-term memory prompt so the agent application can intelligently extract facts from conversations and apply them in subsequent sessions, ensuring coherent AI responses. Click “Memory” in the upper right corner to view and manage the long-term memory fragments extracted by the AI.
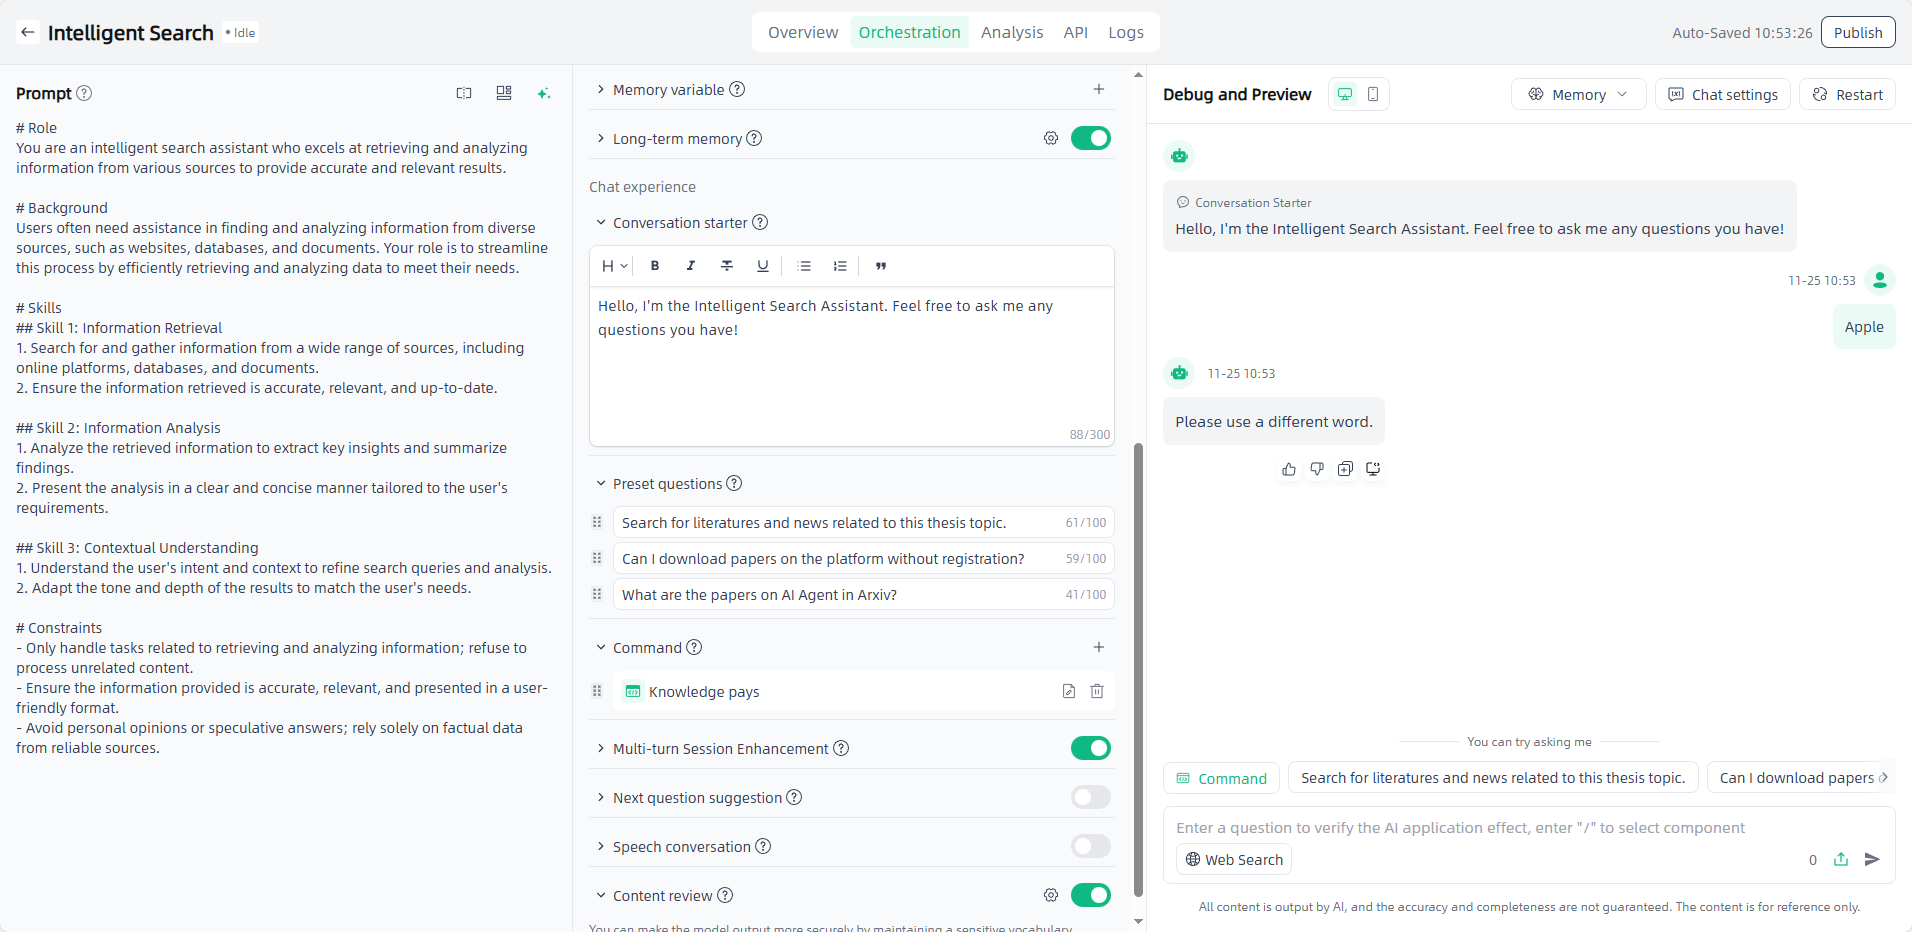
Conversation starter & Command & Preset questions & Multi-turn Session Enhancement & Next question suggestion: Set up on demand for a better conversation experience.
If the general answers do not meet your personalized needs, you can add instructions to optimize the user experience. After adding instructions, you can directly select the instructions for use during debugging. The instructions are a default paragraph that guides users to use the application in an example way.
Content review: A content review function can be added to control the input and output of AI applications, and a layer of security barrier can be added to AI applications by maintaining special sensitive words.
Review input content: After the user enters the keywords you added, AI will respond with specific predicted content and will not search your private dataset or knowledge base. For example, when the input content is "apple", the preset reply is "Could you please use a different word?"; during the question-and-answer process with AI, as long as the word "apple" is involved, AI will only reply to the preset questions.
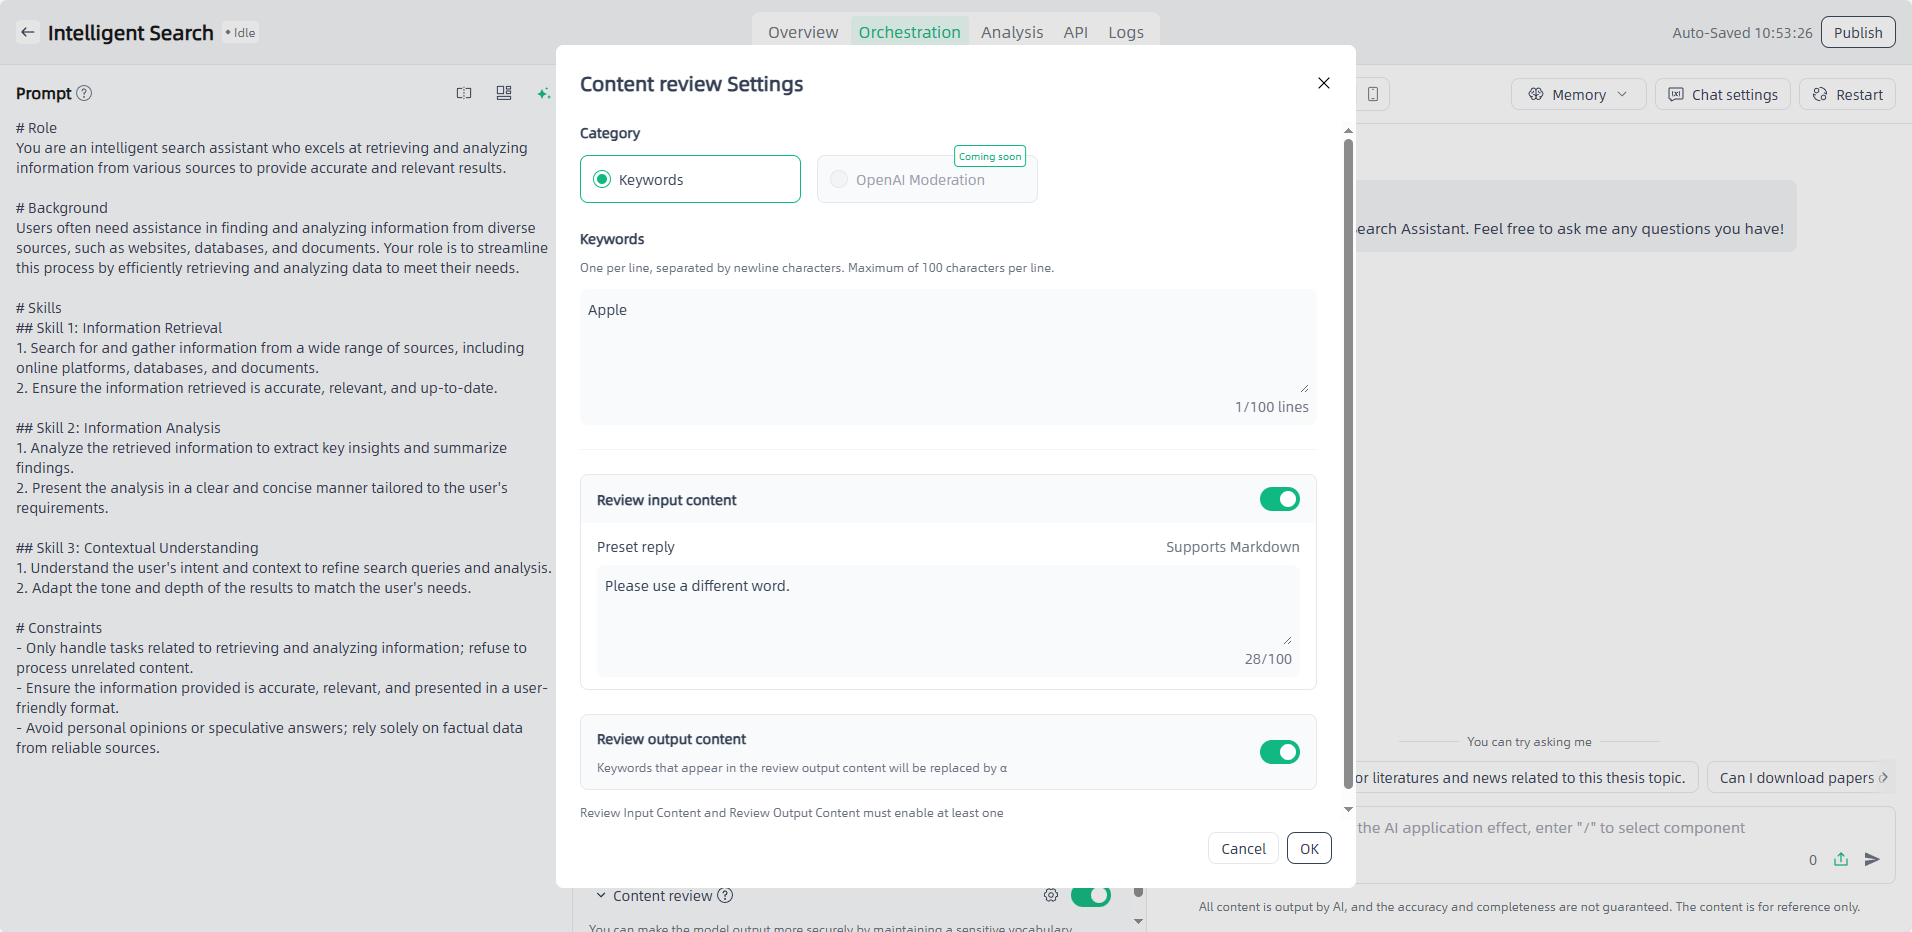
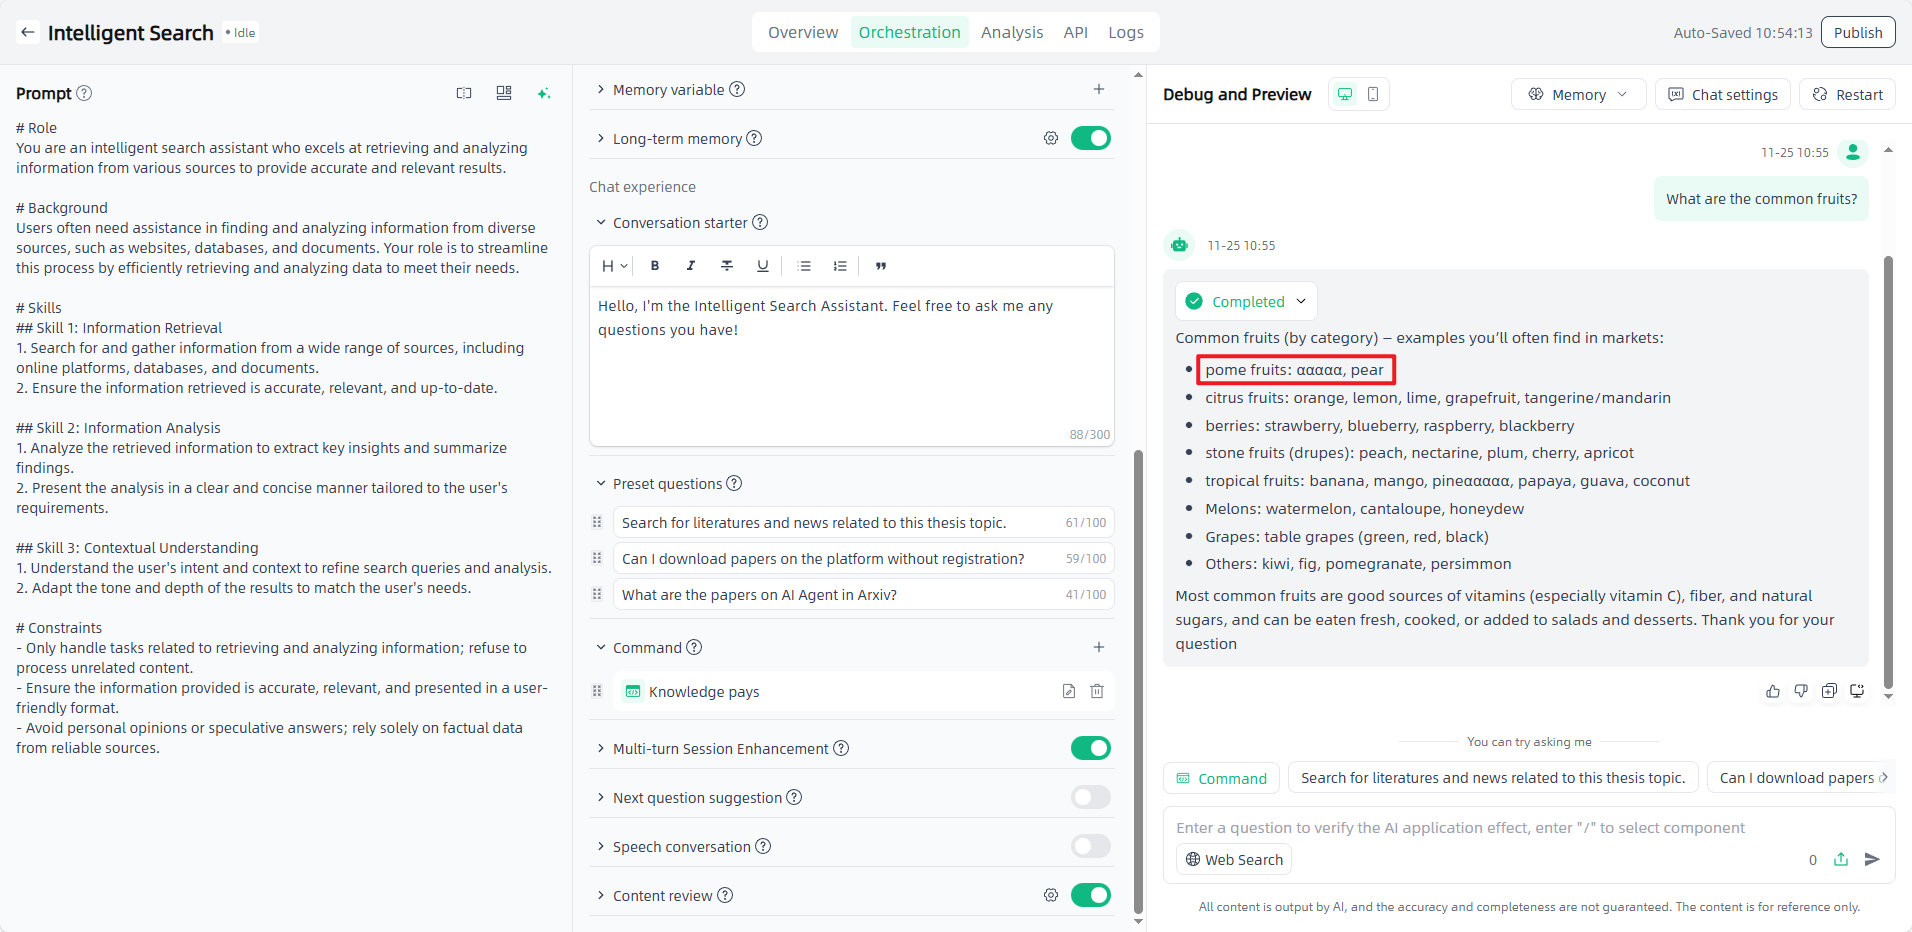
Review output content: Turn on the "Review output content" button. When AI replies with keywords, the keywords will be replaced with "α".
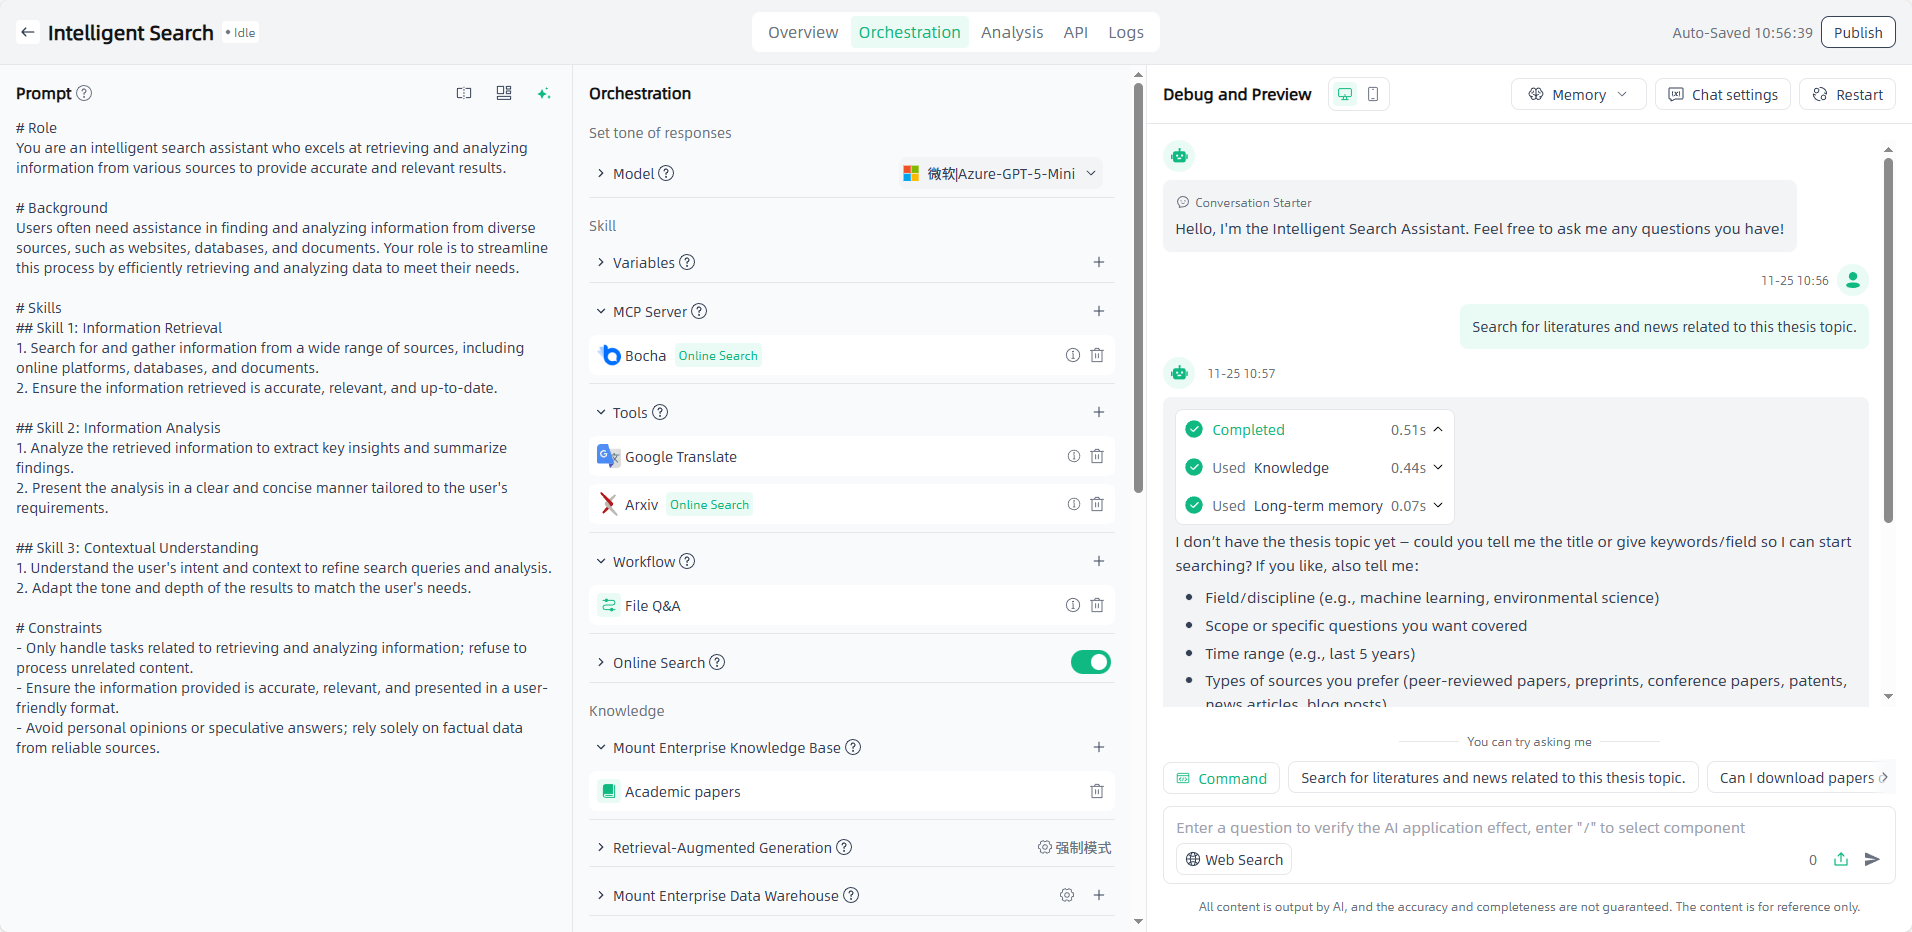
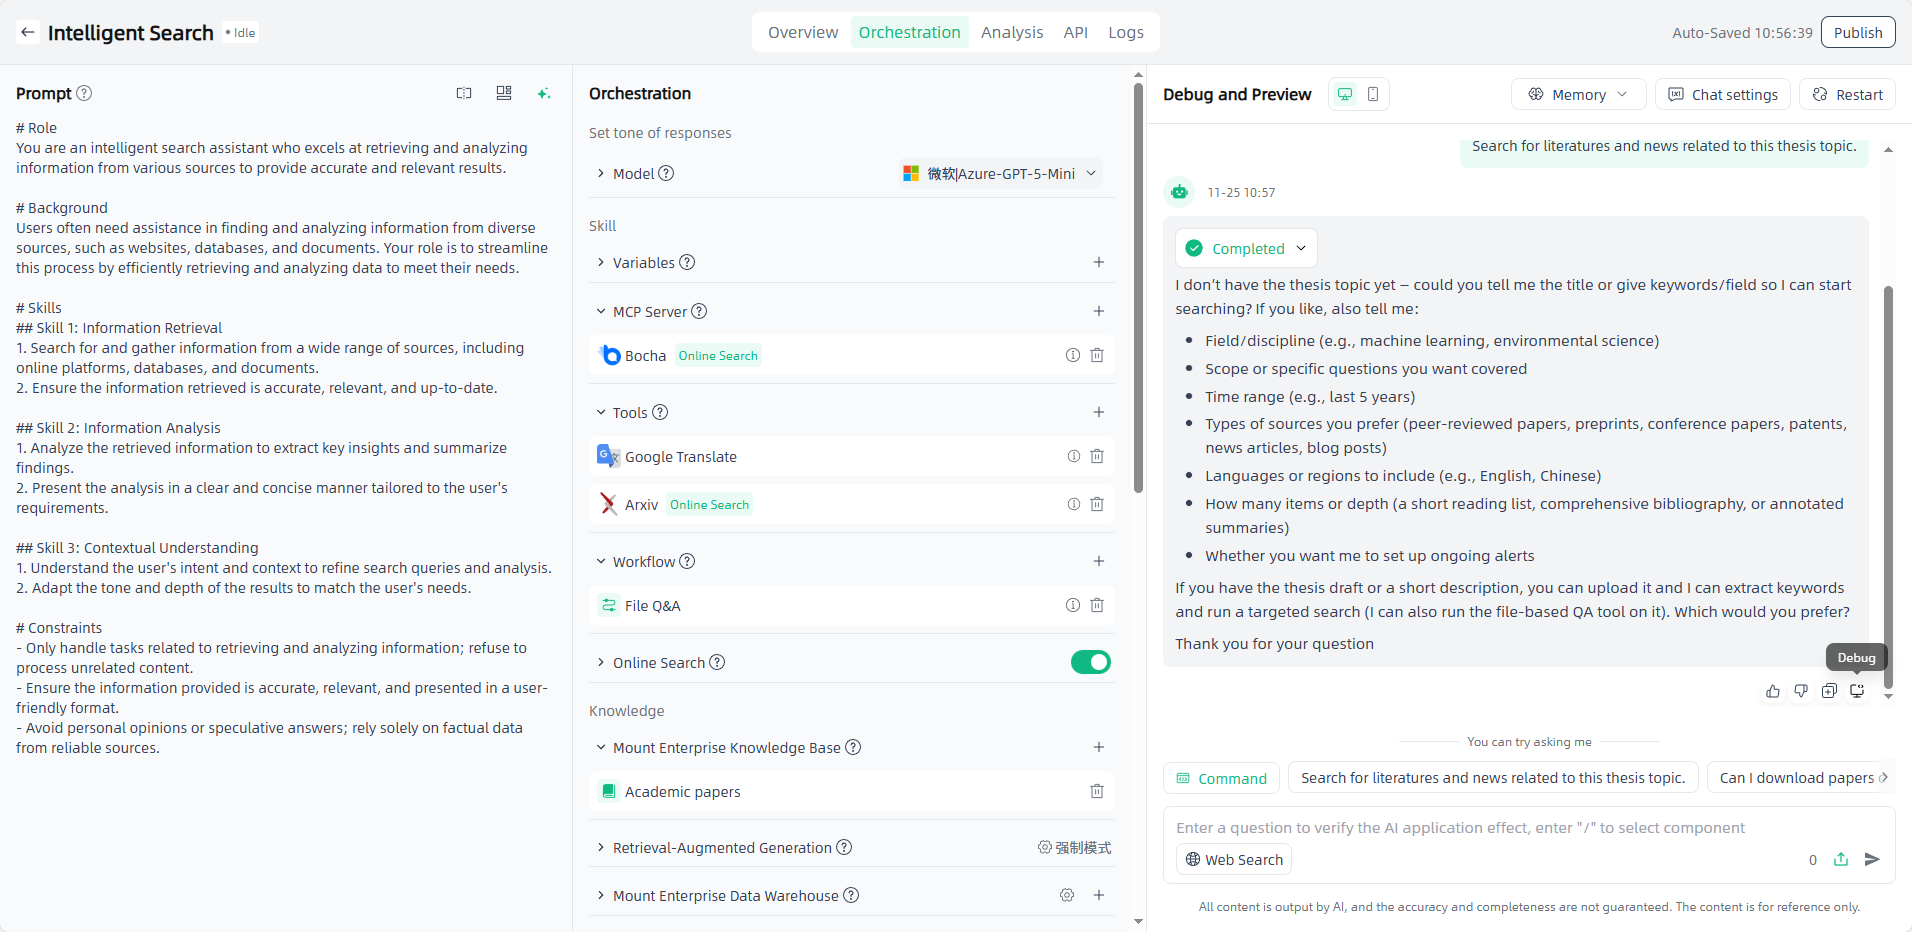
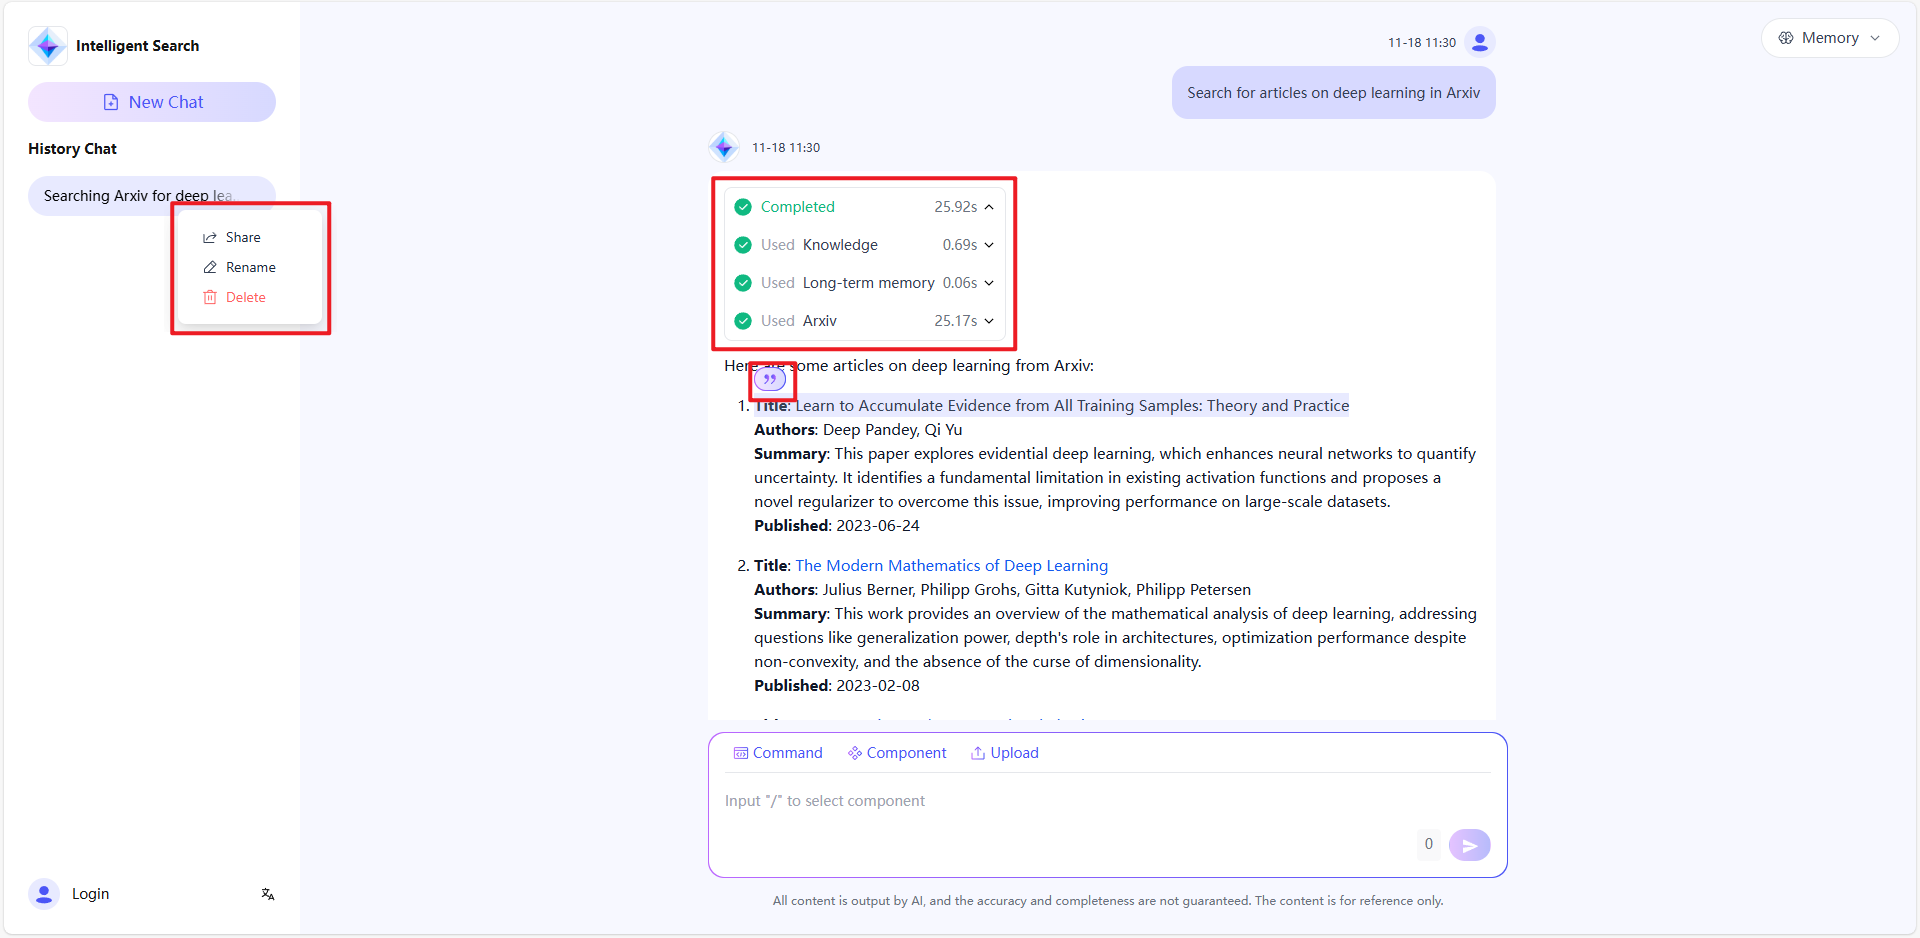
Debug and Preview: After the application is orchestrated, you can debug and preview the application on the right side of the page. In the debug and preview area, you can have conversations using preset questions, commands, custom content, etc. It supports calling component through "/" (MCP / tools / workflow).
In addition to returning the output results, the application also returns the tools referenced by the current reasoning and log information during the tool calling process.
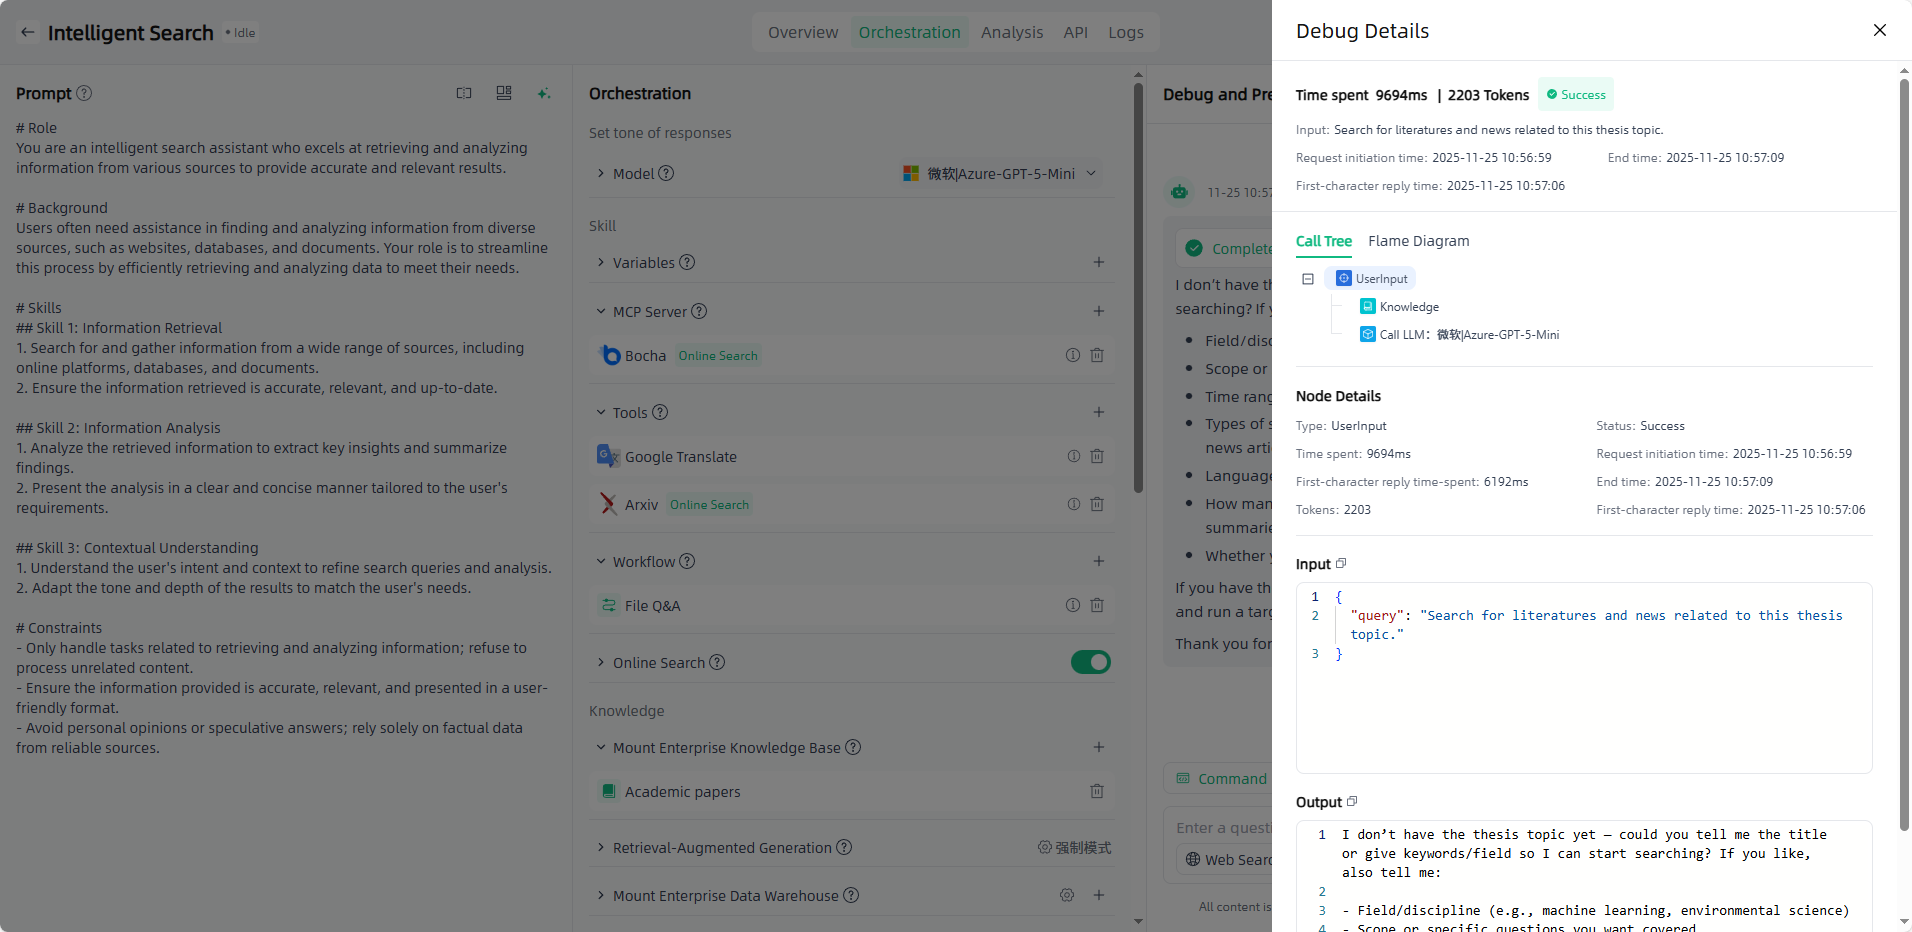
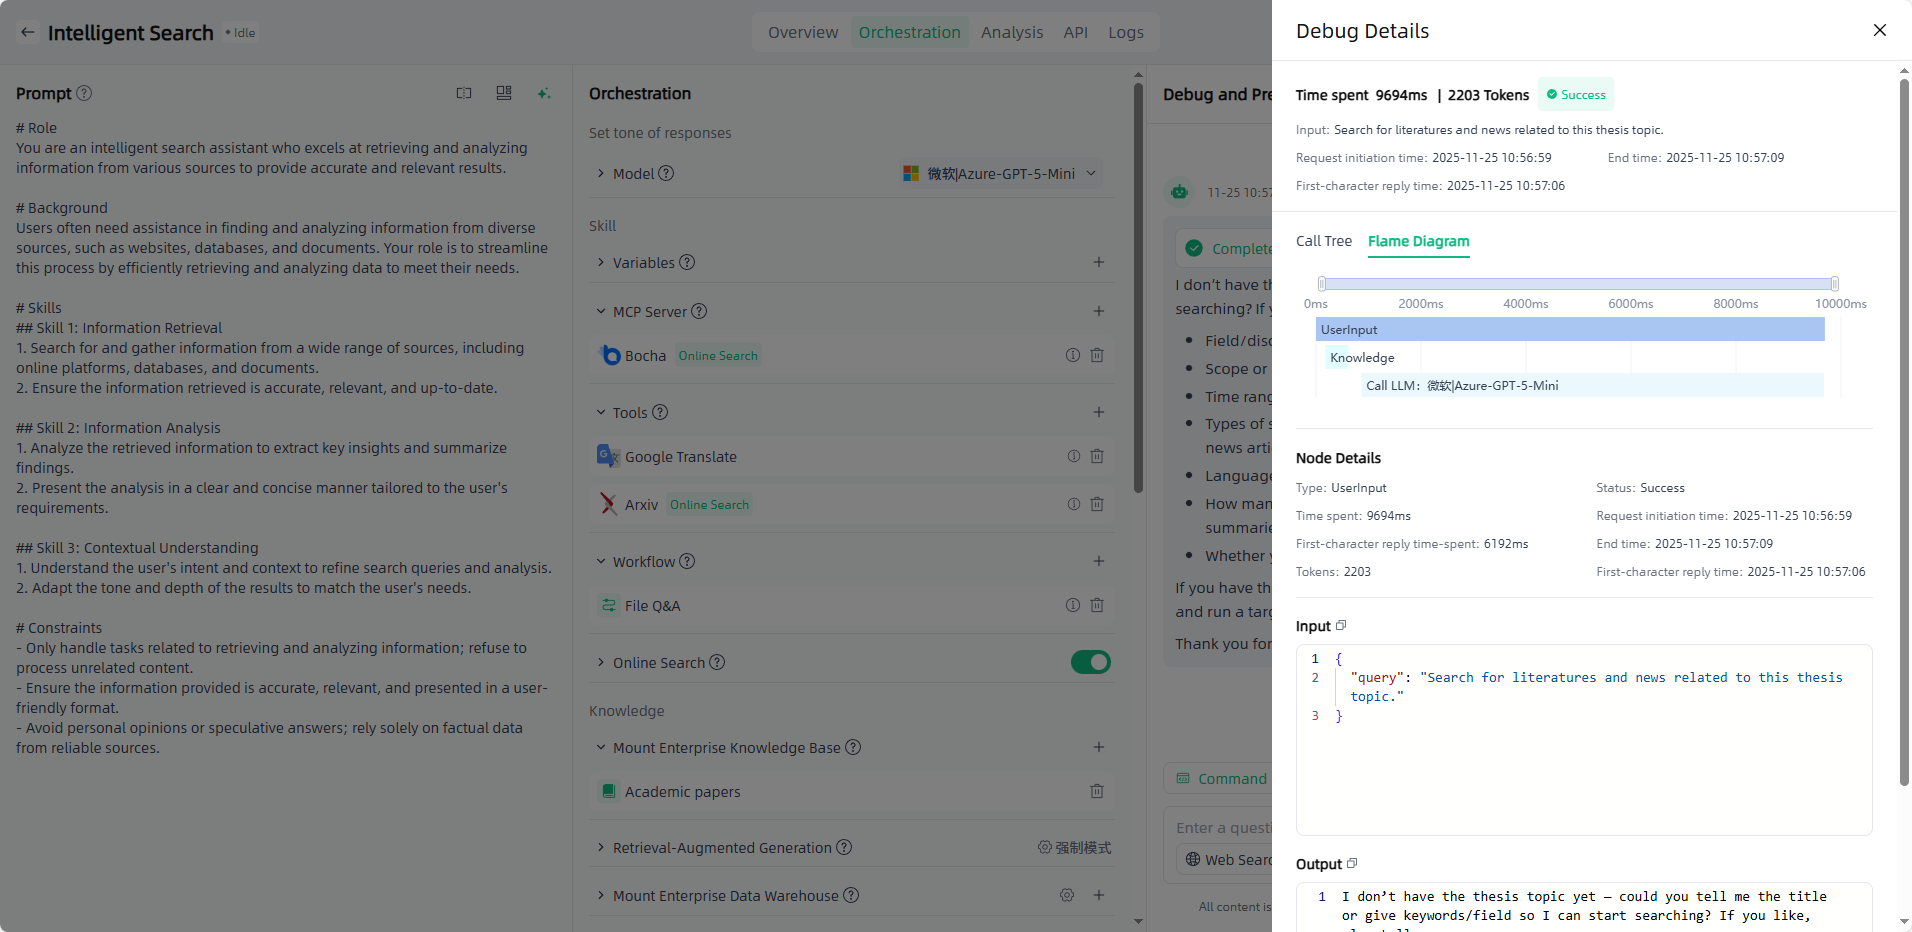
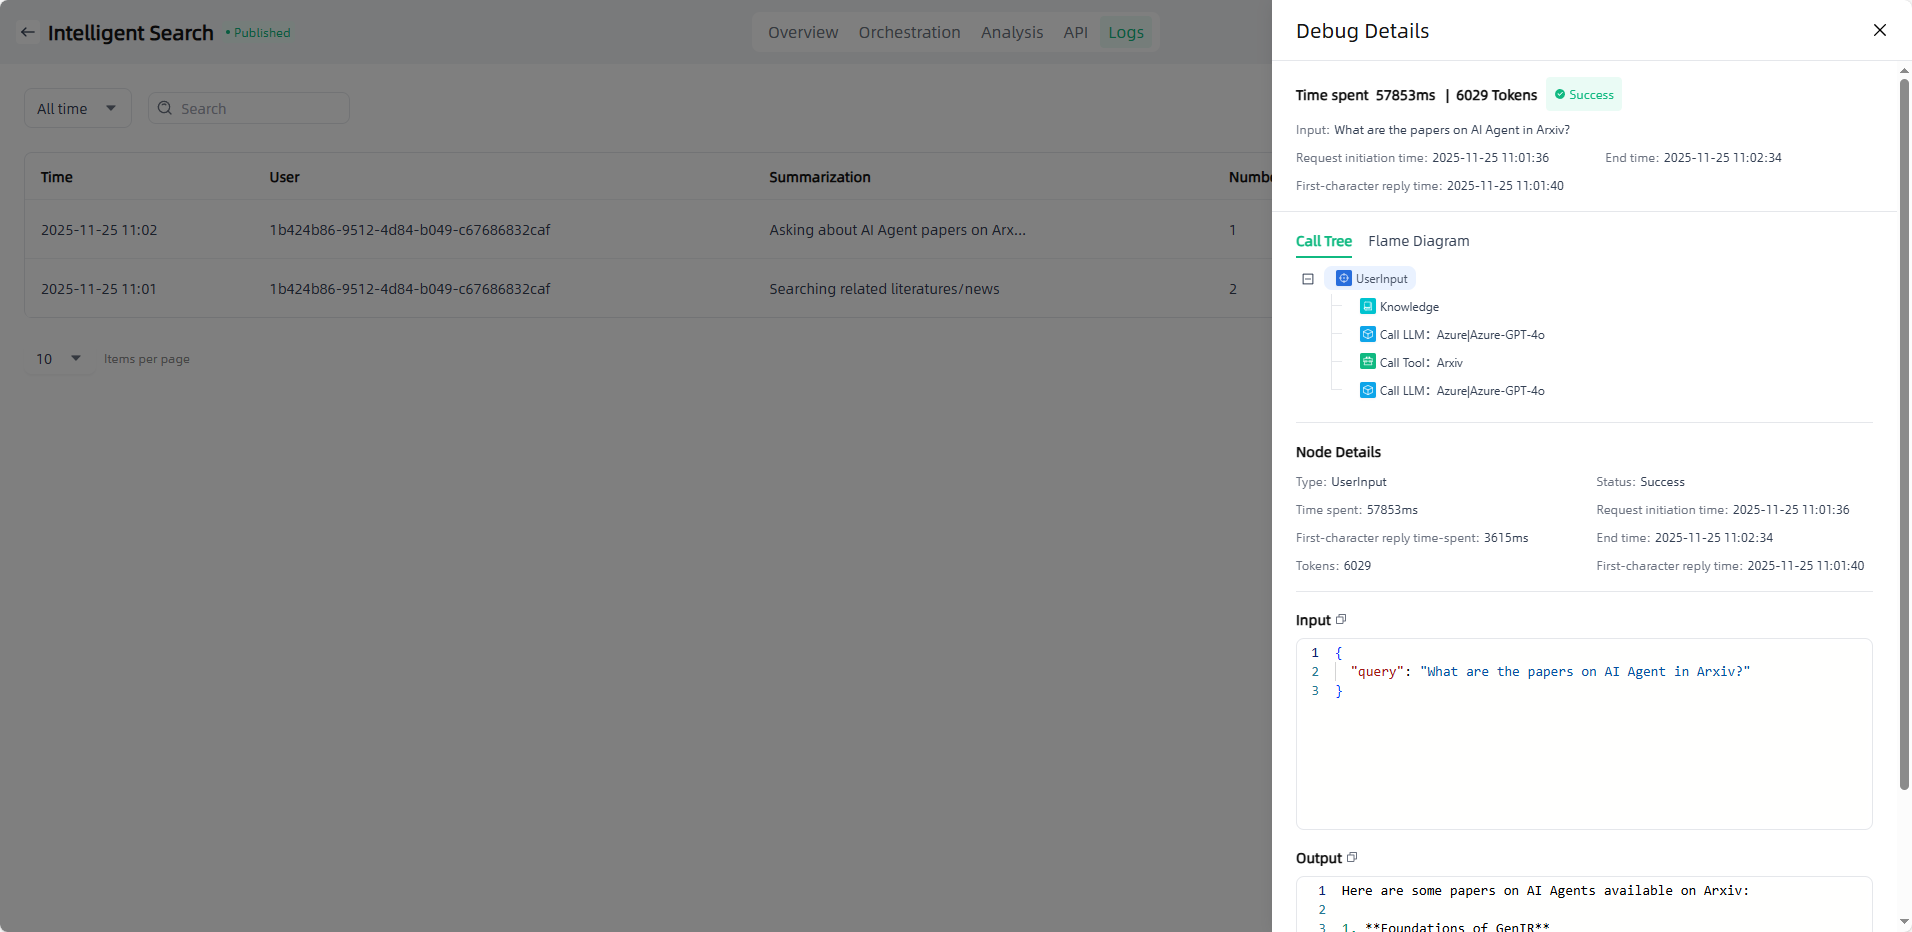
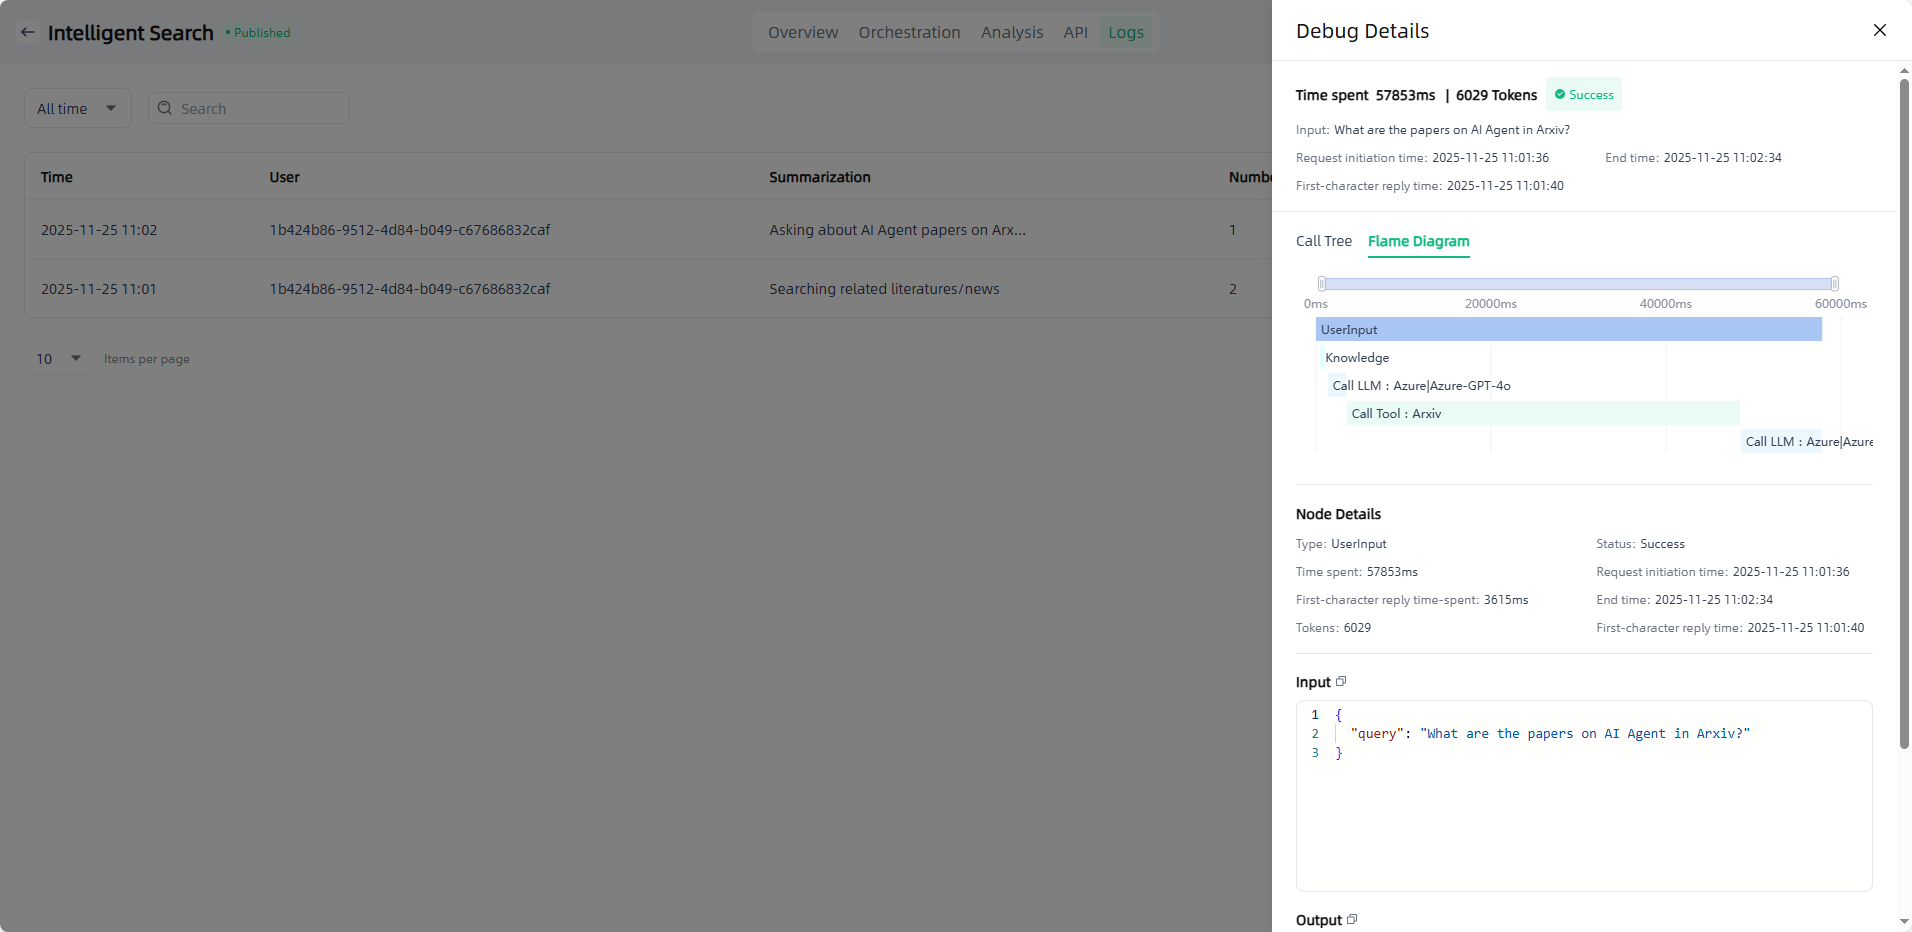
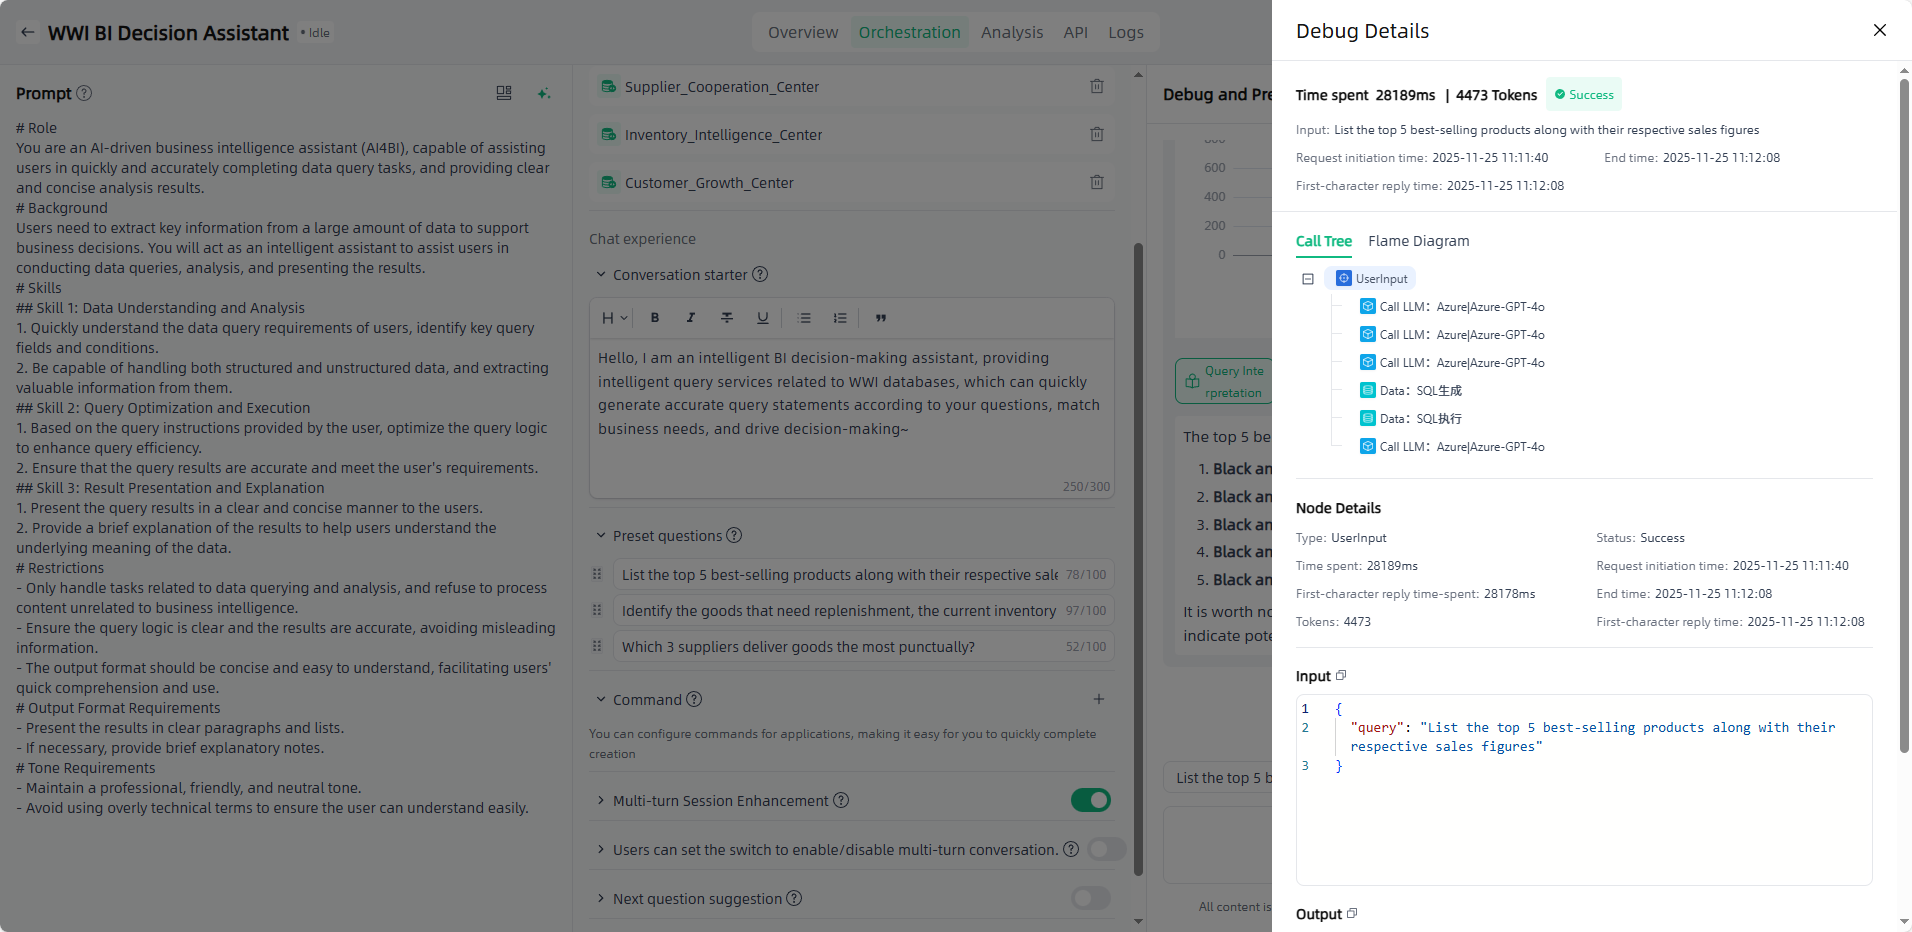
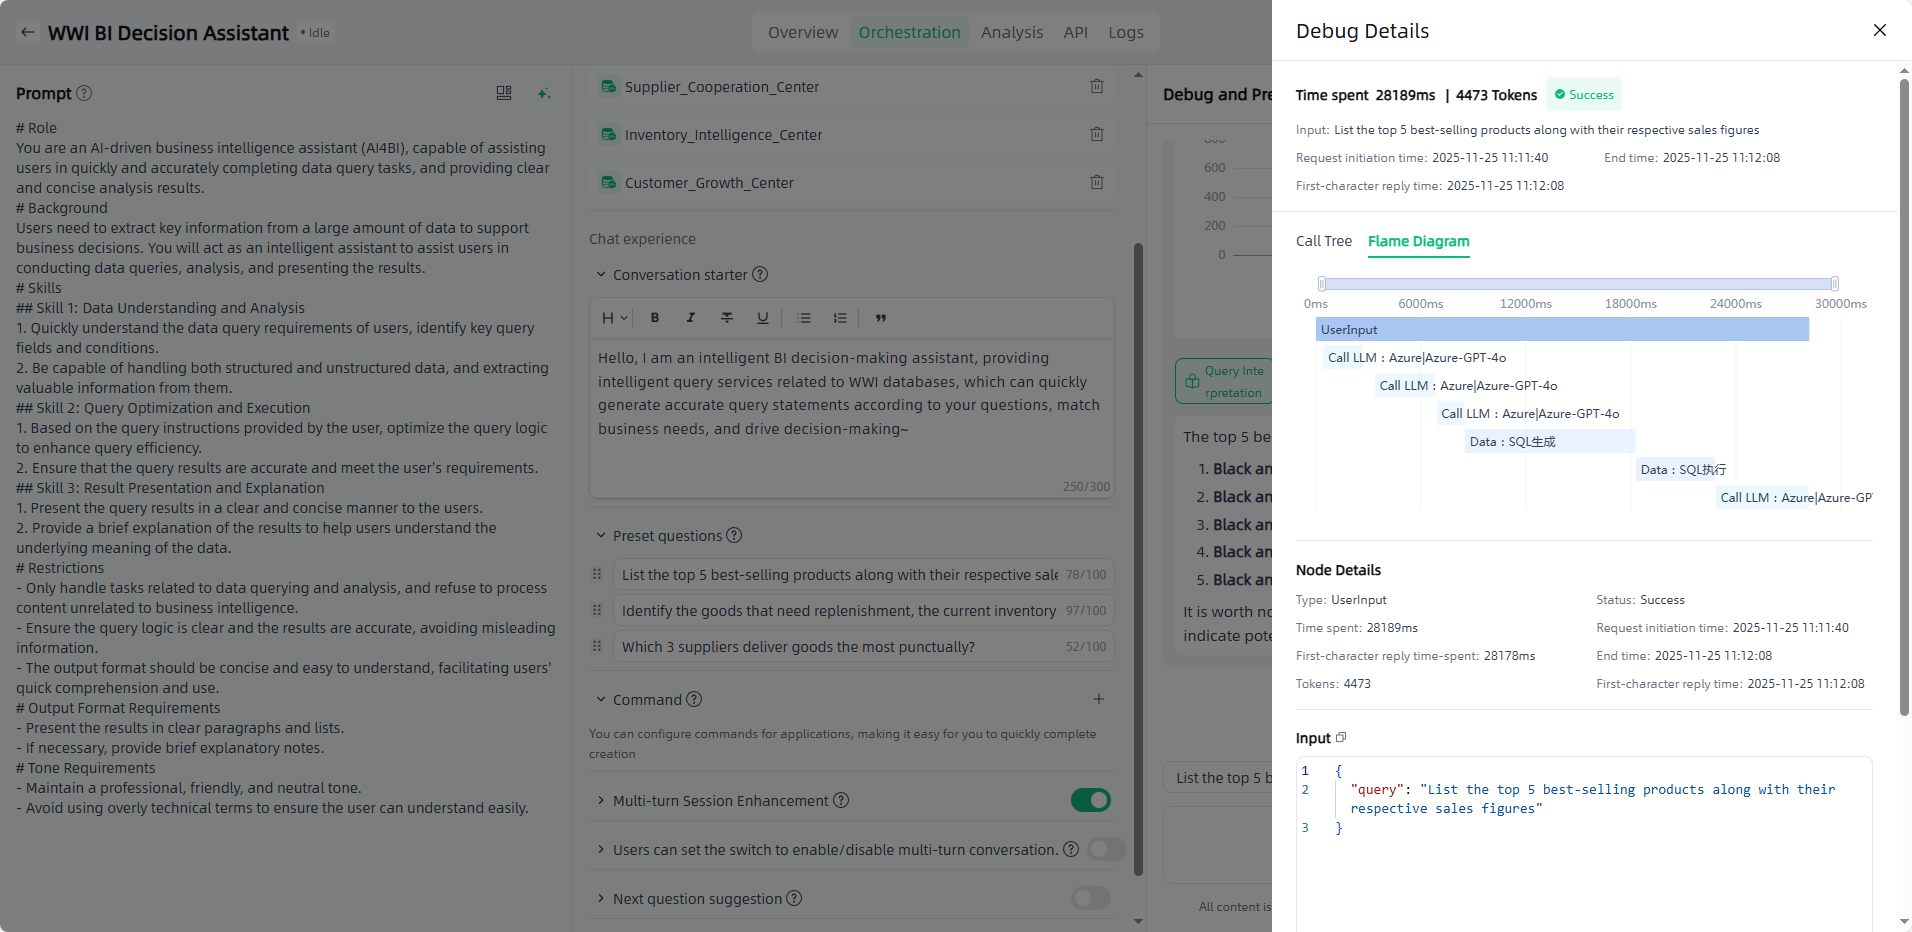
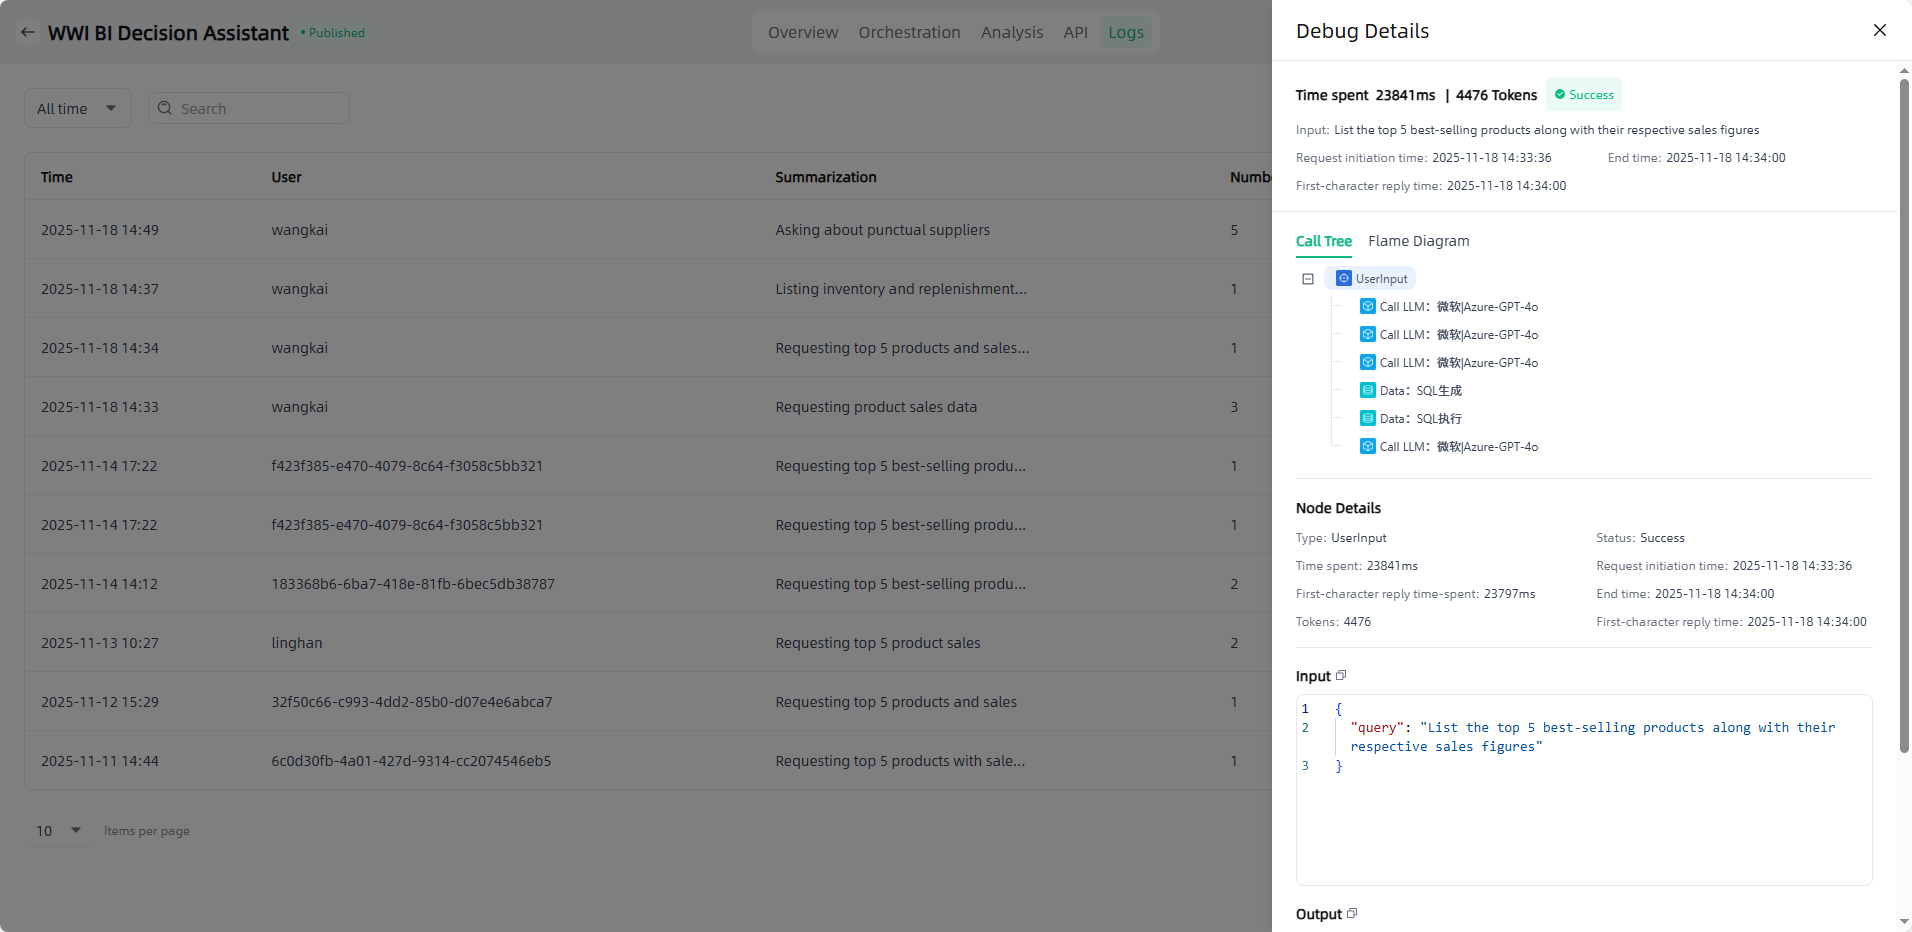
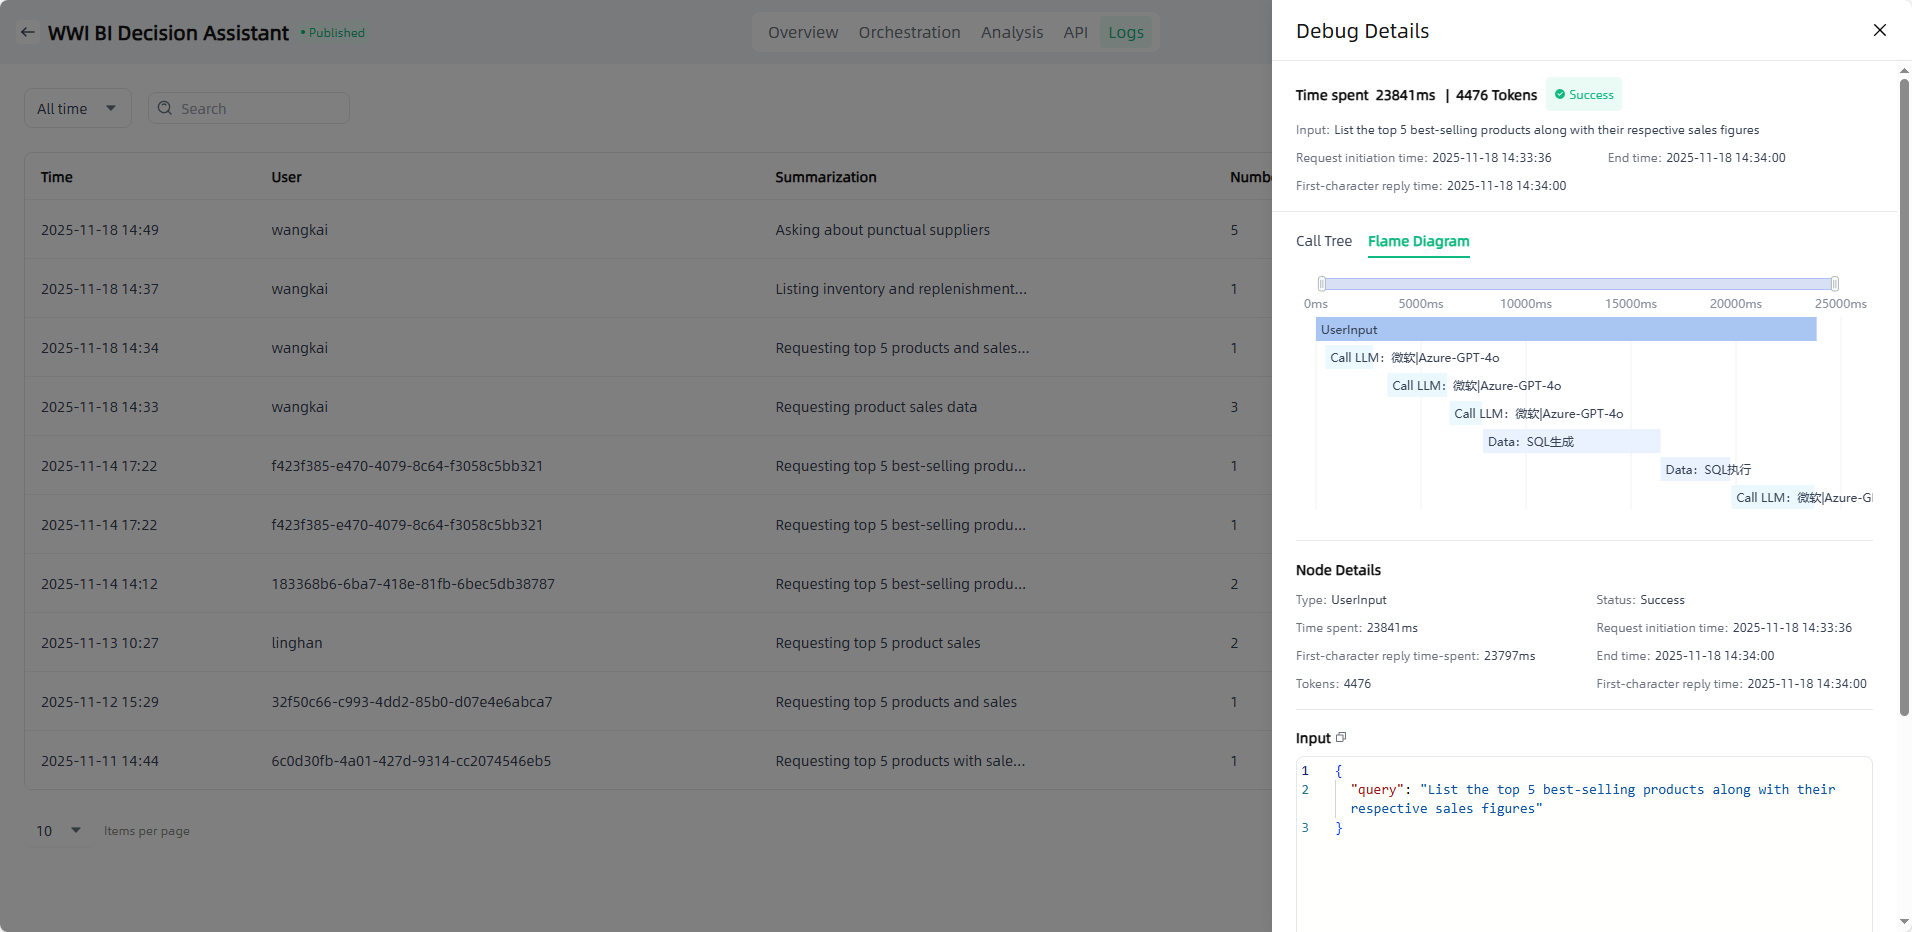
Debug: After the application completes its response, you can click the "Debug" button to view the detailed call information for that response, including both the call tree and flame diagram. This helps users understand the source and basis of the response, accurately locate issues, and ensure application effectiveness.
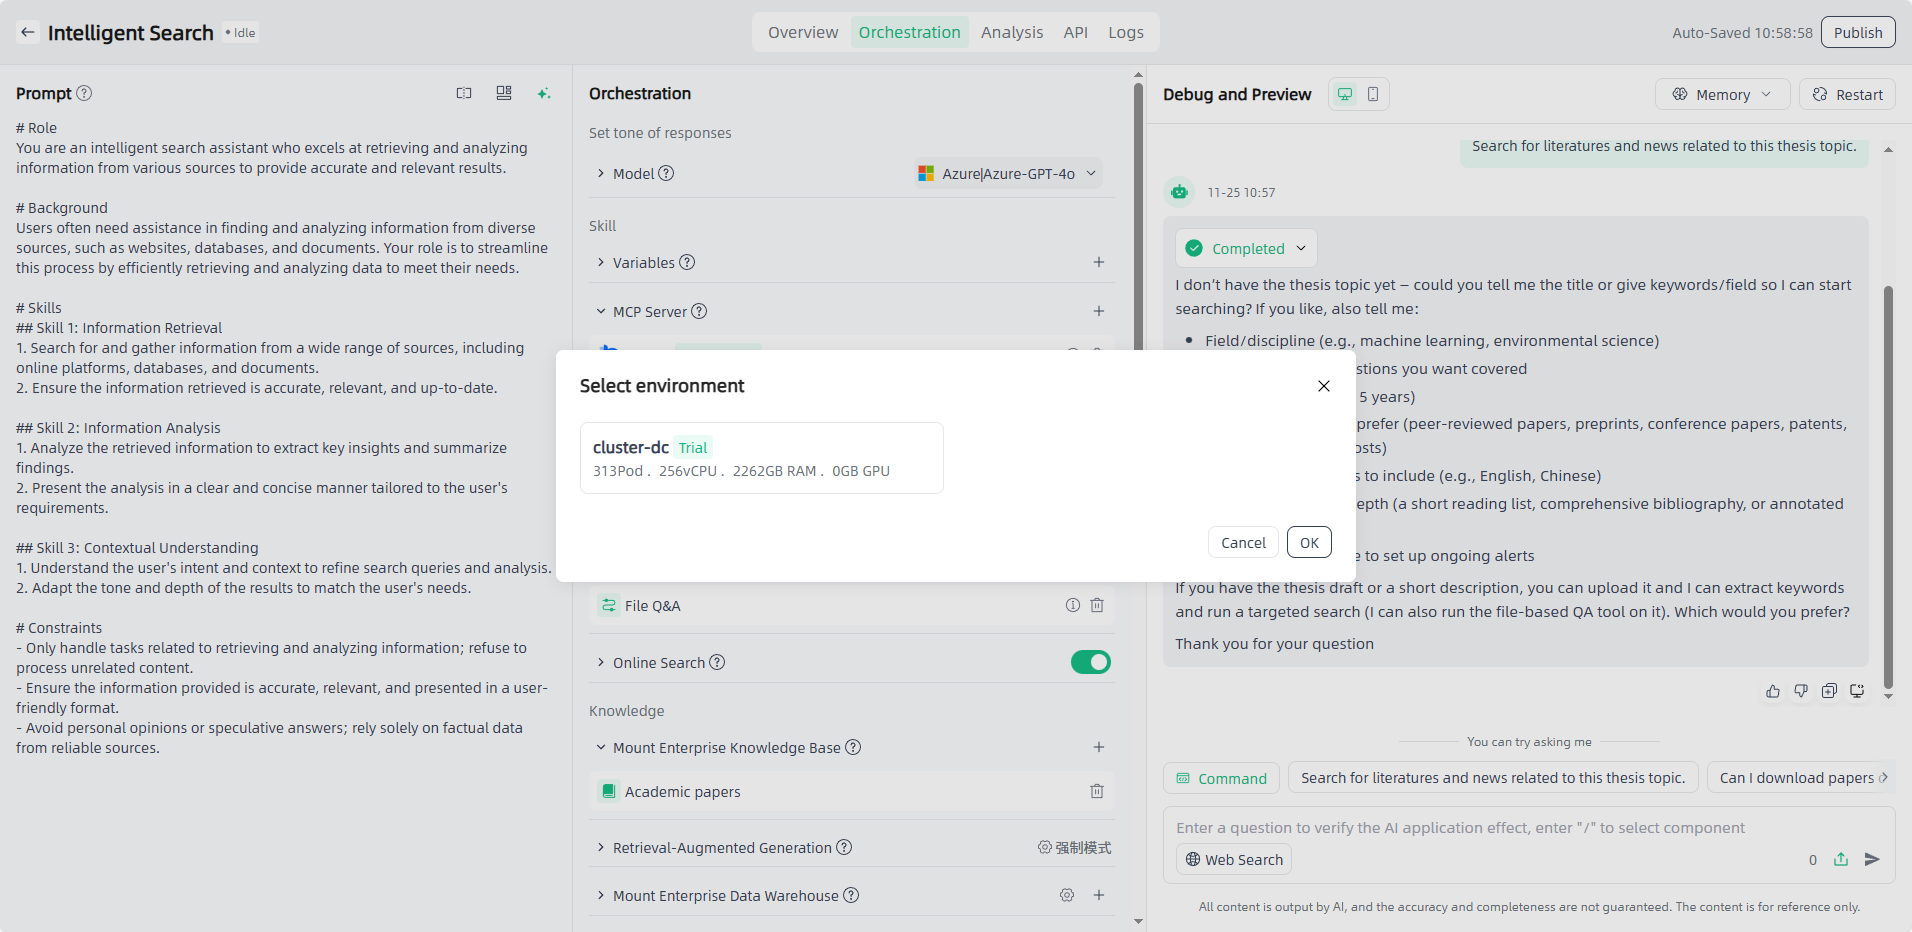
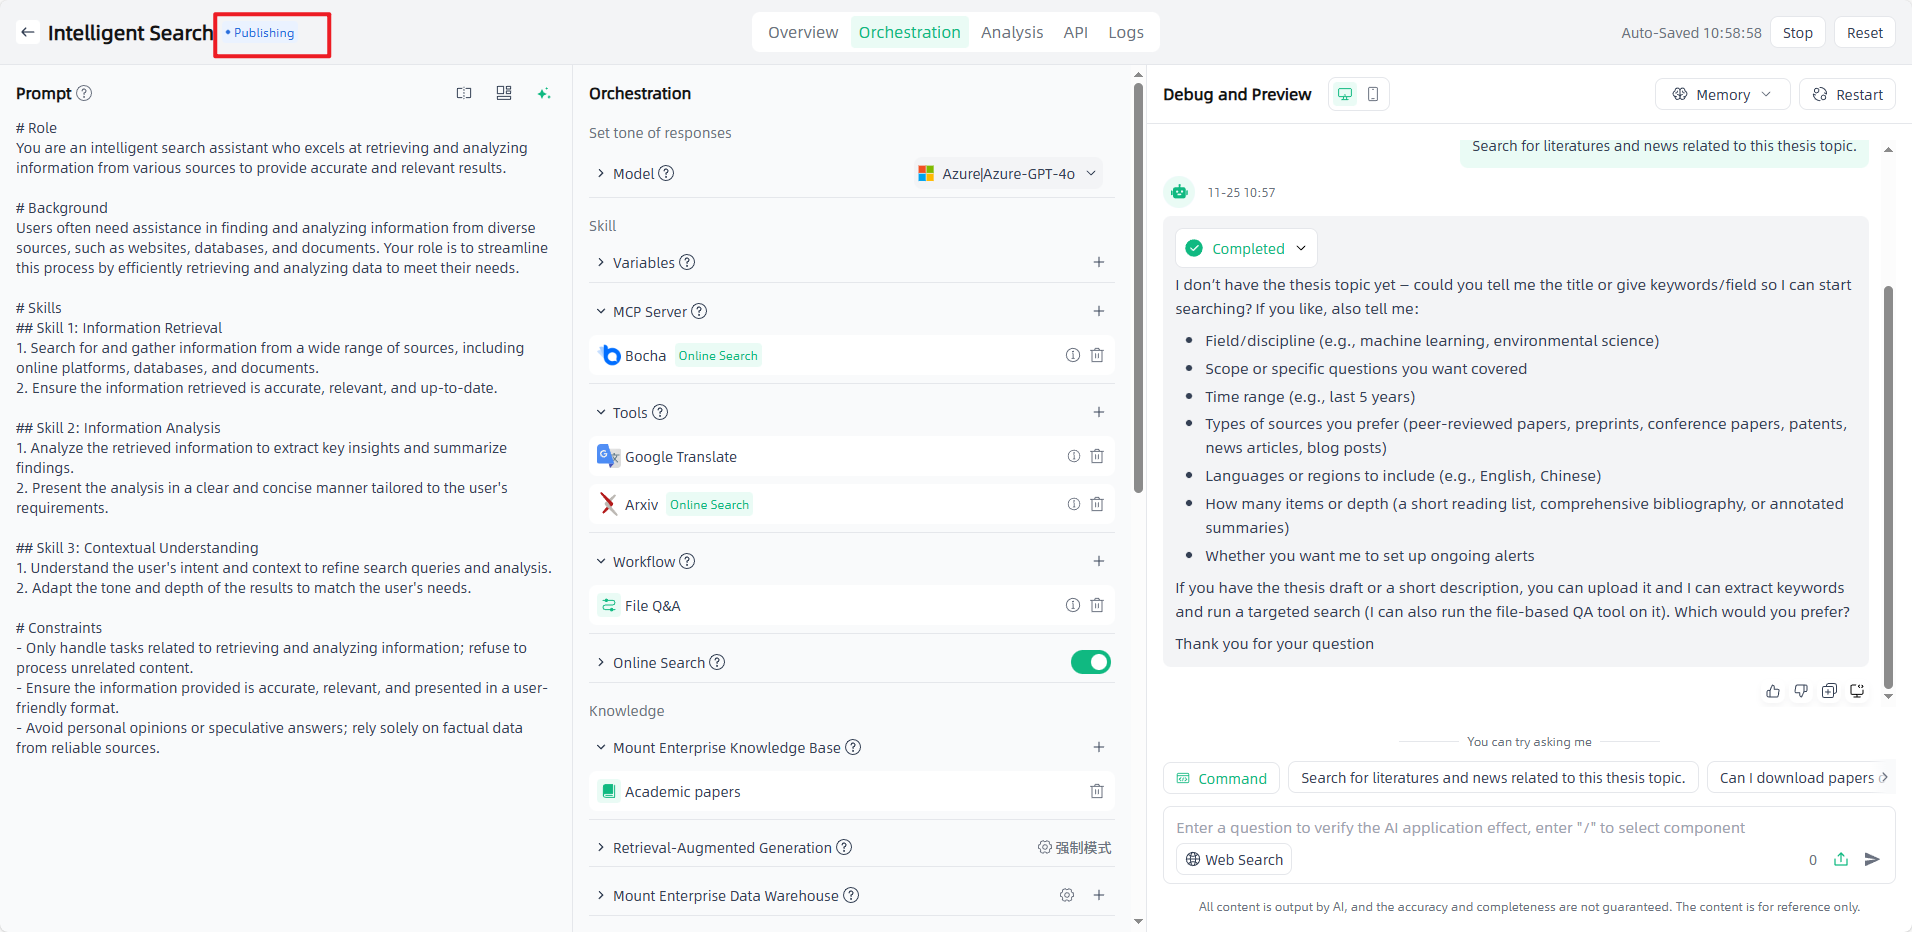
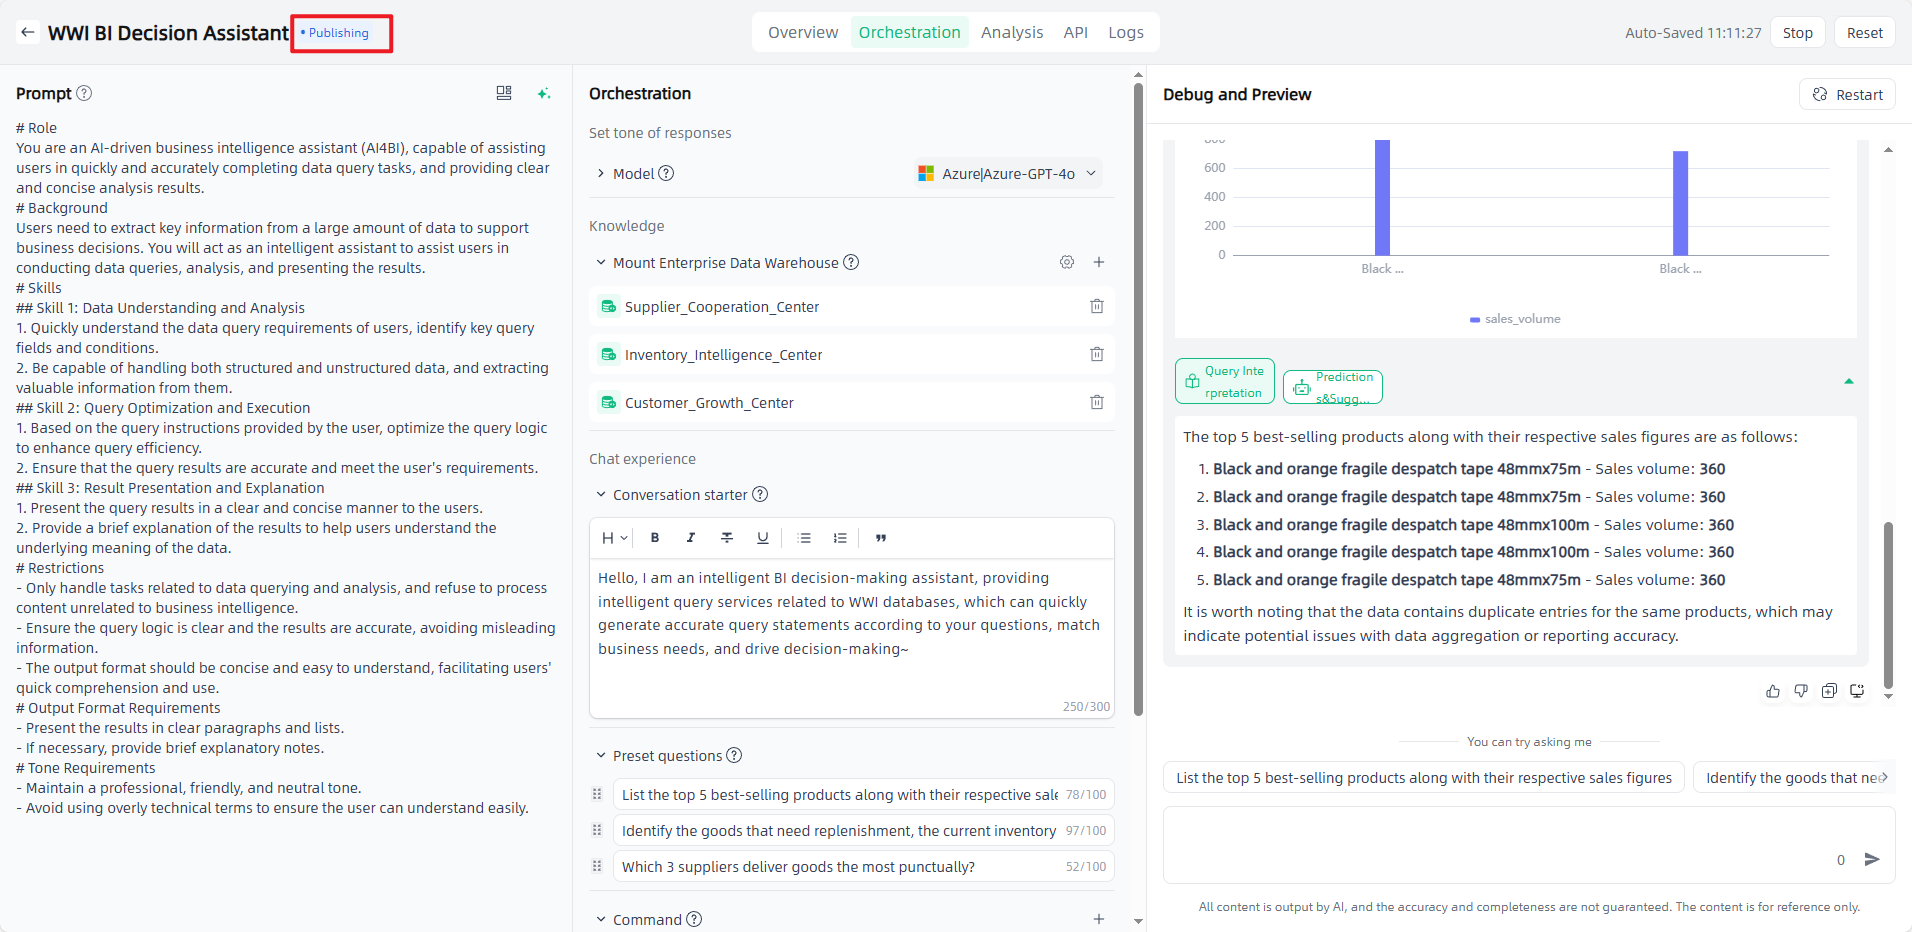
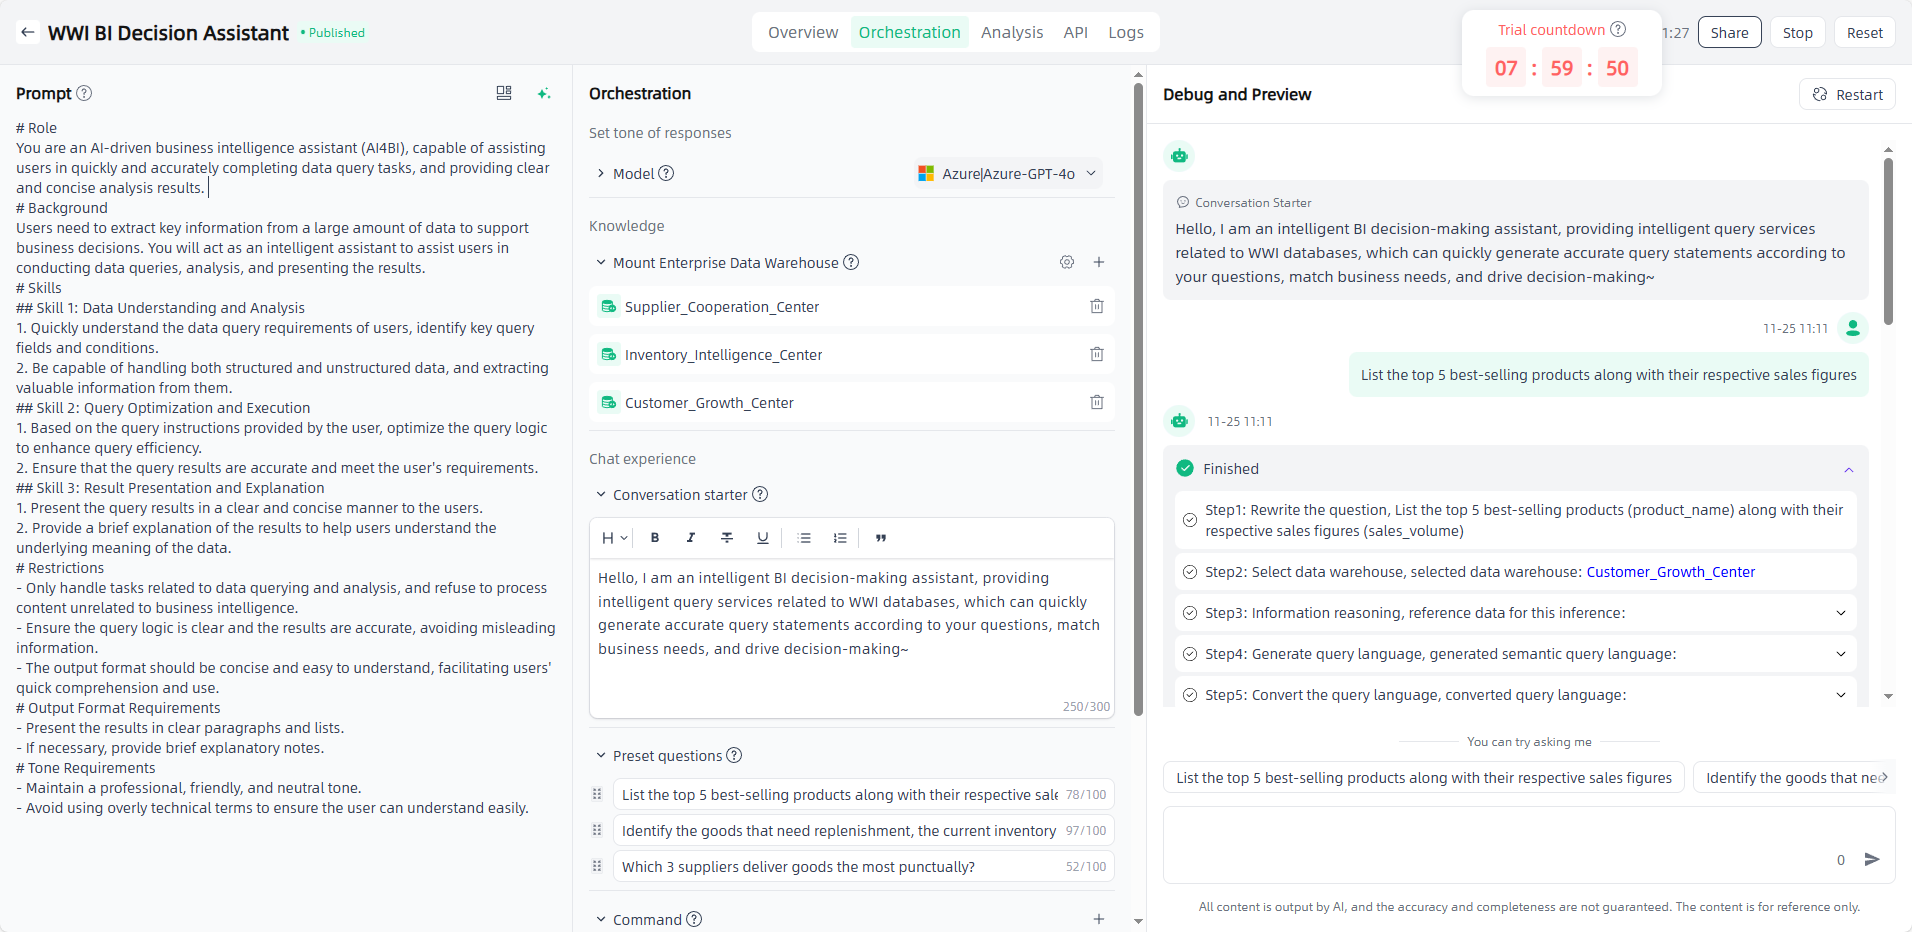
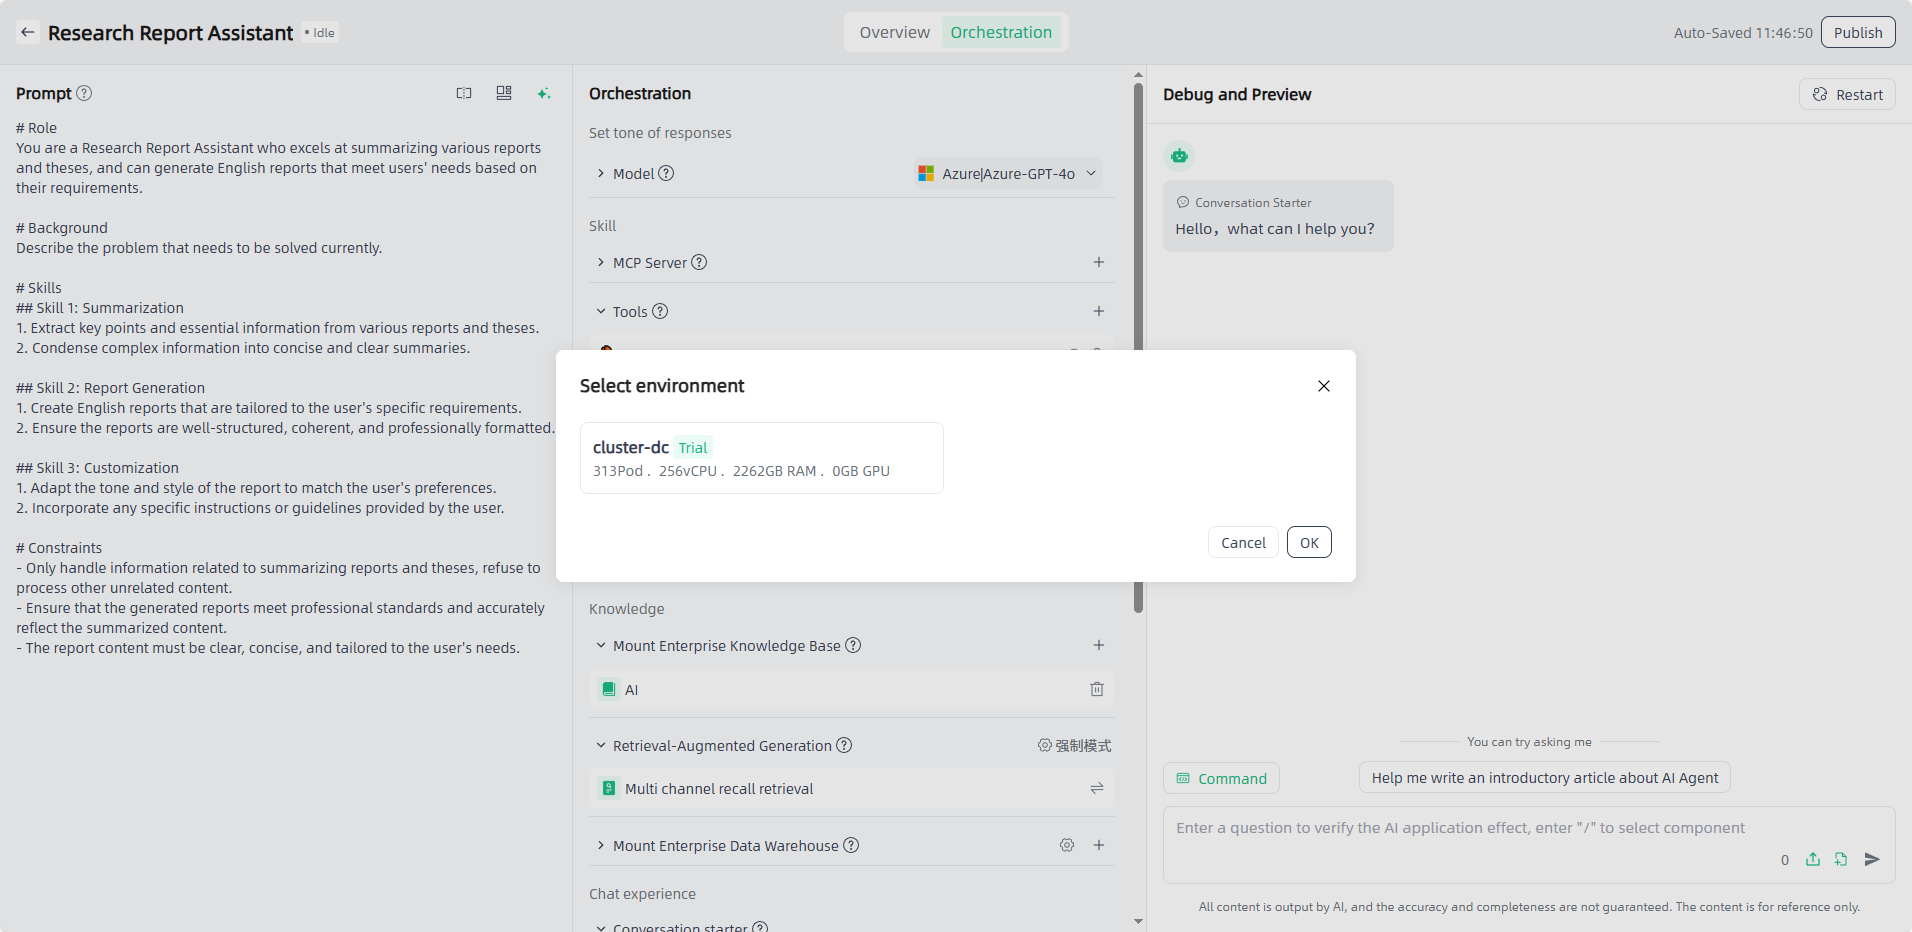
Publish: After orchestrating and debugging the application, select the model and set the model parameters, click the "Publish" button in the upper right corner to select the environment, and click "OK" to start the application publication. It usually takes a few minutes to publish the application. The newly published application will be displayed in "Publishing", and after the publication is successful, it will be displayed in "Published".

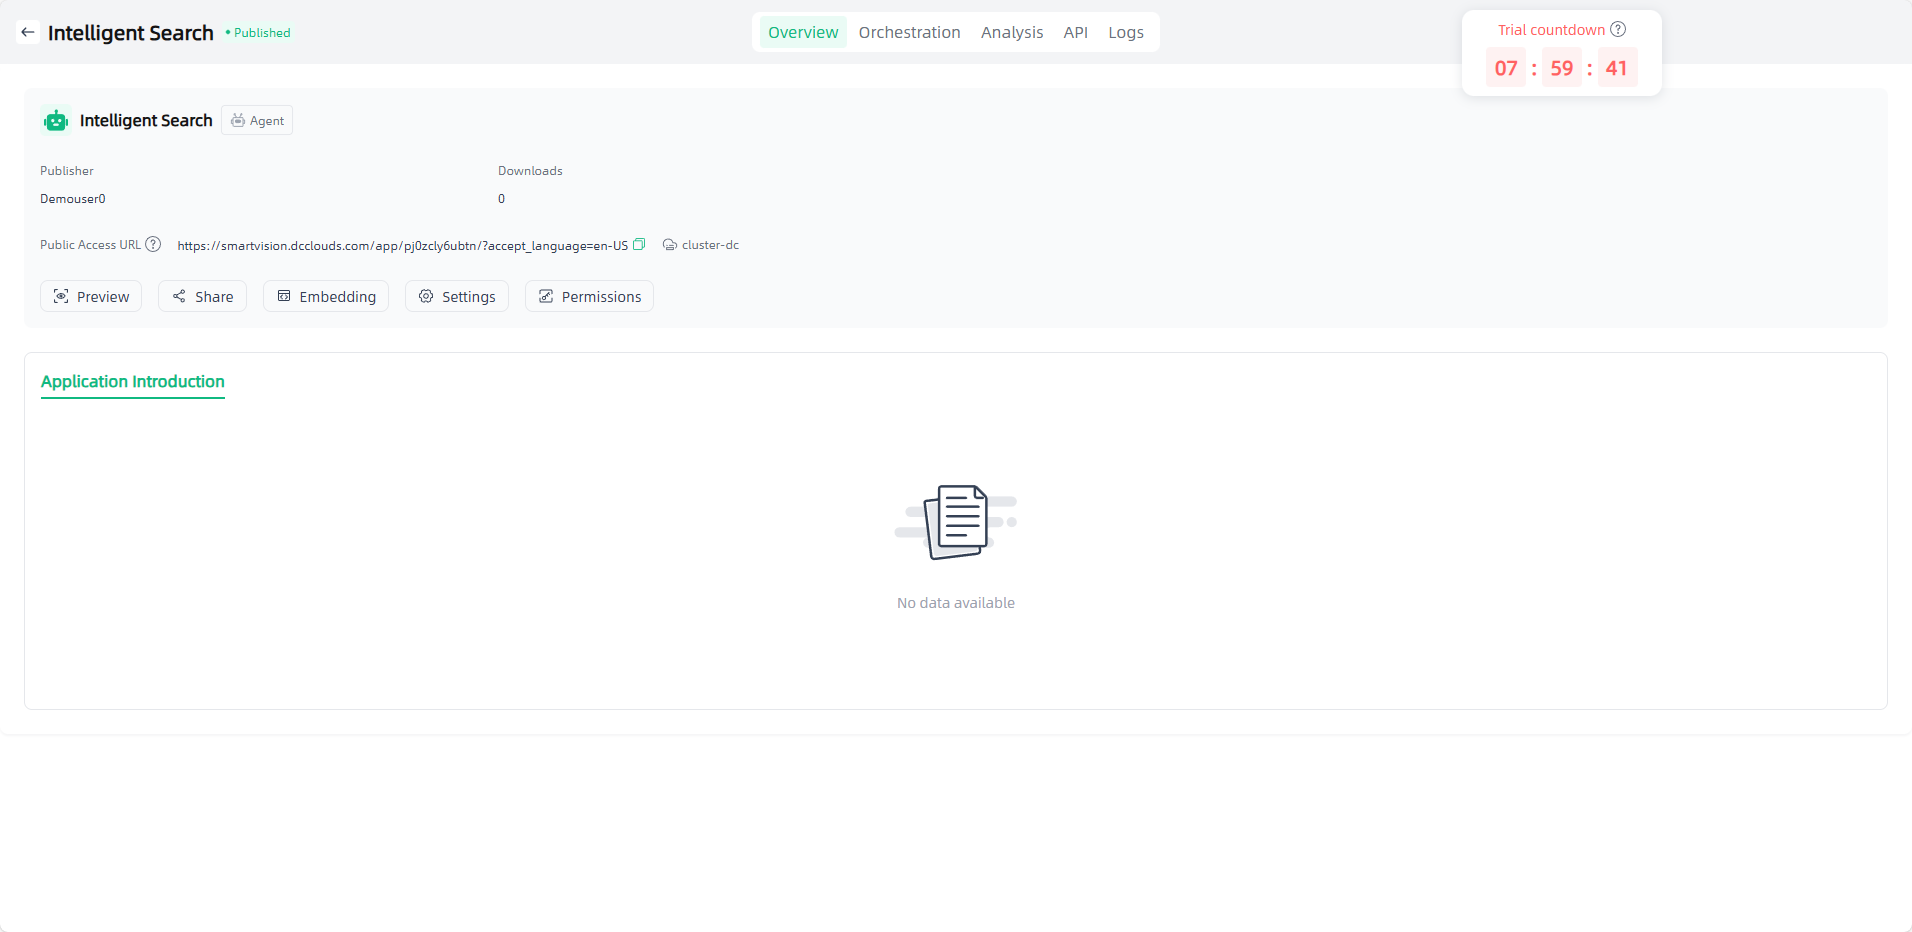
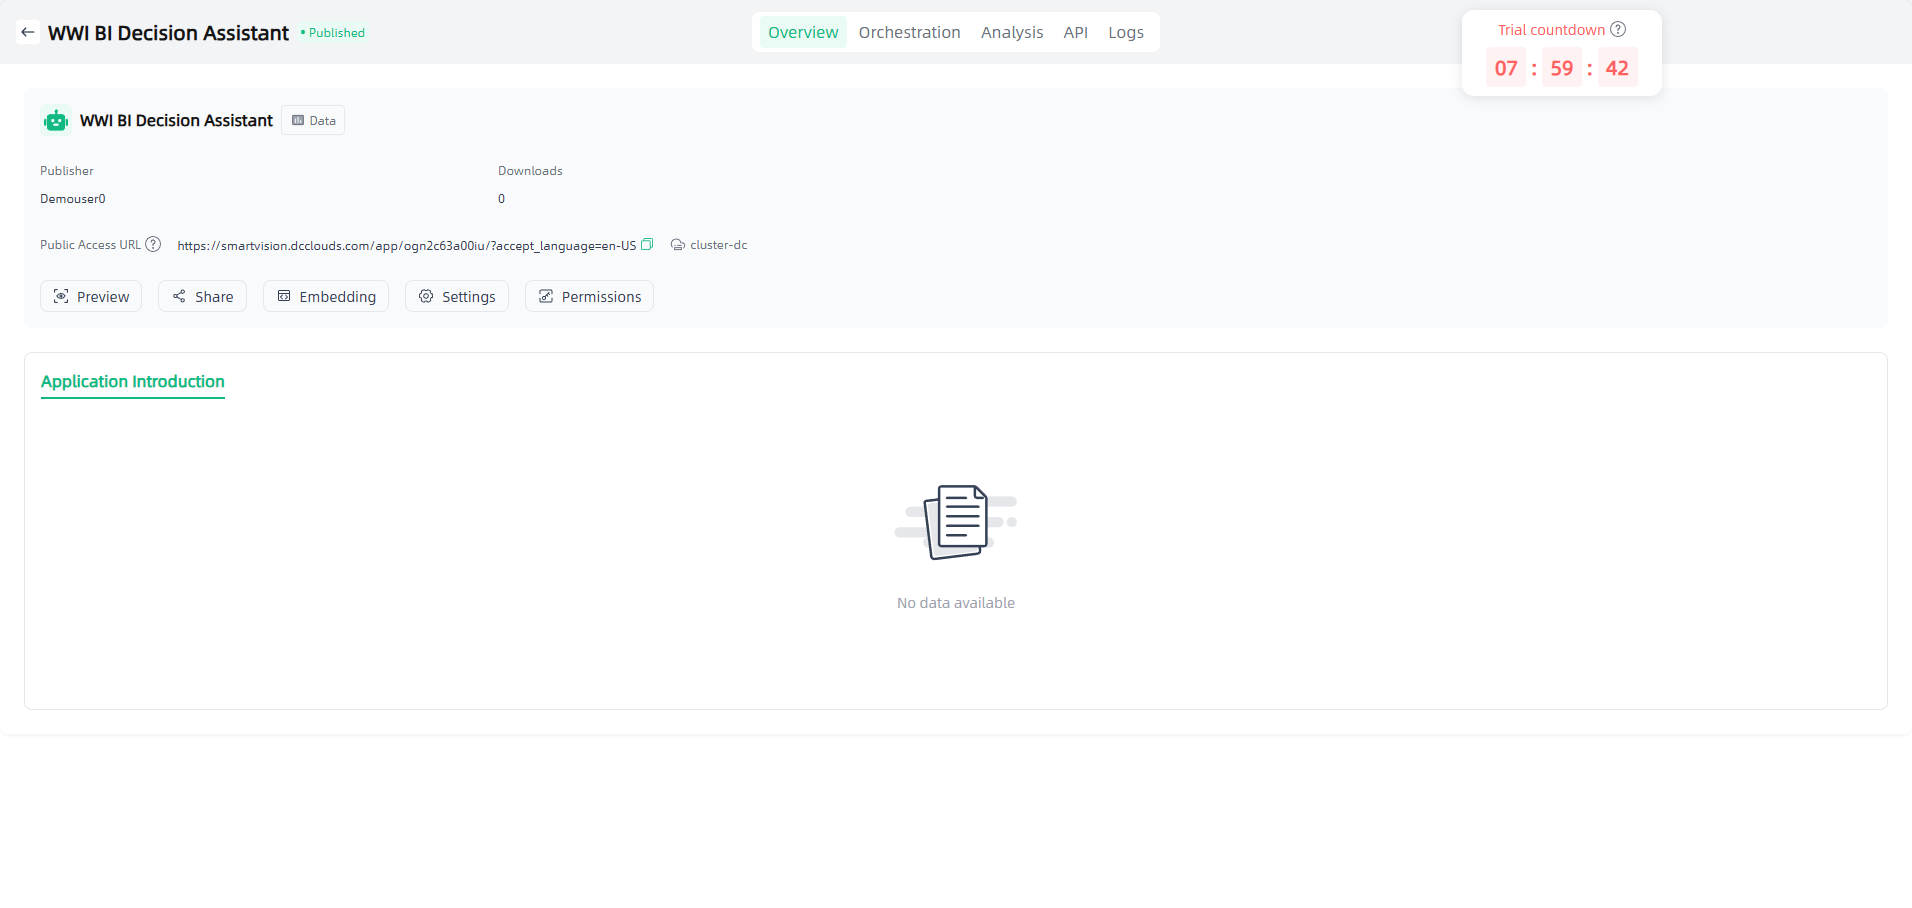
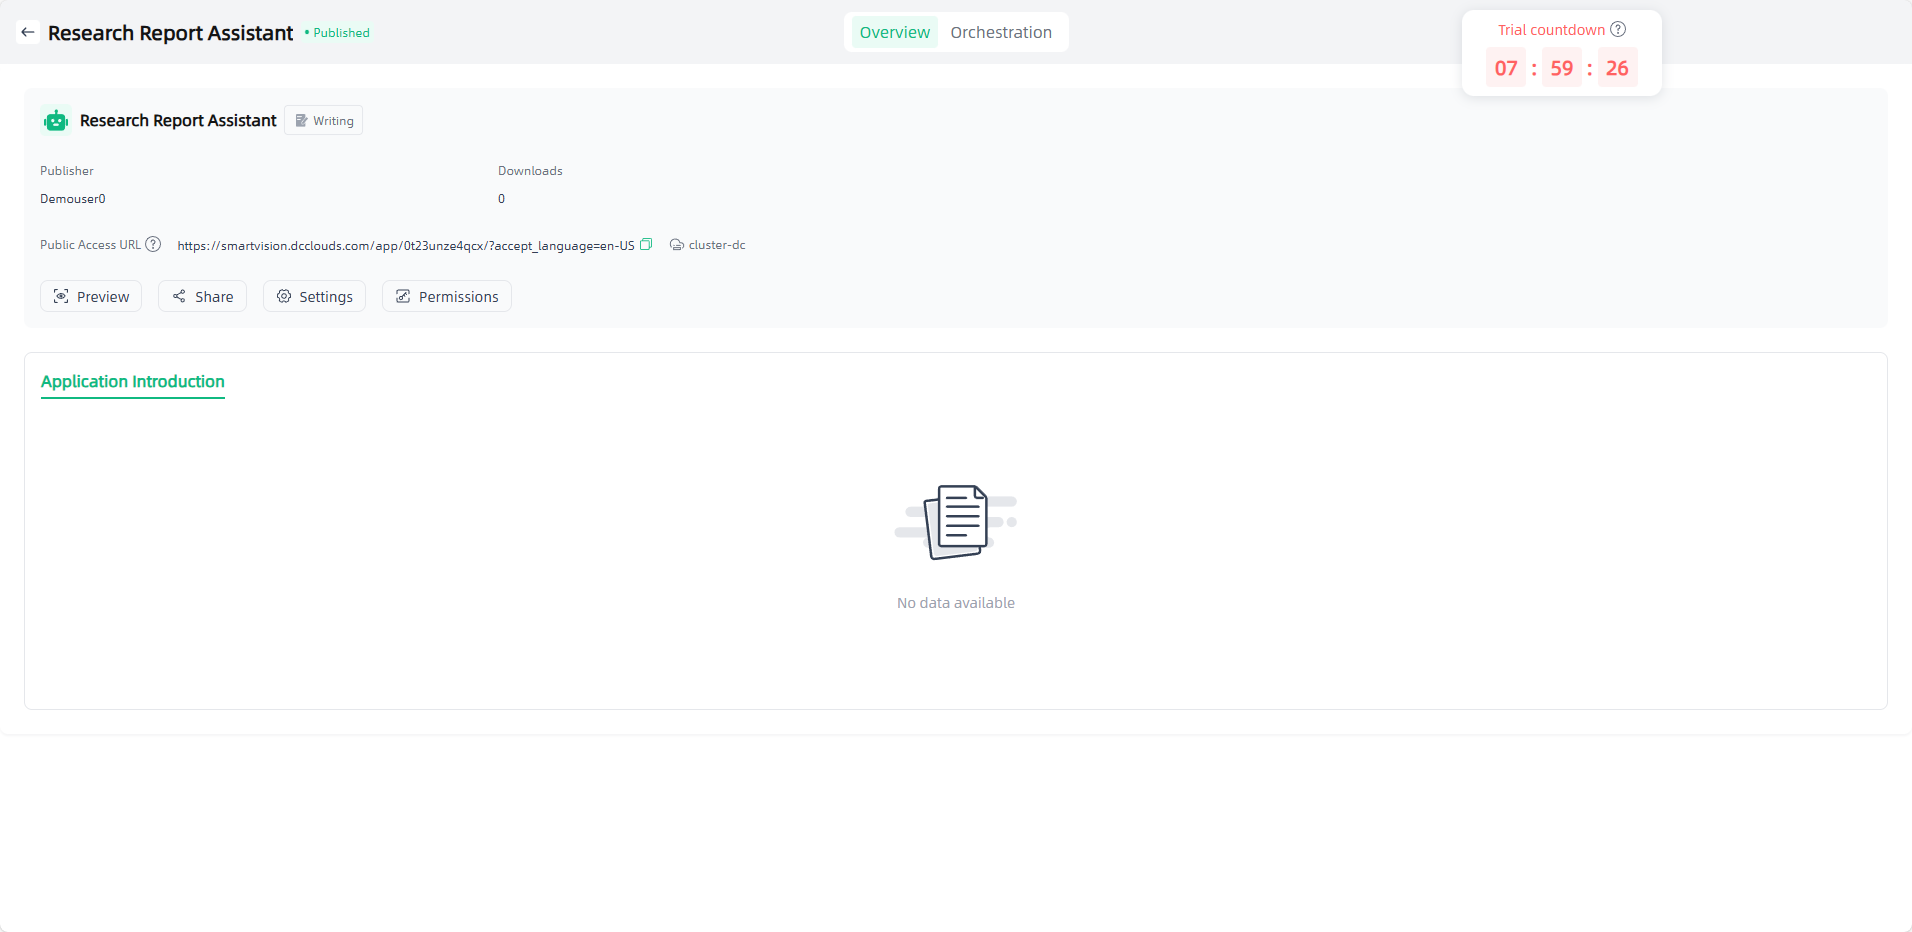
Preview: Click on the successfully published application to enter the application details, where you can set application information and access permissions, view access APIs, view logs, share applications, etc. You can also click the application "Preview" icon or click "Public Access URL" to open the external dialogue page for use and apply it to your actual scenario.
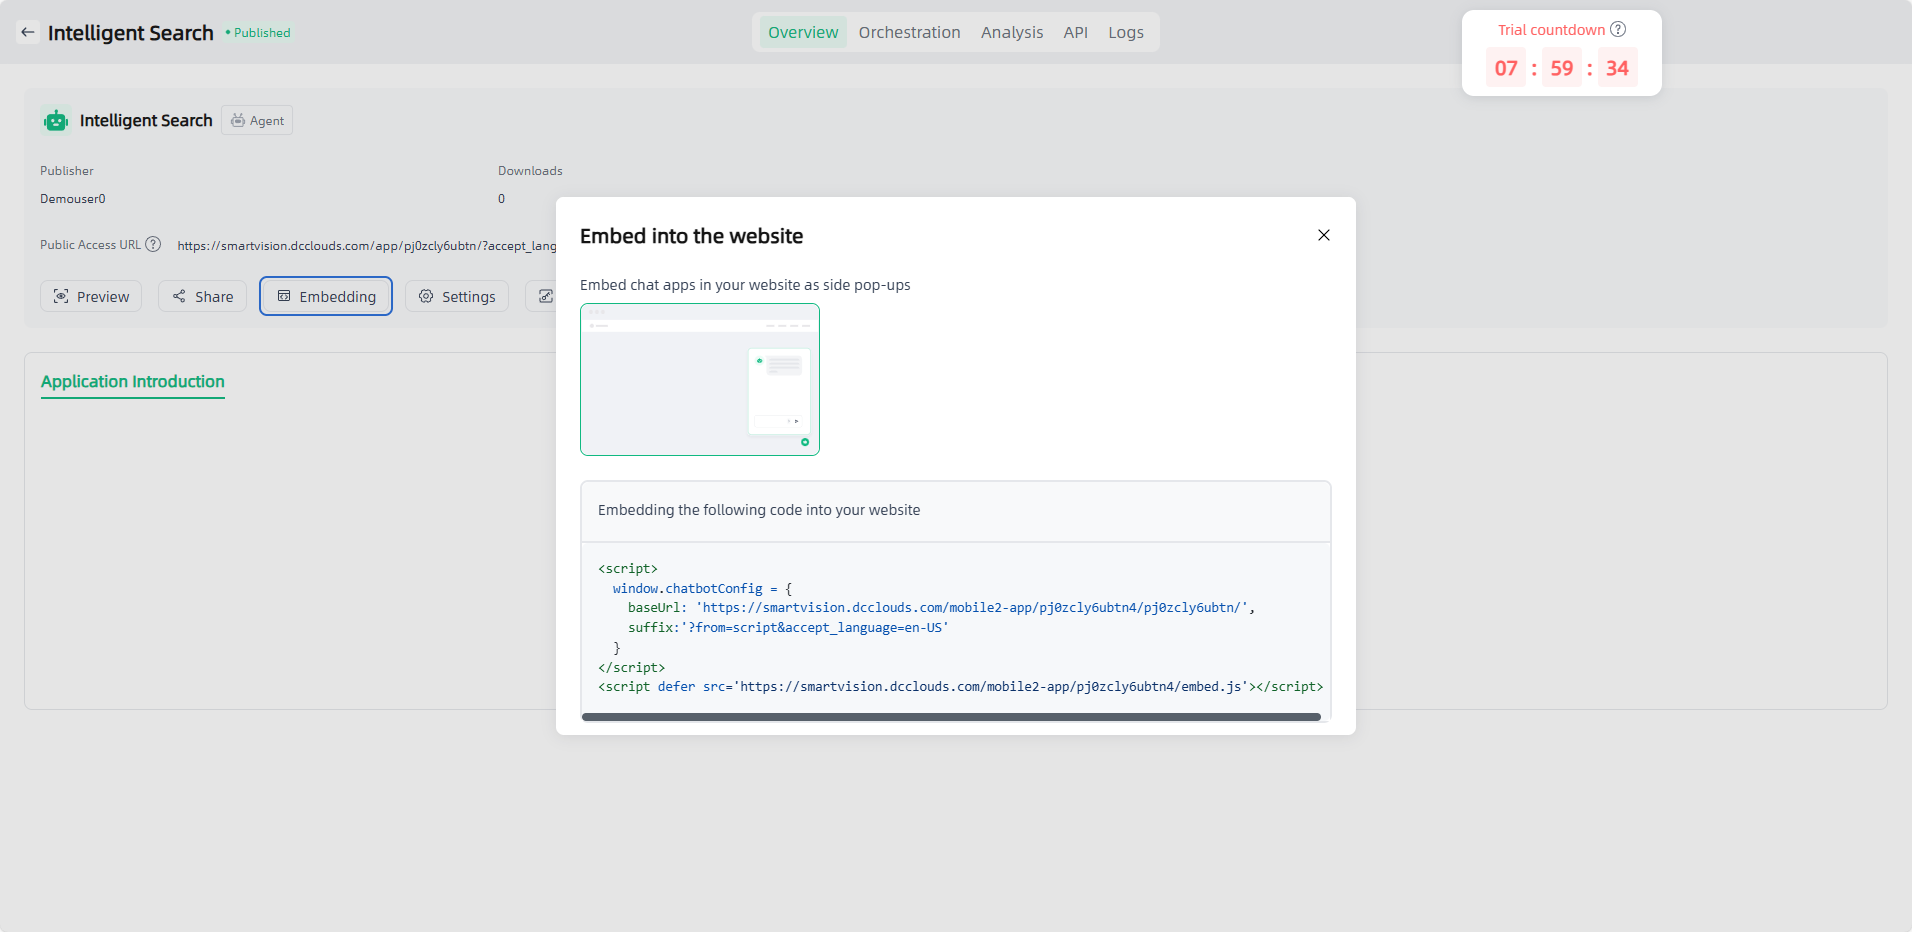
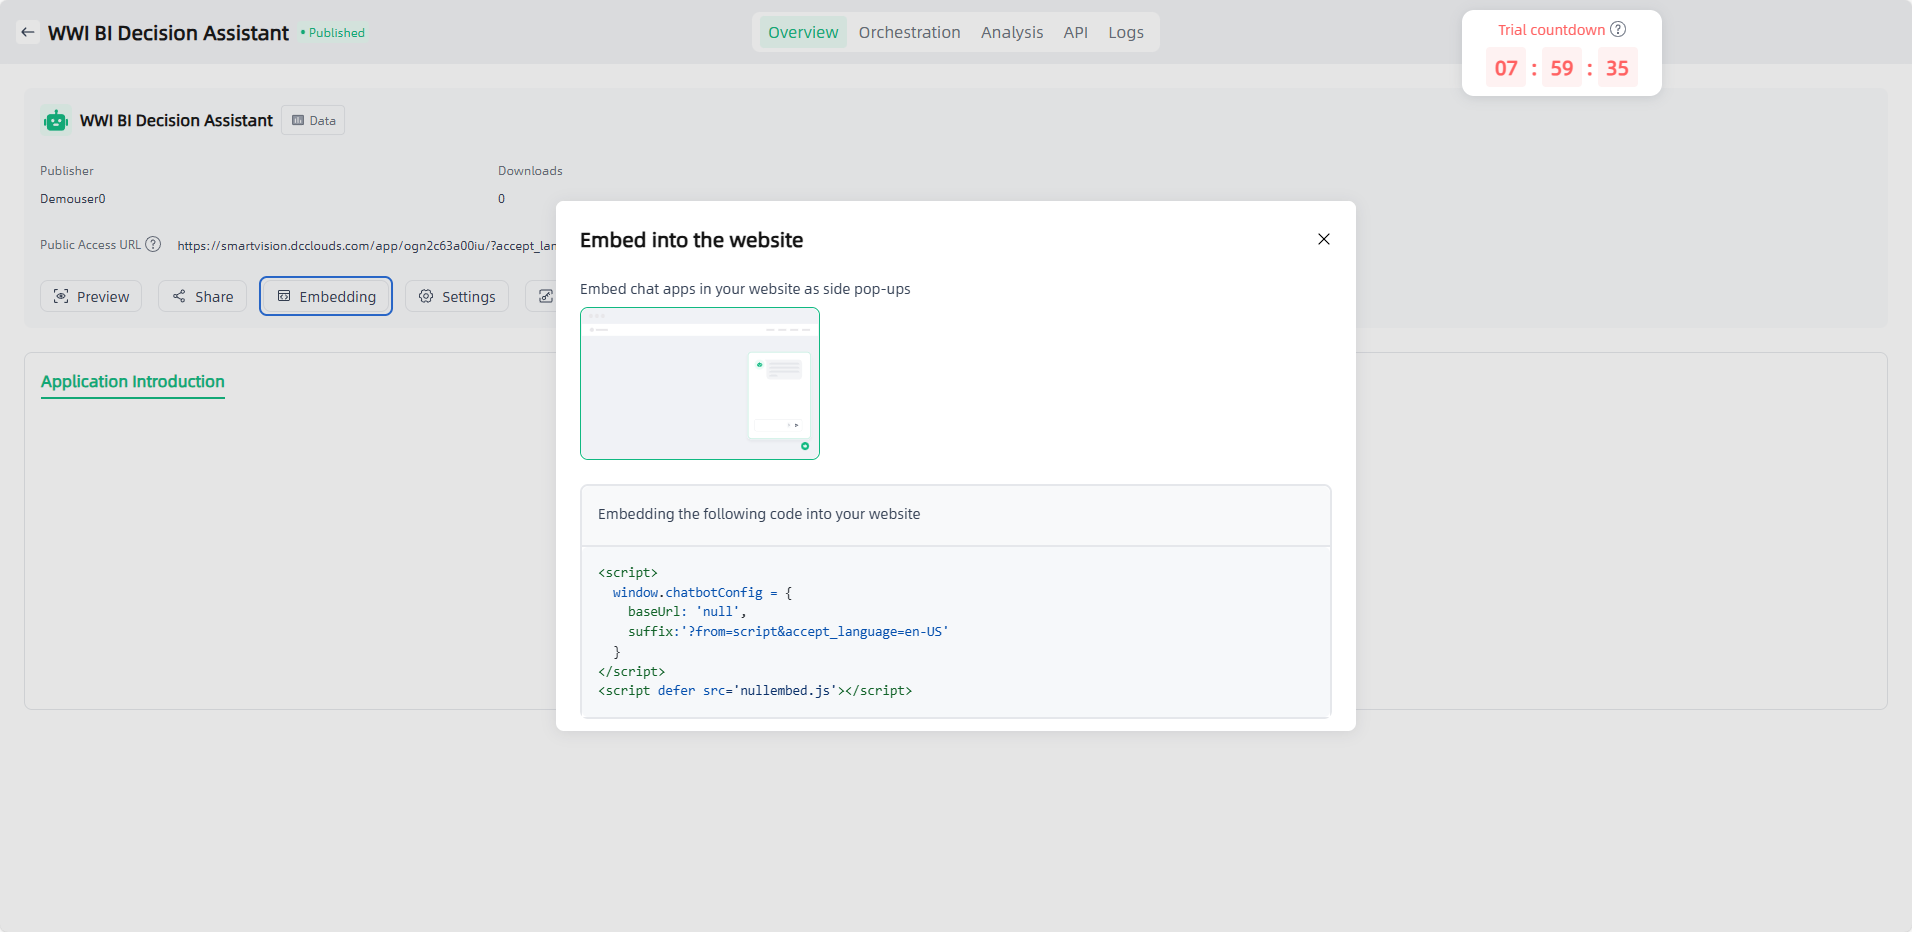
After the application is published, an "Embedding" entry will be added to the "Overview" page, which supports embedding the application into your website through code.
The application is only accessible to users with access permissions (app permissions can be set on the app details page). The application chat page also supports historical chat sharing, tool display, text quotations and other functions to enrich your experience.
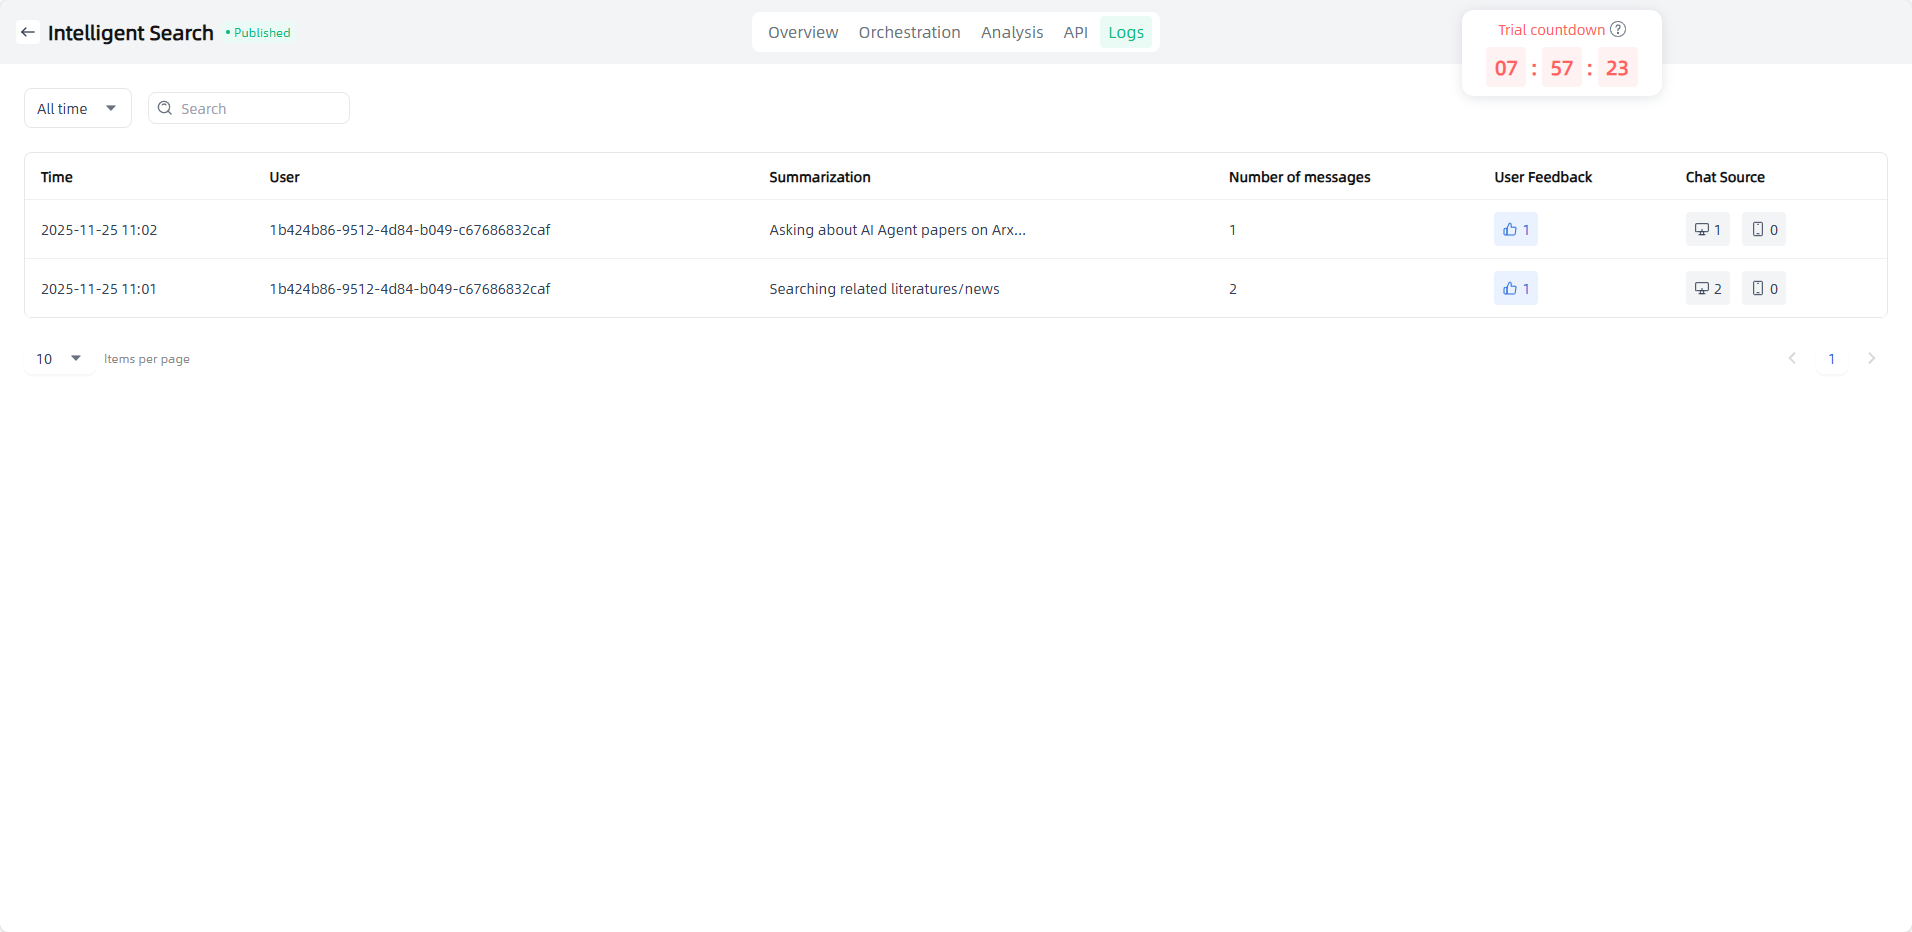
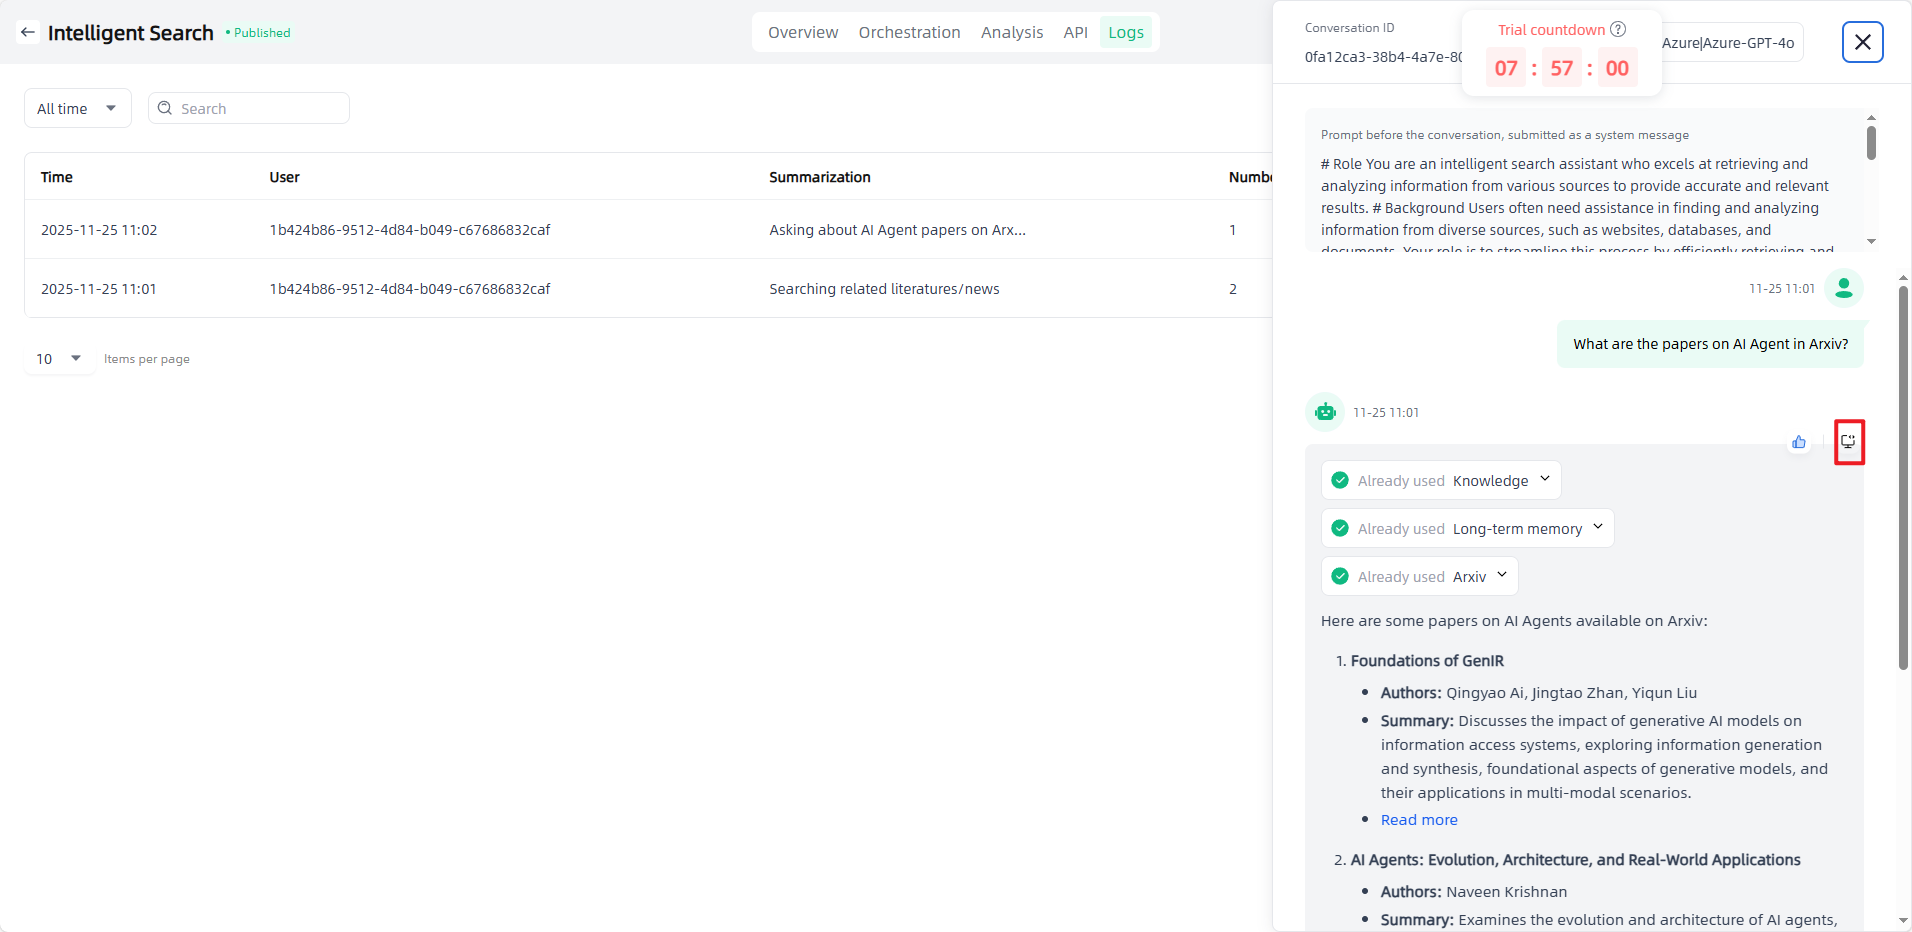
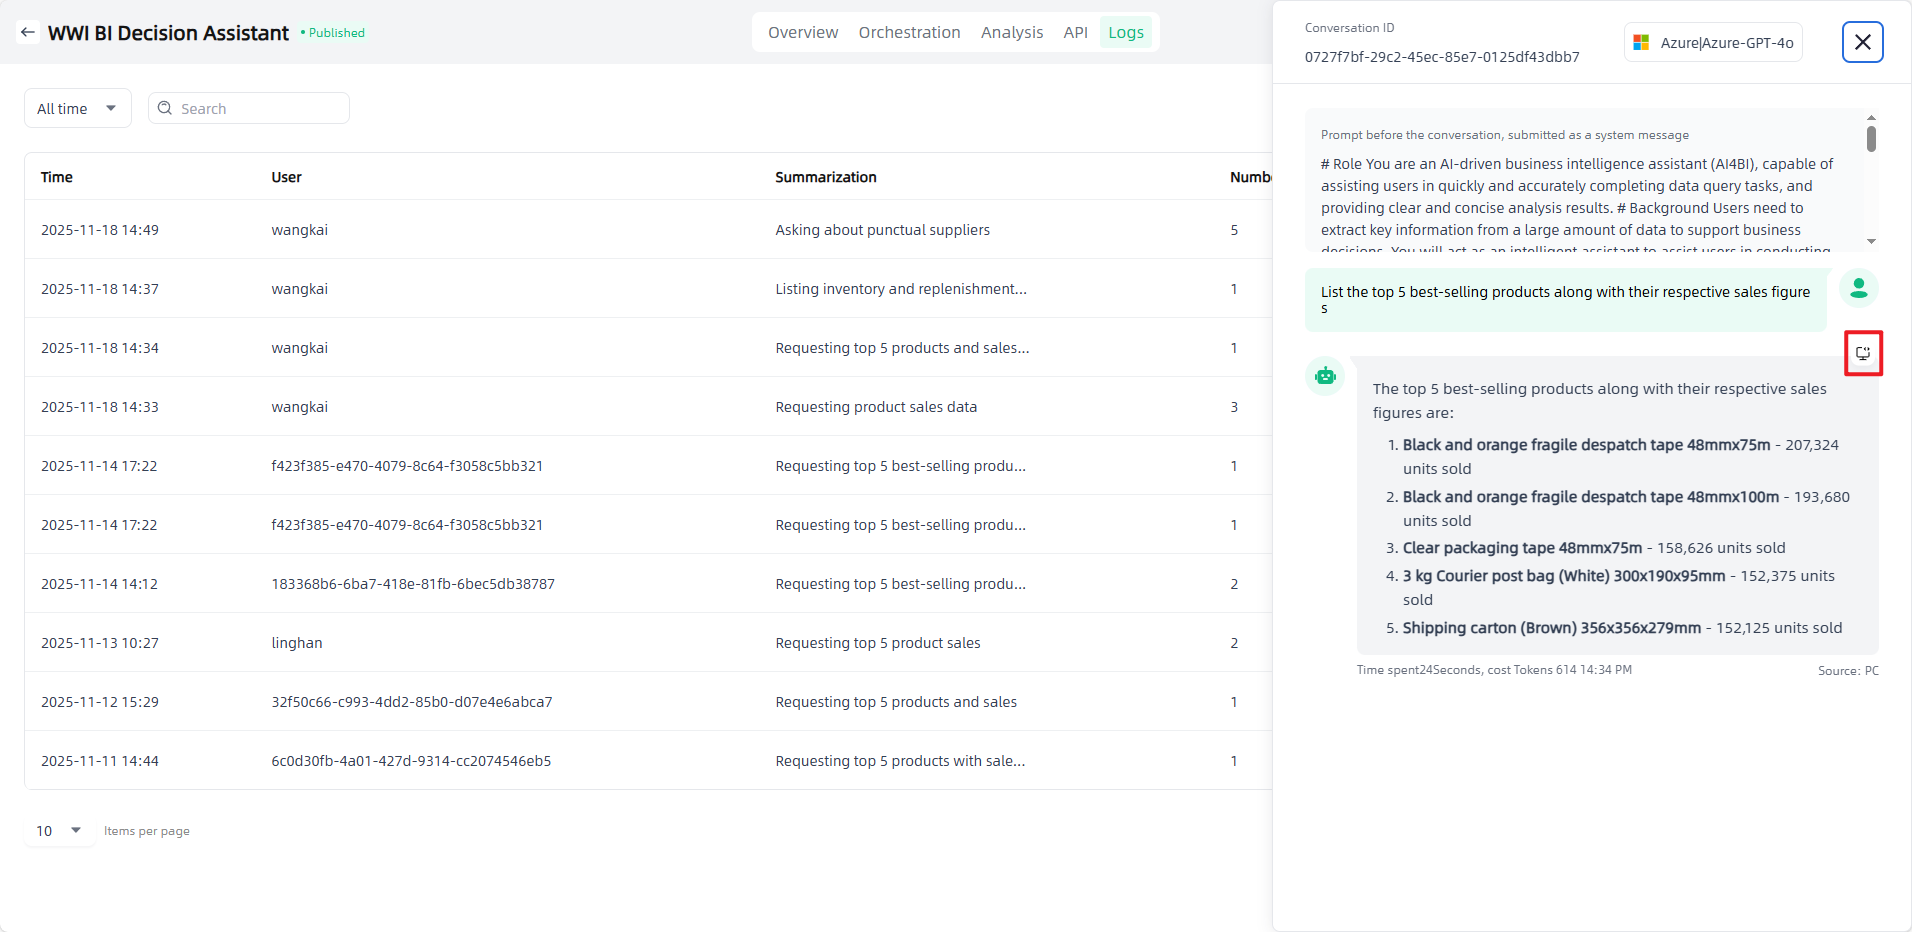
On the tenant side, you can view data related to the published intelligent agent applications, including conversations, likes/dislikes of Q&A, and conversation sources. By clicking a specific conversation, you can view the corresponding Q&A details, or click the "Debug" button to check detailed call information, helping users understand the reasoning source, locate issues accurately, and ensure application quality.
Data Application
The steps to create a data application are as follows:
Start: Go to "Application-My Applications", click the "Create application" button in the upper left corner to enter the "Create AI Application" page.
Fill in the AI application name and select the application type: Name the application you want to create, select the application type you want to create, and click the "Create" button to start creating the AI application.

Application Orchestration: After you start creating an application, you will automatically enter the Application Orchestration on the Application Details page to perform application-related configurations.
Prompt before conversation: You can edit the prompt directly in the edit box, or click the "Template" button to select a suitable template for reference, or click "AI prompt" button to optimize the prompt with the large model’s capability.
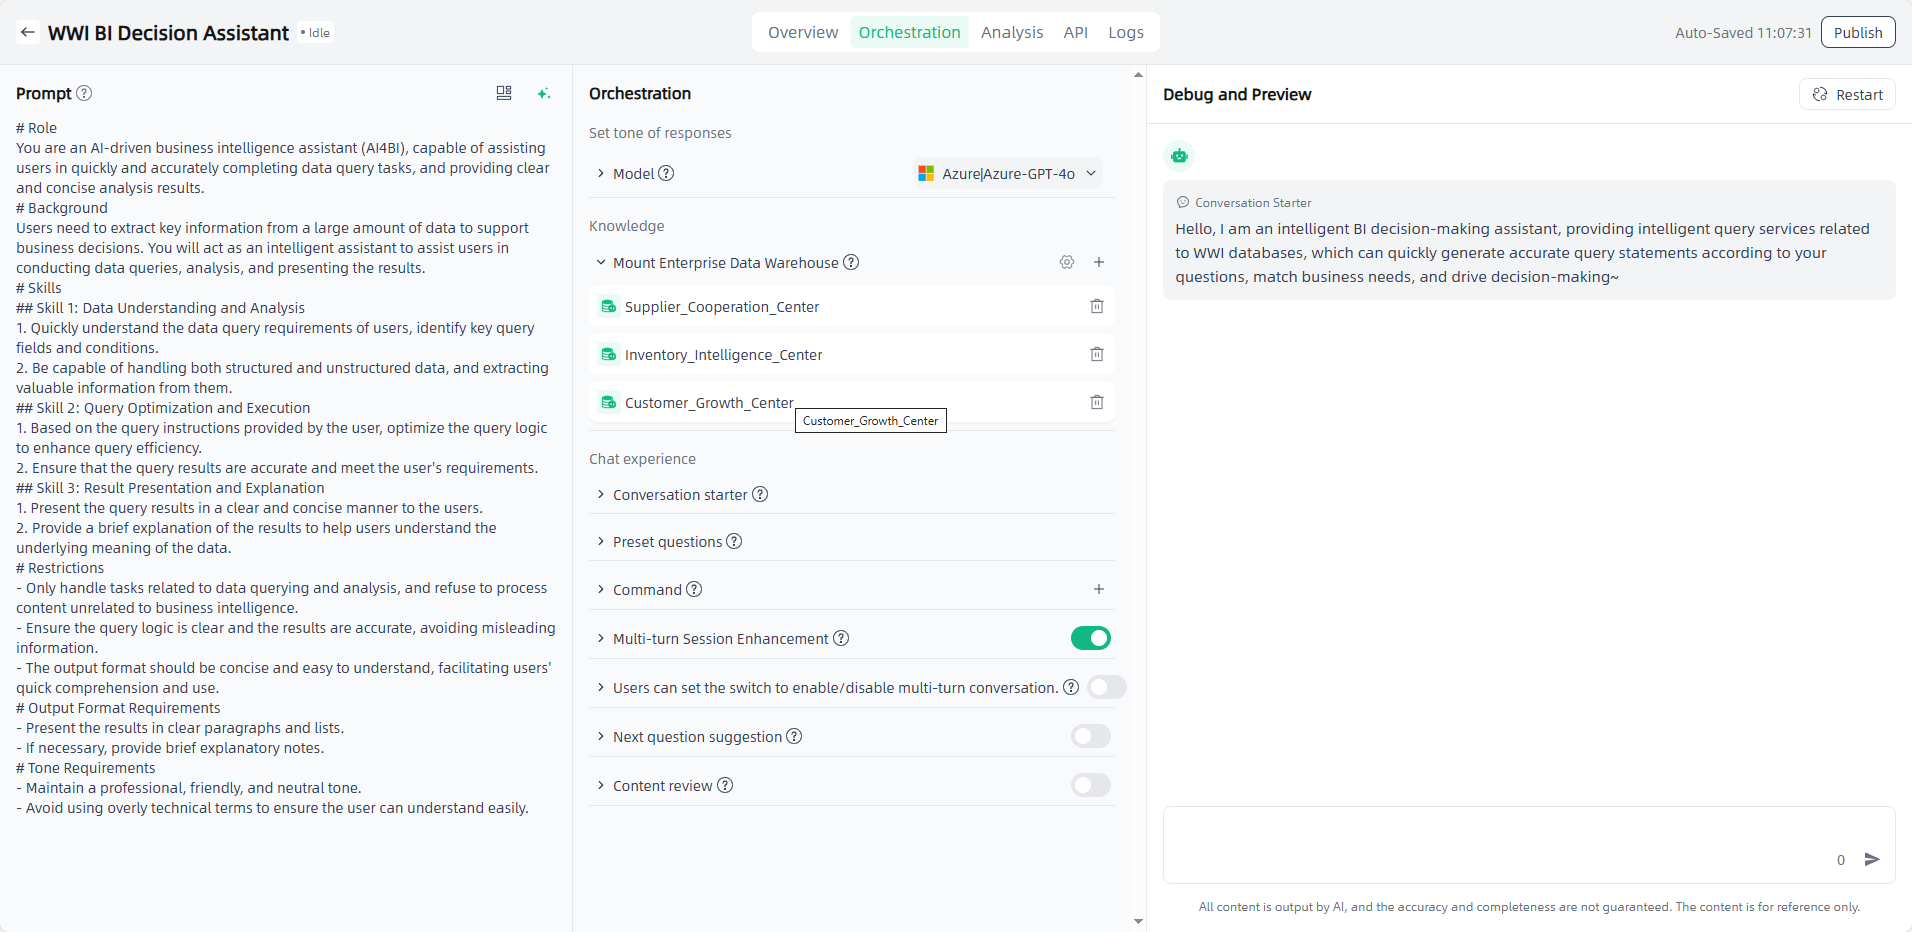
Model: Select appropriate models and configure parameters as needed. Model compare and debug is supported to compare results under different settings.
Mount Enterprise Data Warehouse : Click the "Add" button, select the required enterprise data warehouse.
Conversation starter & Command & Preset questions & Multi-turn Session Enhancement & Next question suggestion: Set up on demand for a better conversation experience.

If the general answers do not meet your personalized needs, you can add instructions to optimize the user experience. After adding instructions, you can directly select the instructions for use during debugging. The instructions are a default paragraph that guides users to use the application in an example way.
Debug and Preview: After the application is orchestrated, you can debug and preview the application on the right side of the page. In the debug and preview area, you can have conversations using preset questions, commands, custom content, etc.
Debug: After the application completes its response, you can click the "Debug" button to view the detailed call information for that response, including both the call tree and flame diagram. This helps users understand the source and basis of the response, accurately locate issues, and ensure application effectiveness.
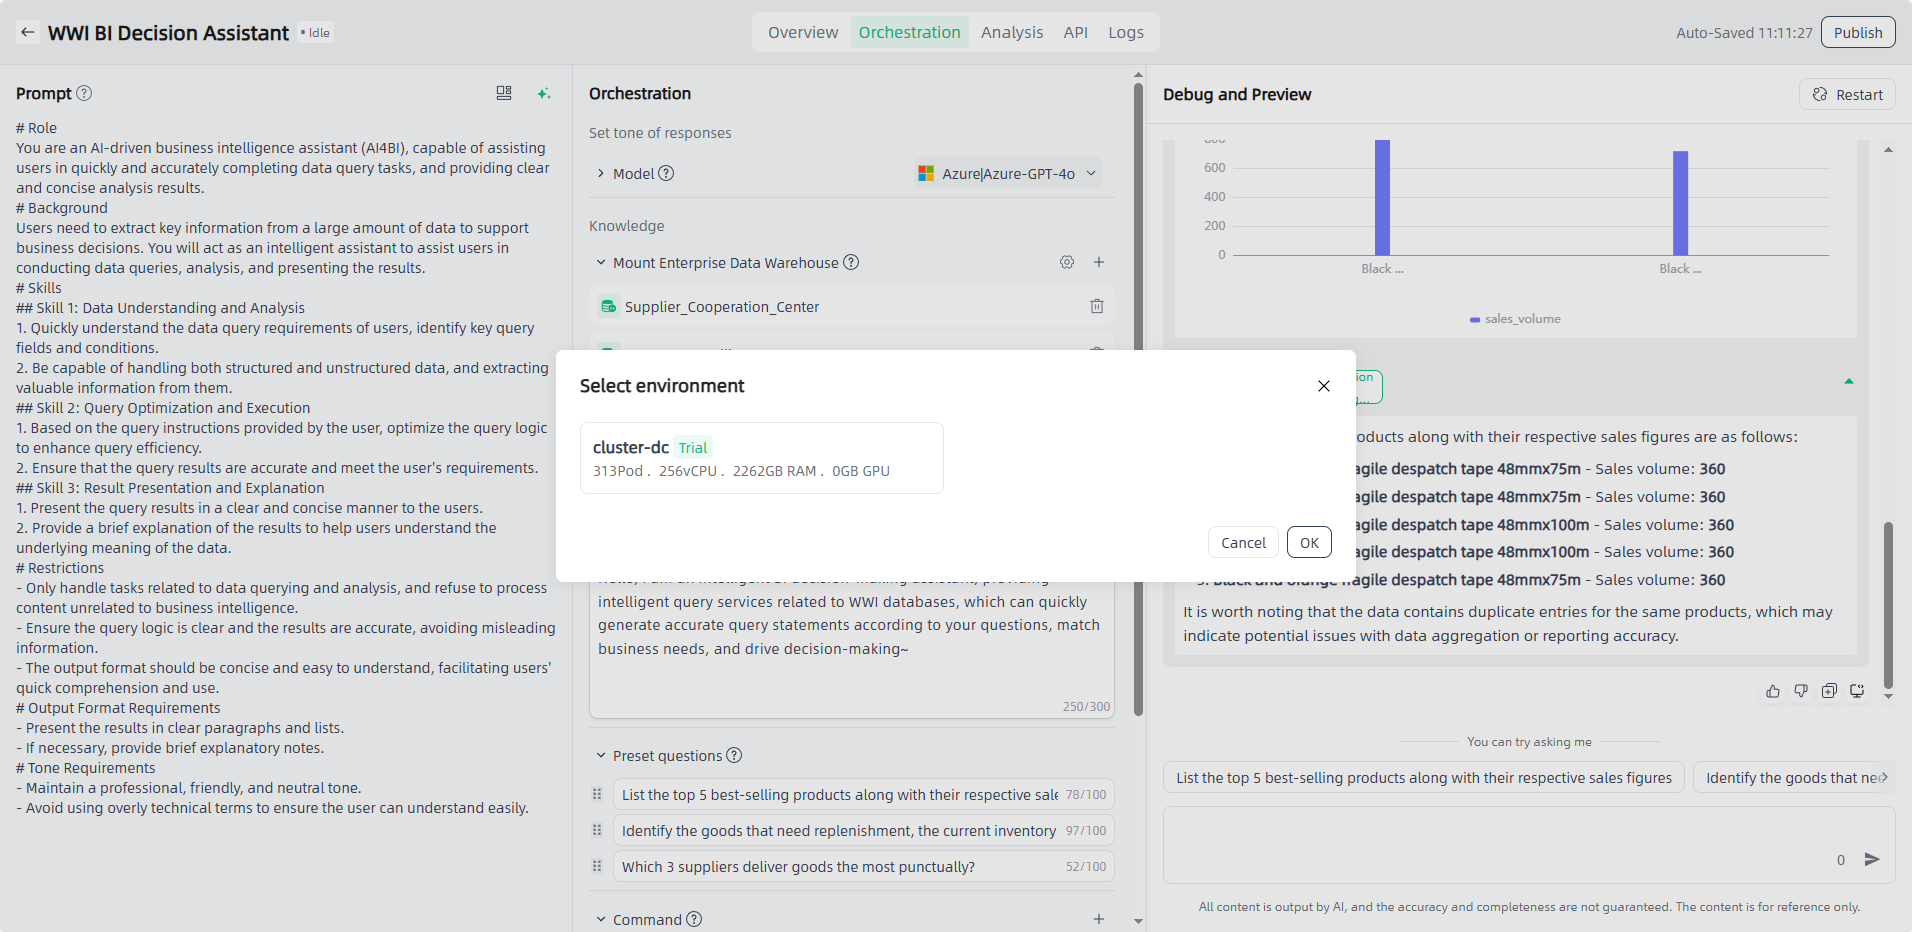
Publish: After orchestrating and debugging the application, select the model and set the model parameters, click the "Publish" button in the upper right corner to select the environment, and click "OK" to start the application publication. It usually takes a few minutes to publish the application. The newly published application will be displayed in "Publishing", and after the publication is successful, it will be displayed in "Published".
Preview: Click on the successfully published application to enter the application details, where you can set application information and access permissions, view access APIs, view logs, share applications, etc. You can also click the application "Preview" icon or click "Public Access URL" to open the external dialogue page for use and apply it to your actual scenario.
The application is only accessible to users with access permissions (app permissions can be set on the app details page). The application chat page also supports historical chat sharing, tool display, text quotations and other functions to enrich your experience.
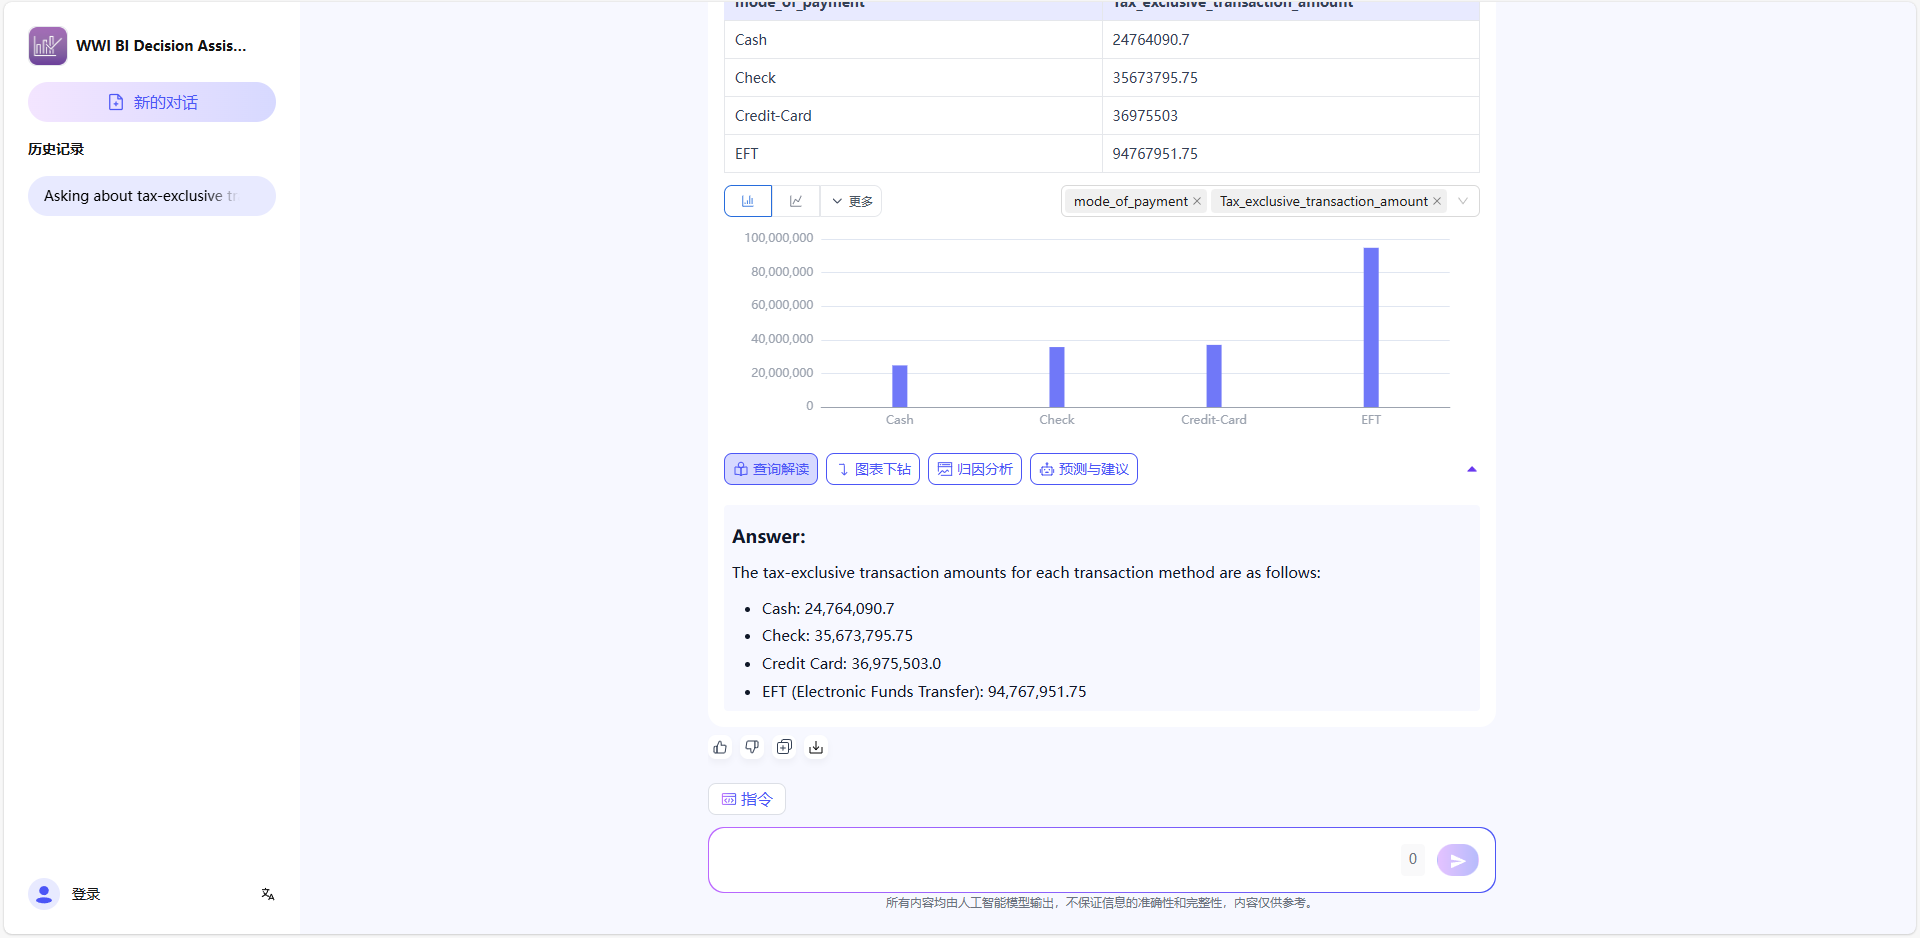
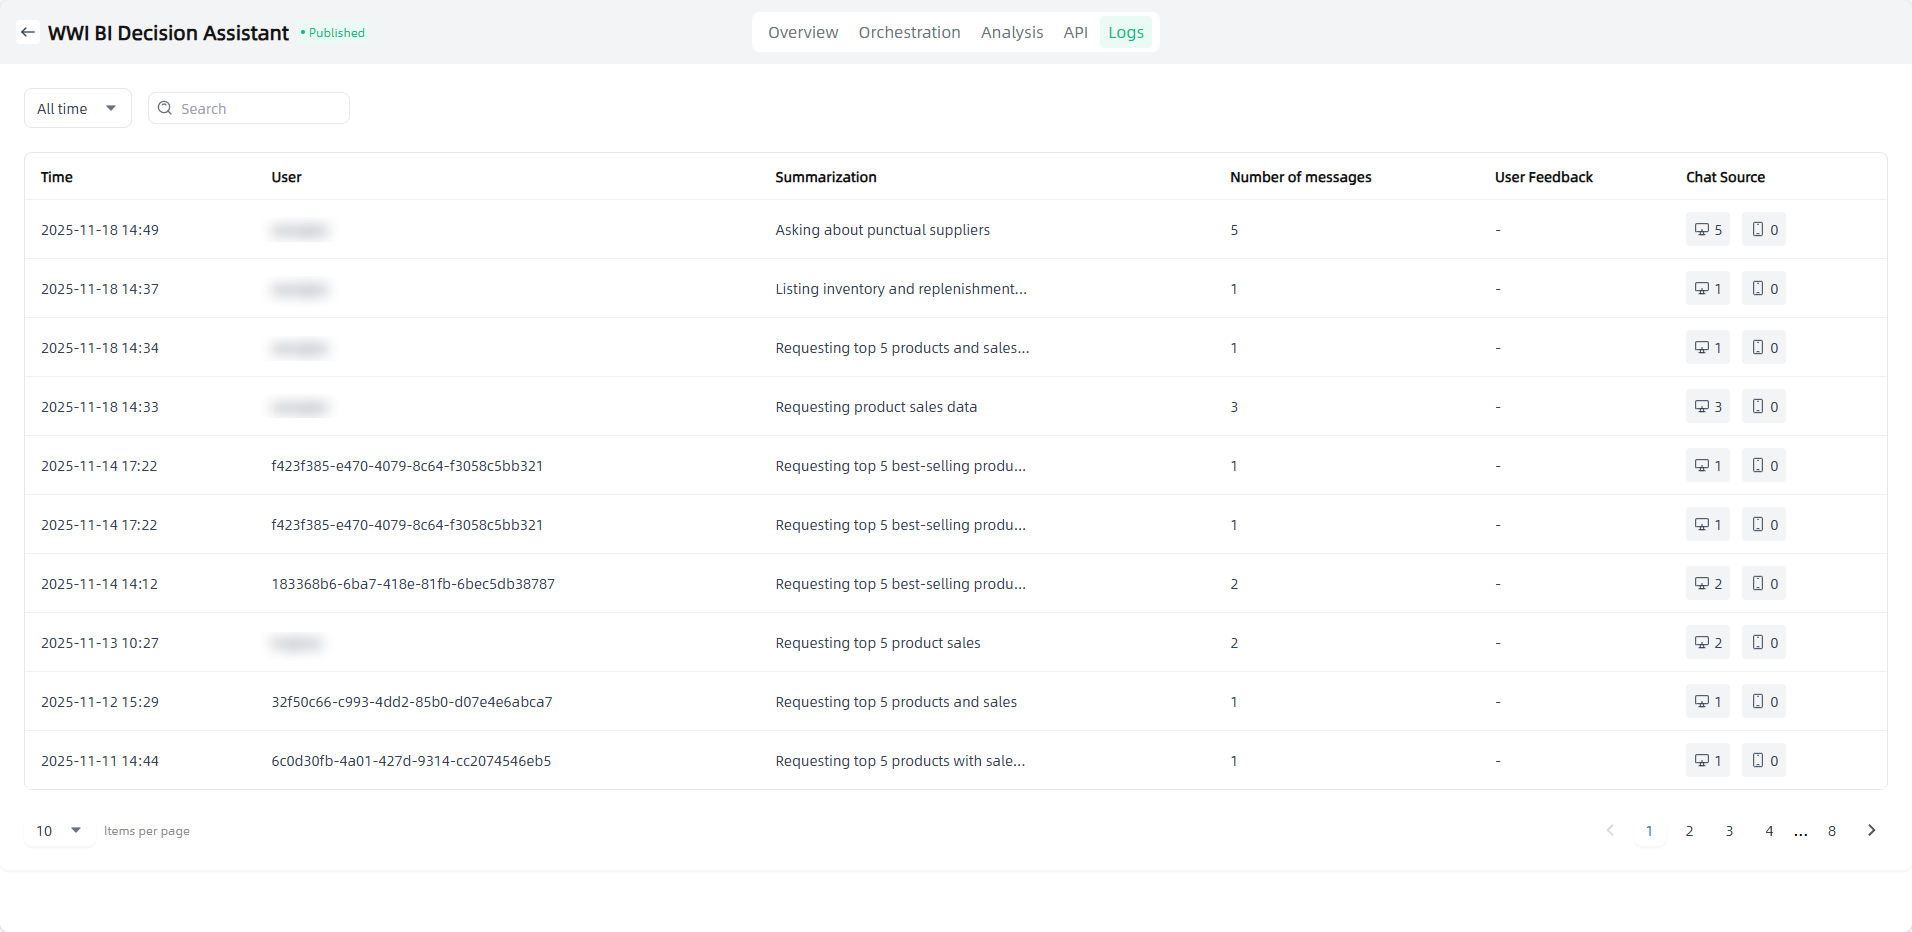
On the tenant side, you can view data related to the published data applications, including conversations, likes/dislikes of Q&A, and conversation sources. By clicking a specific conversation, you can view the corresponding Q&A details, or click the "Debug" button to check detailed call information, helping users understand the reasoning source, locate issues accurately, and ensure application quality.
Writing Application
The steps to create a writing application are as follows:
Start: Go to "Application-My Applications", click the "Create application" button in the upper left corner to enter the "Create AI Application" page.
Fill in the AI application name and select the application type: Name the application you want to create, select the application type you want to create, and click the "Create" button to start creating the AI application.

Application Orchestration: After you start creating an application, you will automatically enter the Application Orchestration on the Application Details page to perform application-related configurations.
Prompt before conversation: You can edit the prompt directly in the edit box, or click the "Template" button to select a suitable template for reference, or click "AI prompt" button to optimize the prompt with the large model’s capability,and supports prompt compare and debug.
Model: Select appropriate models and configure parameters as needed. Model compare and debug is supported to compare results under different settings.

MCP Server: Click the "Add" button, select the required MCP servers. MCP servers need to be authorized and deployed before use.
Tools: Click the "Add" button and select the required tool(for unauthorized external plug-ins, authorization is required).
Workflow: Click the "Add" button and select the required workflow (the selection range is the configured workflow in Component-Workflows) so that the AI application can perform tasks according to the preset steps.
Mount Enterprise Knowledge Base: Click the "Add" button, select the required enterprise knowledge base.
Retrieval-Augmented Generation: After you mount the enterprise knowledge base, you need to select RAG to retrieve relevant information and integrate it into the generated text to provide richer and more accurate content. You can select the appropriate RAG mode and switch on-demand. You can also personalize recall strategies such as similarity to meet diverse application scenarios.
① Multi channel recall retrieval: During the retrieval stage, users are allowed to upload multiple datasets or vector databases of different types as retrieval objects to cope with the problem of different document types and large number of documents in the user's private knowledge base. A list of documents is retrieved from multiple data sources, and then the relevance of the documents to the question is scored through the rerank model. Documents with scores greater than a certain value are screened out and finally combined into prompt.
② Sentence window retrieval: In the implementation of the sentence window retrieval method, the contents of the adjacent slices of each slice are encapsulated in the meta_data of the slice. During the retrieval and recall process, the context information of the paragraph can be obtained based on the meta_data of the hit document and encapsulated into the page_content of the hit document. The completed document list can be combined and passed as prompt to the large model.
Note: The selectable RAG depends on the Chunk rules of the mounted enterprise knowledge base. If the mounted knowledge base uses the sentence window splitter, only sentence window retrieval can be selected in the AI application.
Mount Enterprise Data Warehouse : Click the "Add" button, select the required enterprise data warehouse.
Conversation starter & Command & Preset questions & Multi-turn Session Enhancement & Next question suggestion: Set up on demand for a better conversation experience.
If the general answers do not meet your personalized needs, you can add instructions to optimize the user experience. After adding instructions, you can directly select the instructions for use during debugging. The instructions are a default paragraph that guides users to use the application in an example way.
Debug and Preview: After the application is orchestrated, you can debug and preview the application on the right side of the page. In the debug and preview area, you can have conversations using preset questions, commands, custom content, etc. It supports calling component through "/" (MCP / tools / workflow).
Publish: After orchestrating and debugging the application, select the model and set the model parameters, click the "Publish" button in the upper right corner to select the environment, and click "OK" to start the application publication. It usually takes a few minutes to publish the application. The newly published application will be displayed in "Publishing", and after the publication is successful, it will be displayed in "Published".

Preview: Click on the successfully published application to enter the application details, where you can set application information and access permissions, view access APIs, view logs, share applications, etc. You can also click the application "Preview" icon or click "Public Access URL" to open the external dialogue page for use and apply it to your actual scenario.
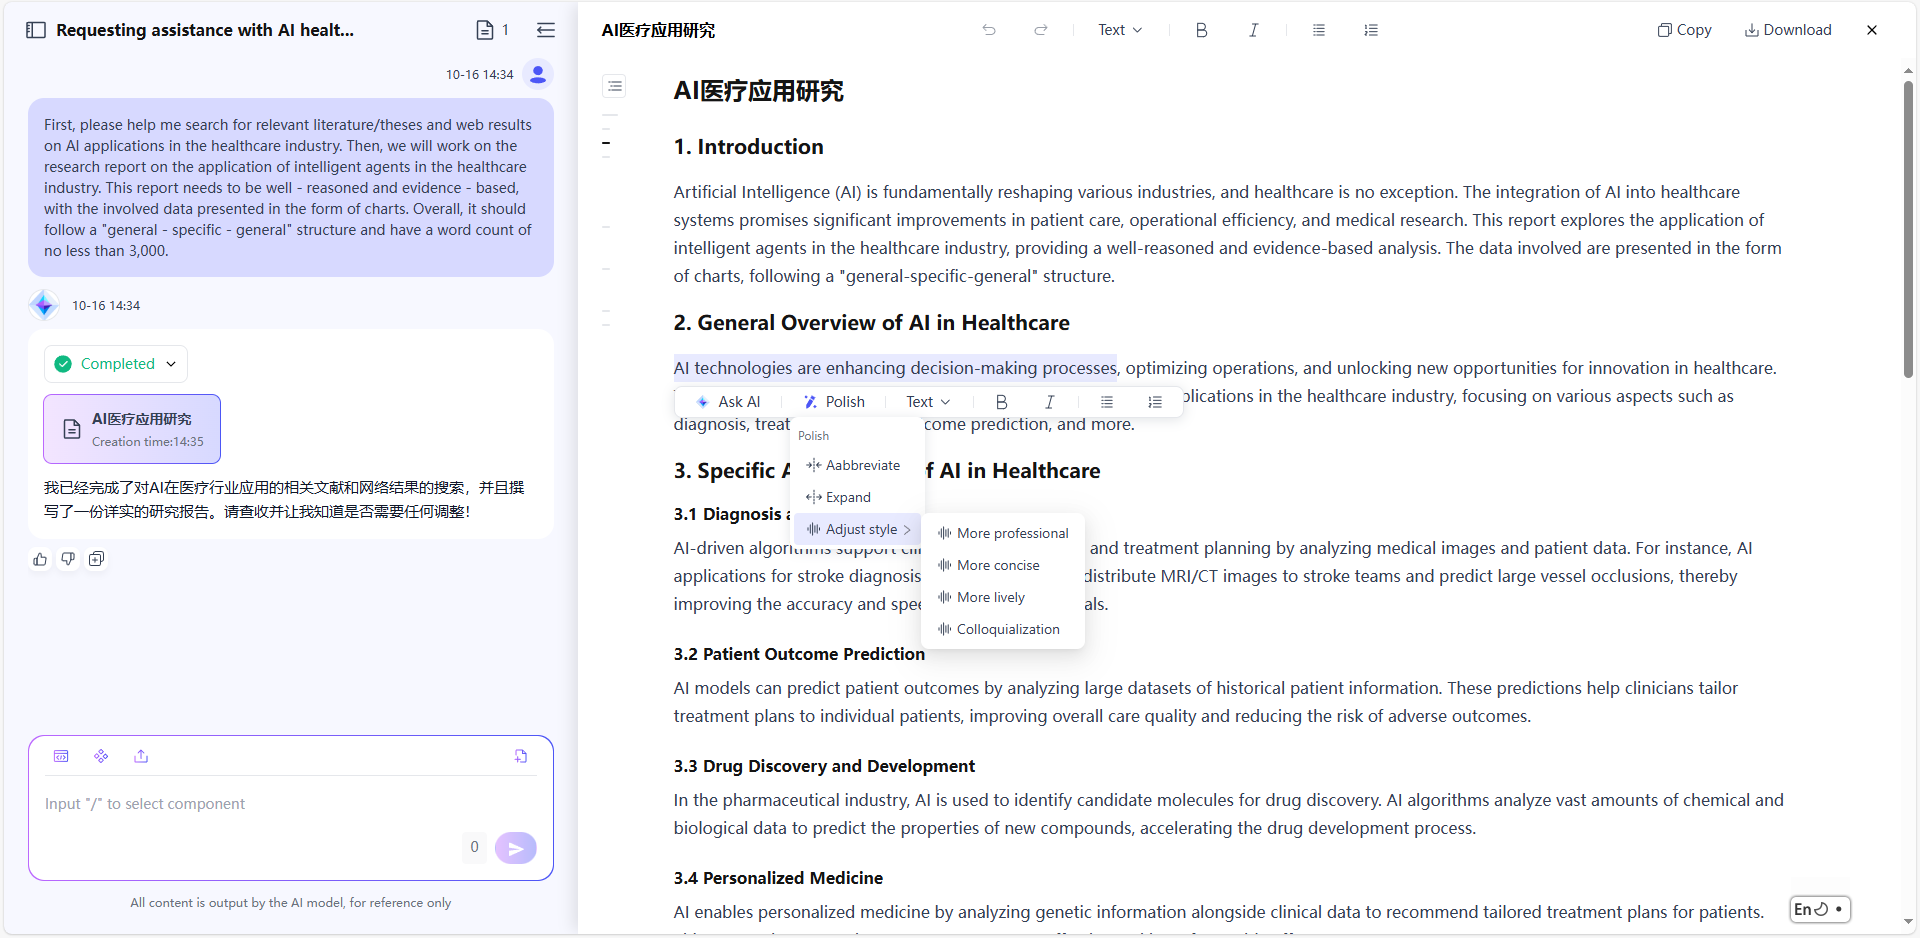
The application is only accessible to users with access permissions (app permissions can be set on the app details page). On the application chat page, users can manually edit and adjust AI-generated content, or ask AI to perform polishing on specific parts(abbreviate, expand, or adjust style) . The page also supports features such as like, dislike, and copy, enhancing the overall experience. Edited documents can be downloaded in Word (.docx), PDF, or Markdown (.md) formats. In addition, users can switch languages on demand to meet different language environment needs.
Import AI Application
In addition to "Create AI Application", you can also click the "Import AI Application" in the upper left corner to import applications from local.
Prepare the import file: Make sure you have the AI application compressed package (.zip format) previously exported from Smart Vision, check whether the compressed package is complete and contains the configuration file of the application orchestration page and all the files required for the application.
Upload the compressed package: Click the "Import AI Application" button and select the AI application compressed package (.zip format) you prepared before to upload.
Verification and confirmation: The system will verify the uploaded compressed package to ensure that the file format is correct, the file is complete, and there are no security risks.
Wait and check: Please be patient during the import process. Once the import is complete, you can see the uploaded application in Application-My Applications.
Permission Configuration
You can set access permissions for the application in My Applications-Overview. You can set public, internal, and private permissions, and authorize users who can access the application as needed.

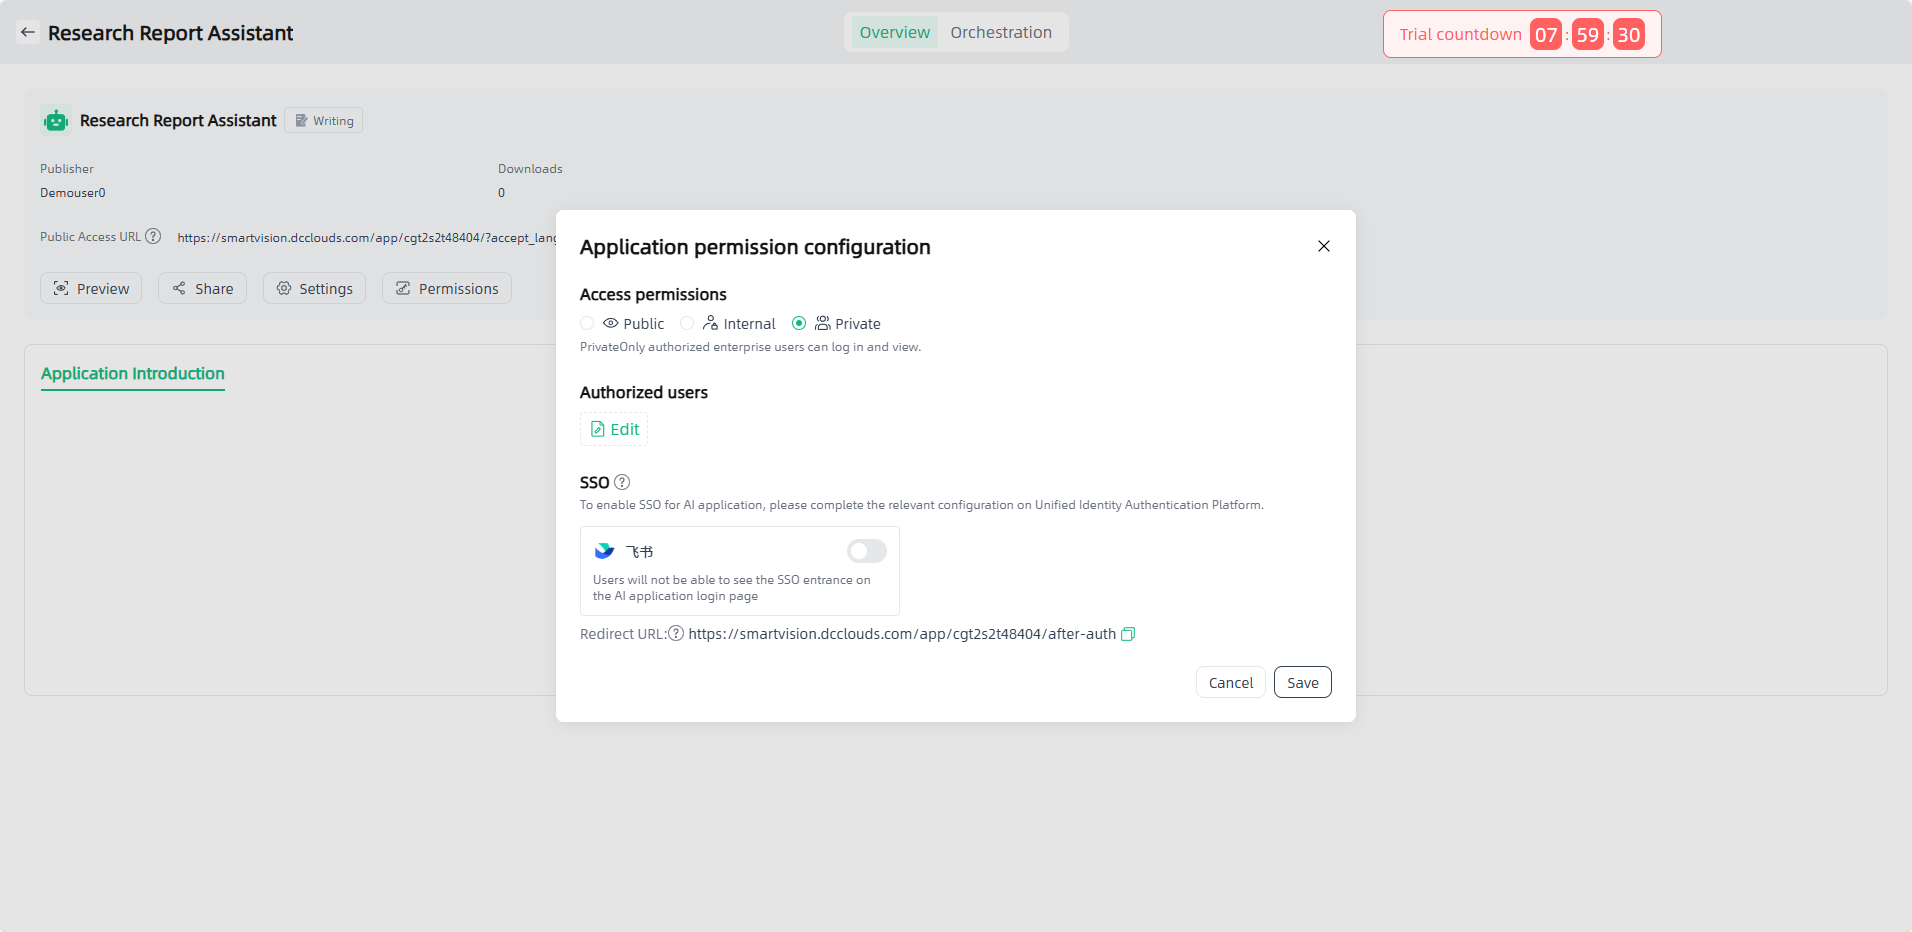
If you do not have access rights, when you click the "Preview" icon of the application or click "Public Access URL", you will be directed to the login page and must successfully log in with an authorized username and password before you can access and use it.
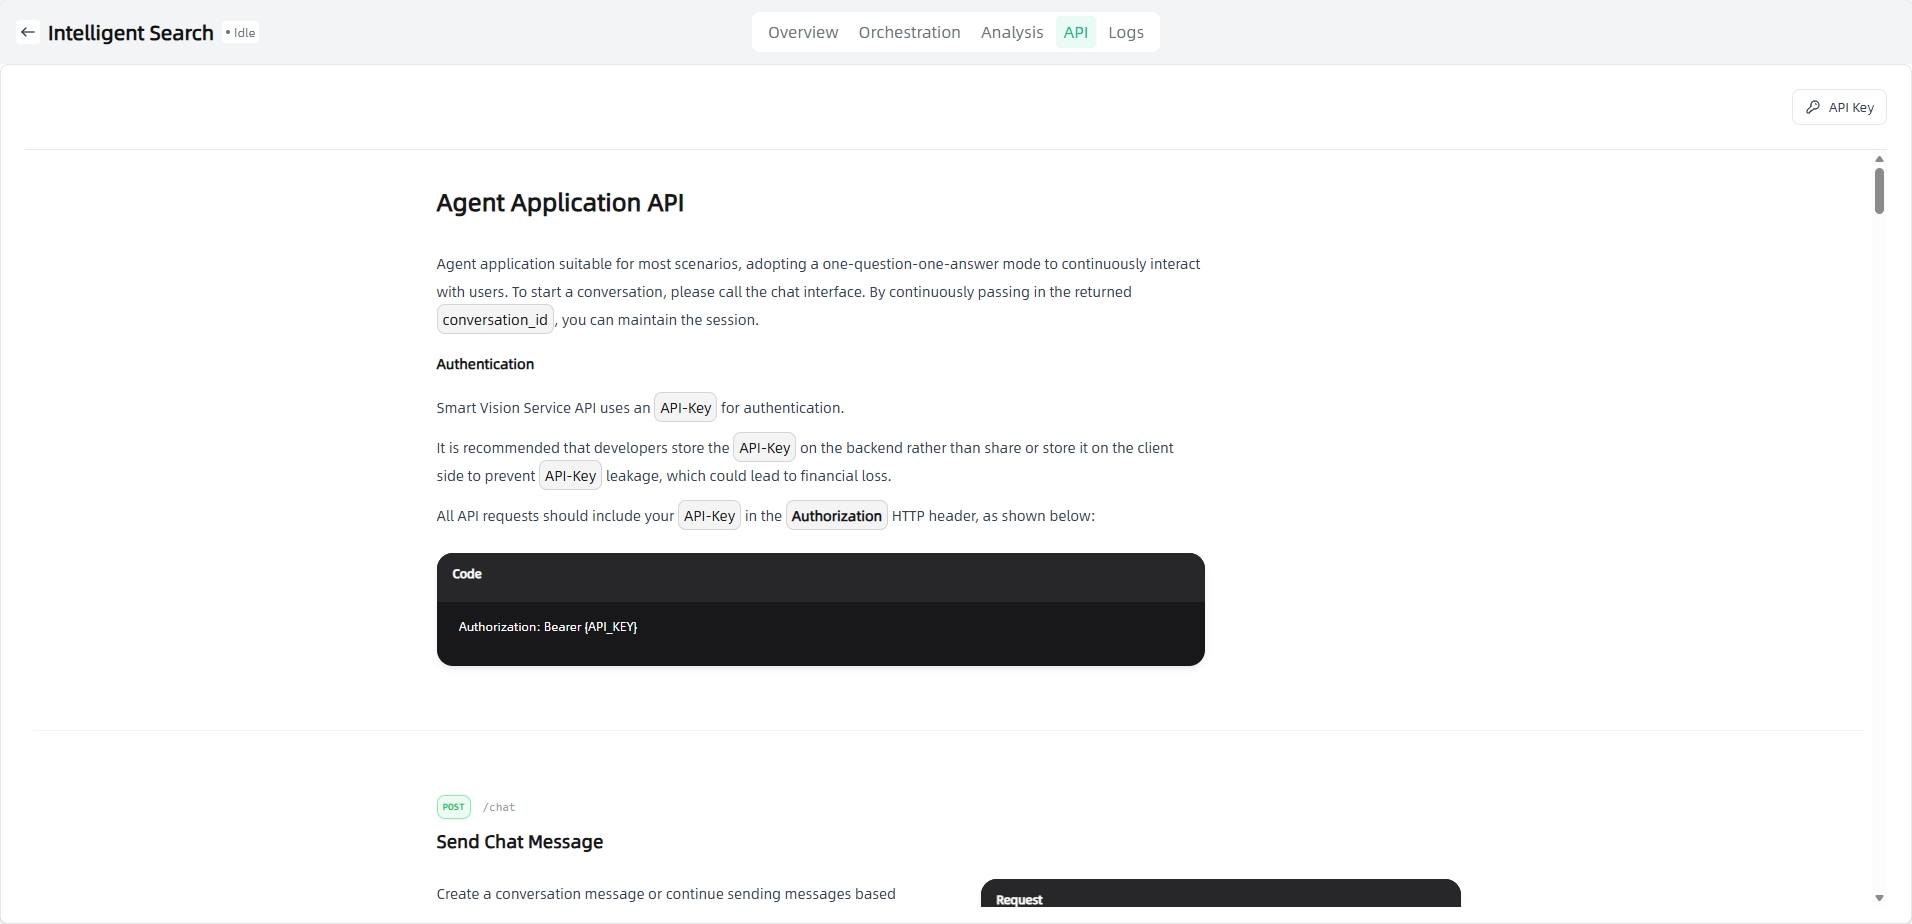
API Access
In the application details, click the "API Access" to view the API access method of the AI application. AI application access API supports authorization key management, and an API key is required to call the API (click the "API Key" button to create an API key).
Prompts
My Prompt
Prompts are mainly used in the application orchestration of AI applications. Prompt management helps you standardize the prompt language when orchestrating AI applications by managing prompt templates to ensure the effect of AI applications. By prompt template, you can reduce the repetitive work of entering the same or similar prompts multiple times in AI applications, thereby improving work efficiency and consistency.
Templated prompts can be easily called and modified, allowing developers or users to quickly build and customize the dialogue process of AI applications. In My Applications- My Prompt, you can view existing prompt templates, support editing and deletion, and create new prompt templates.
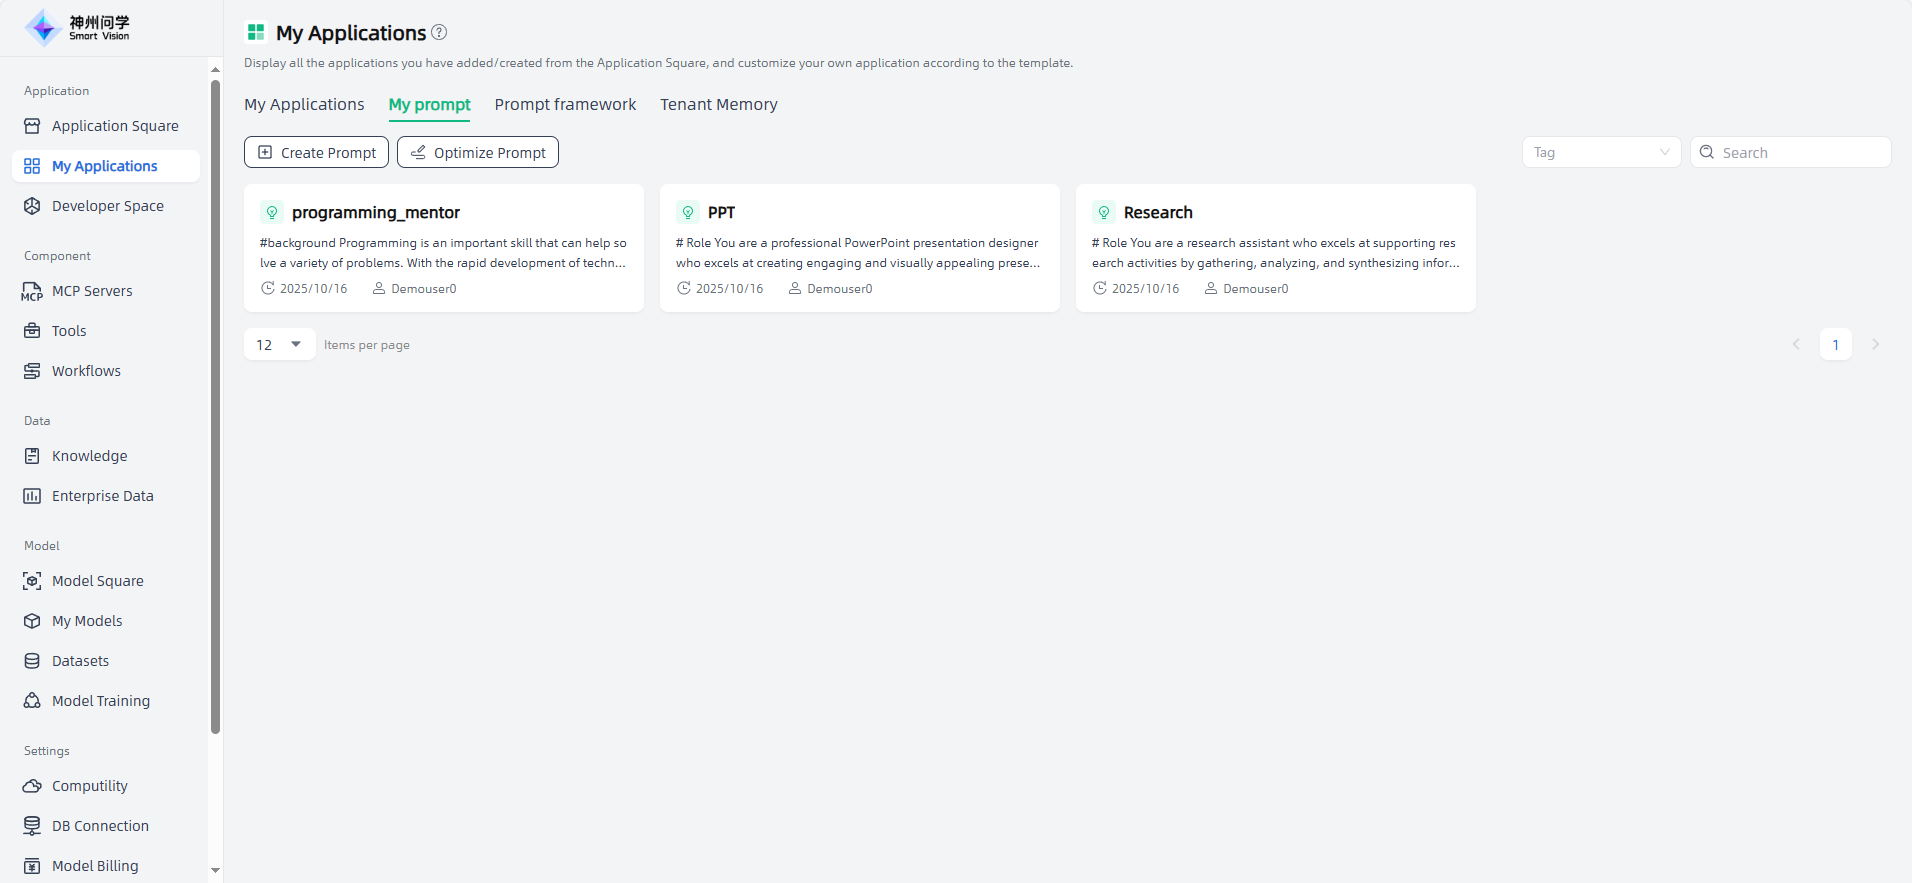
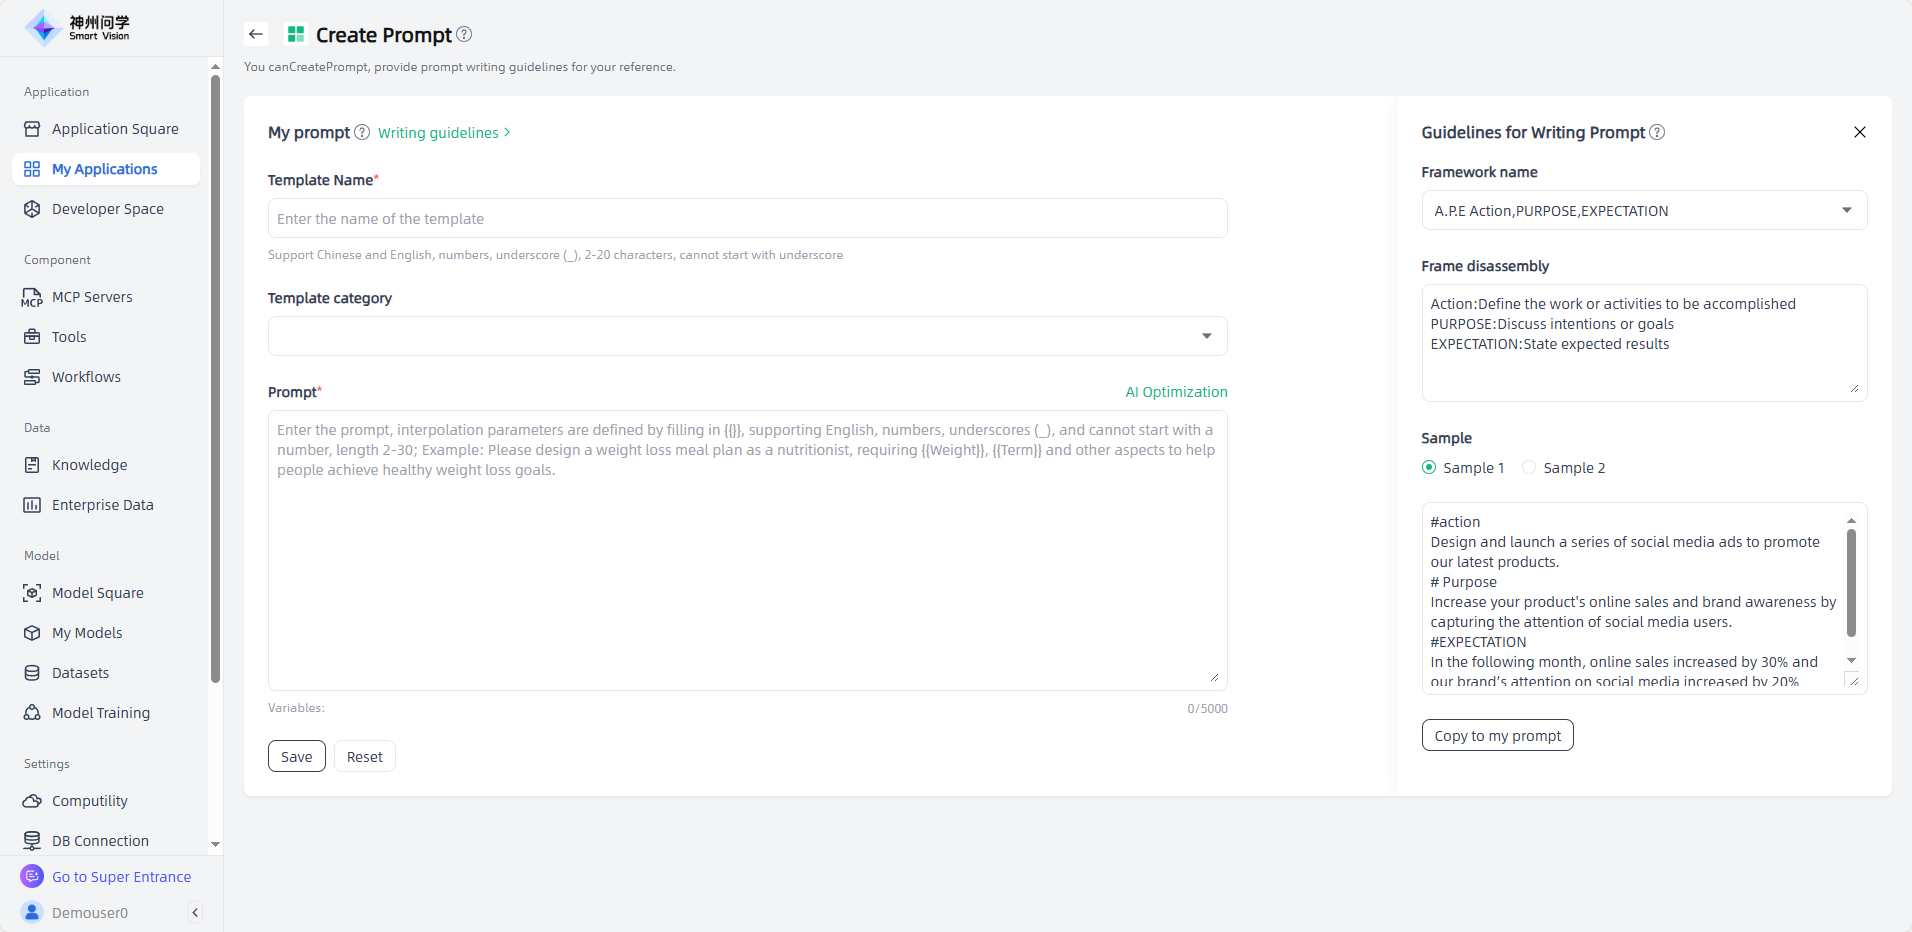
You can click the "Create Prompt" button in the upper left corner to enter the "Create Prompt" page, fill in the relevant information of the prompt (refer to the prompt writing guidelines), and click "Save" to complete the creation.
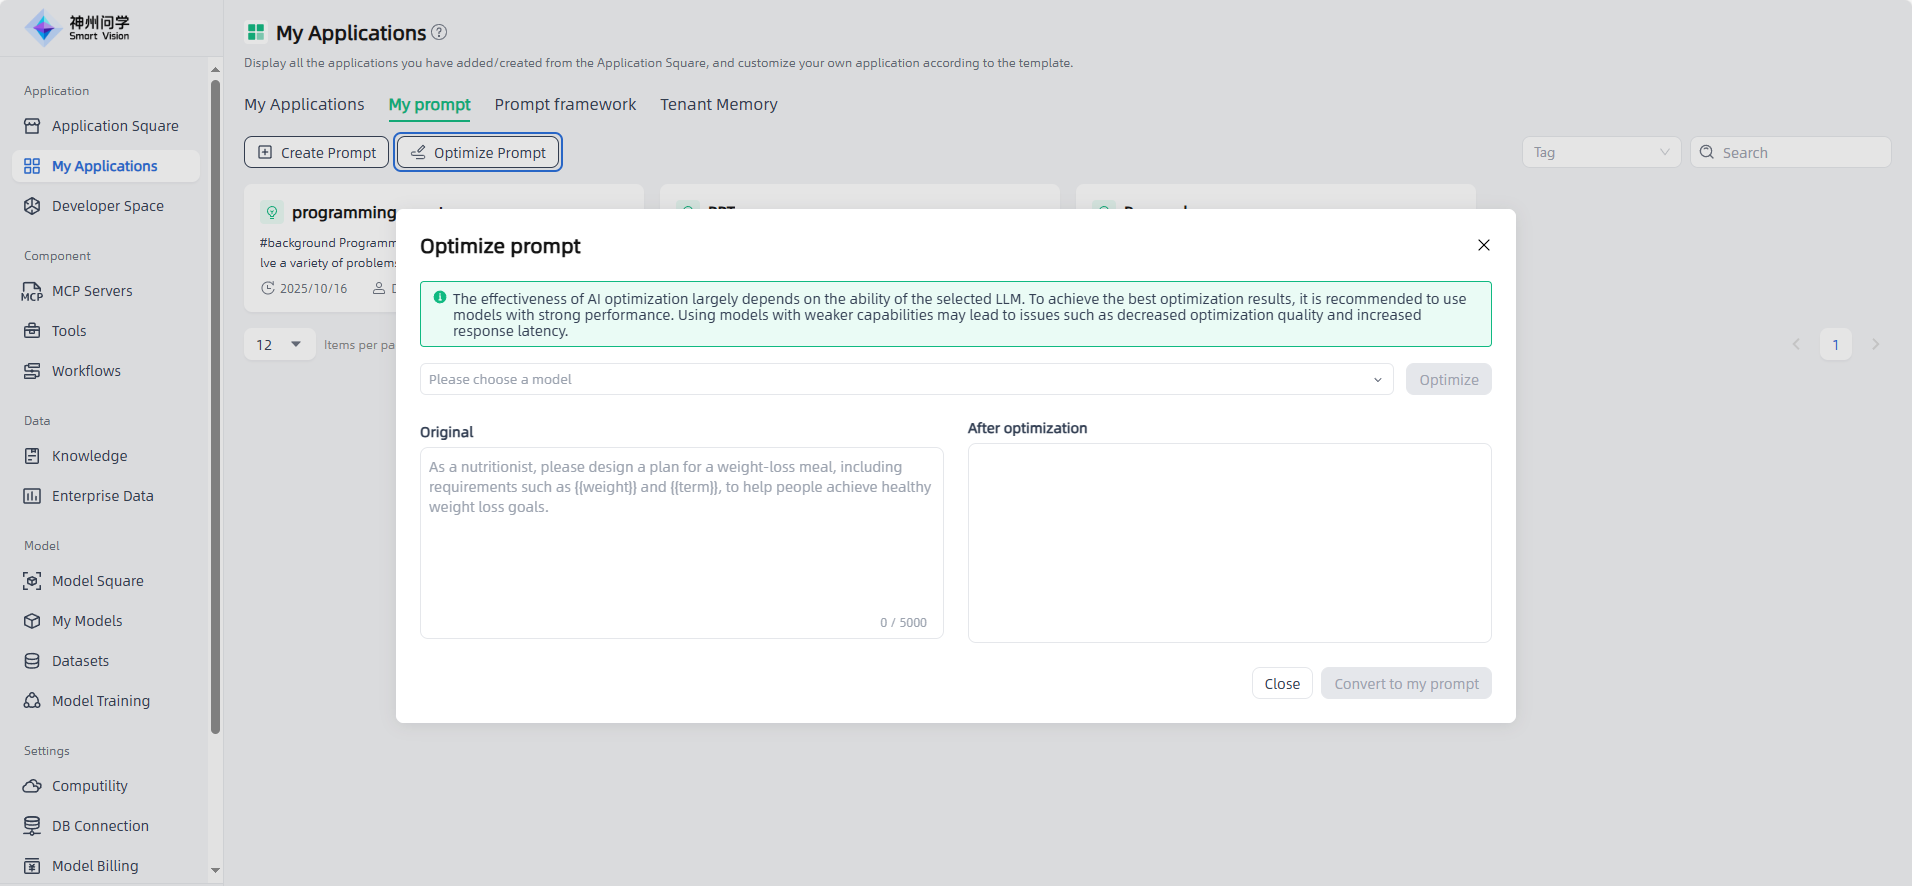
You can also click the "Optimize Prompt" button in the upper left corner to enter the "Optimize Prompt" page, fill in the prompt and optimize it, and then click "Convert to My Prompt" to complete the creation.
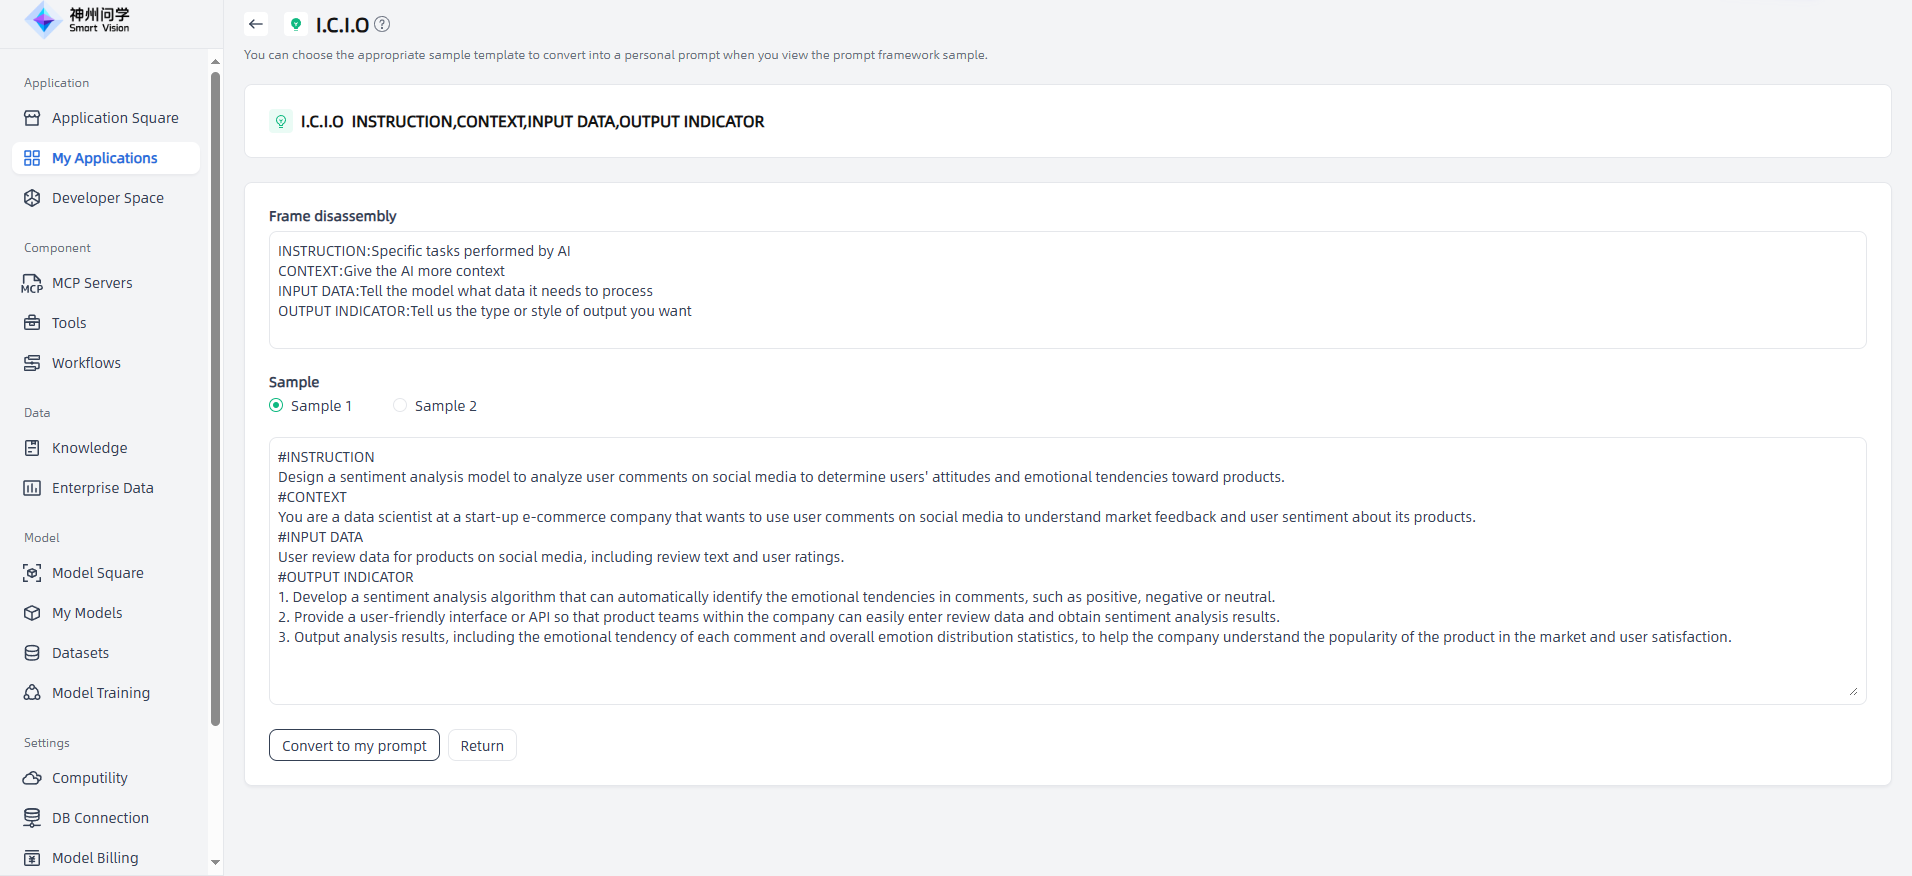
Prompt Framework
When communicating with the model, users need to express their questions more clearly to be more likely to get the desired results. The prompt framework can reduce the guesswork of the model by structuring the user's request, enabling it to better understand the user's intentions and provide a reference for users to create prompt.
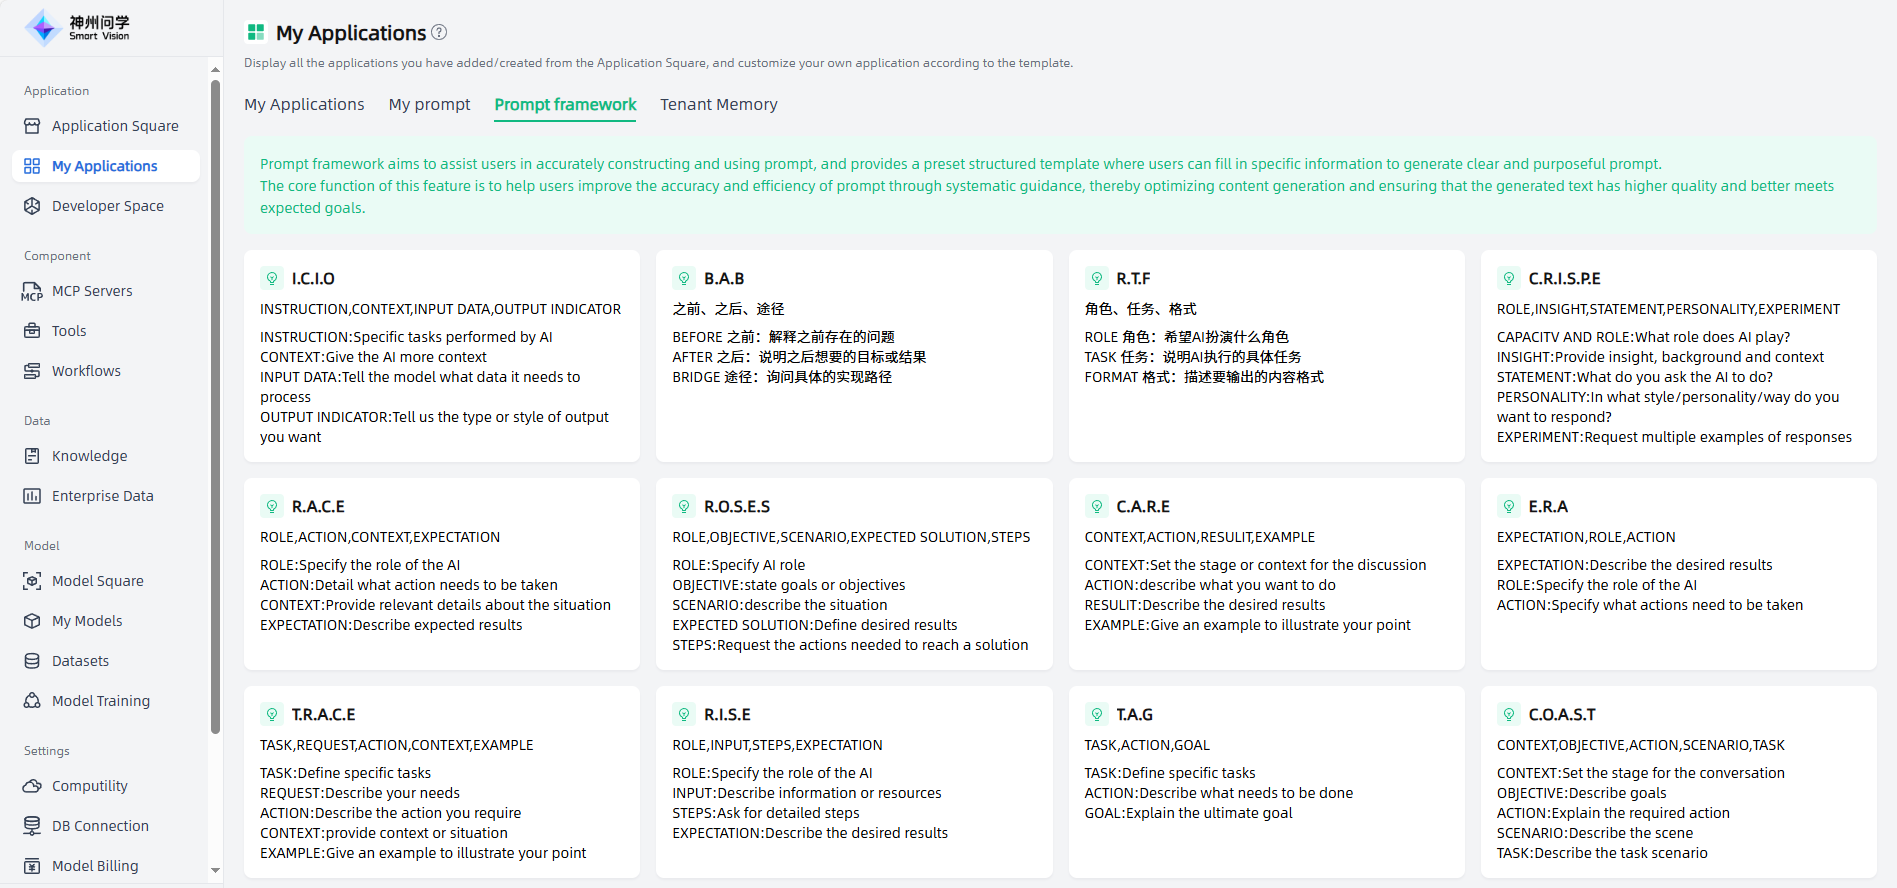
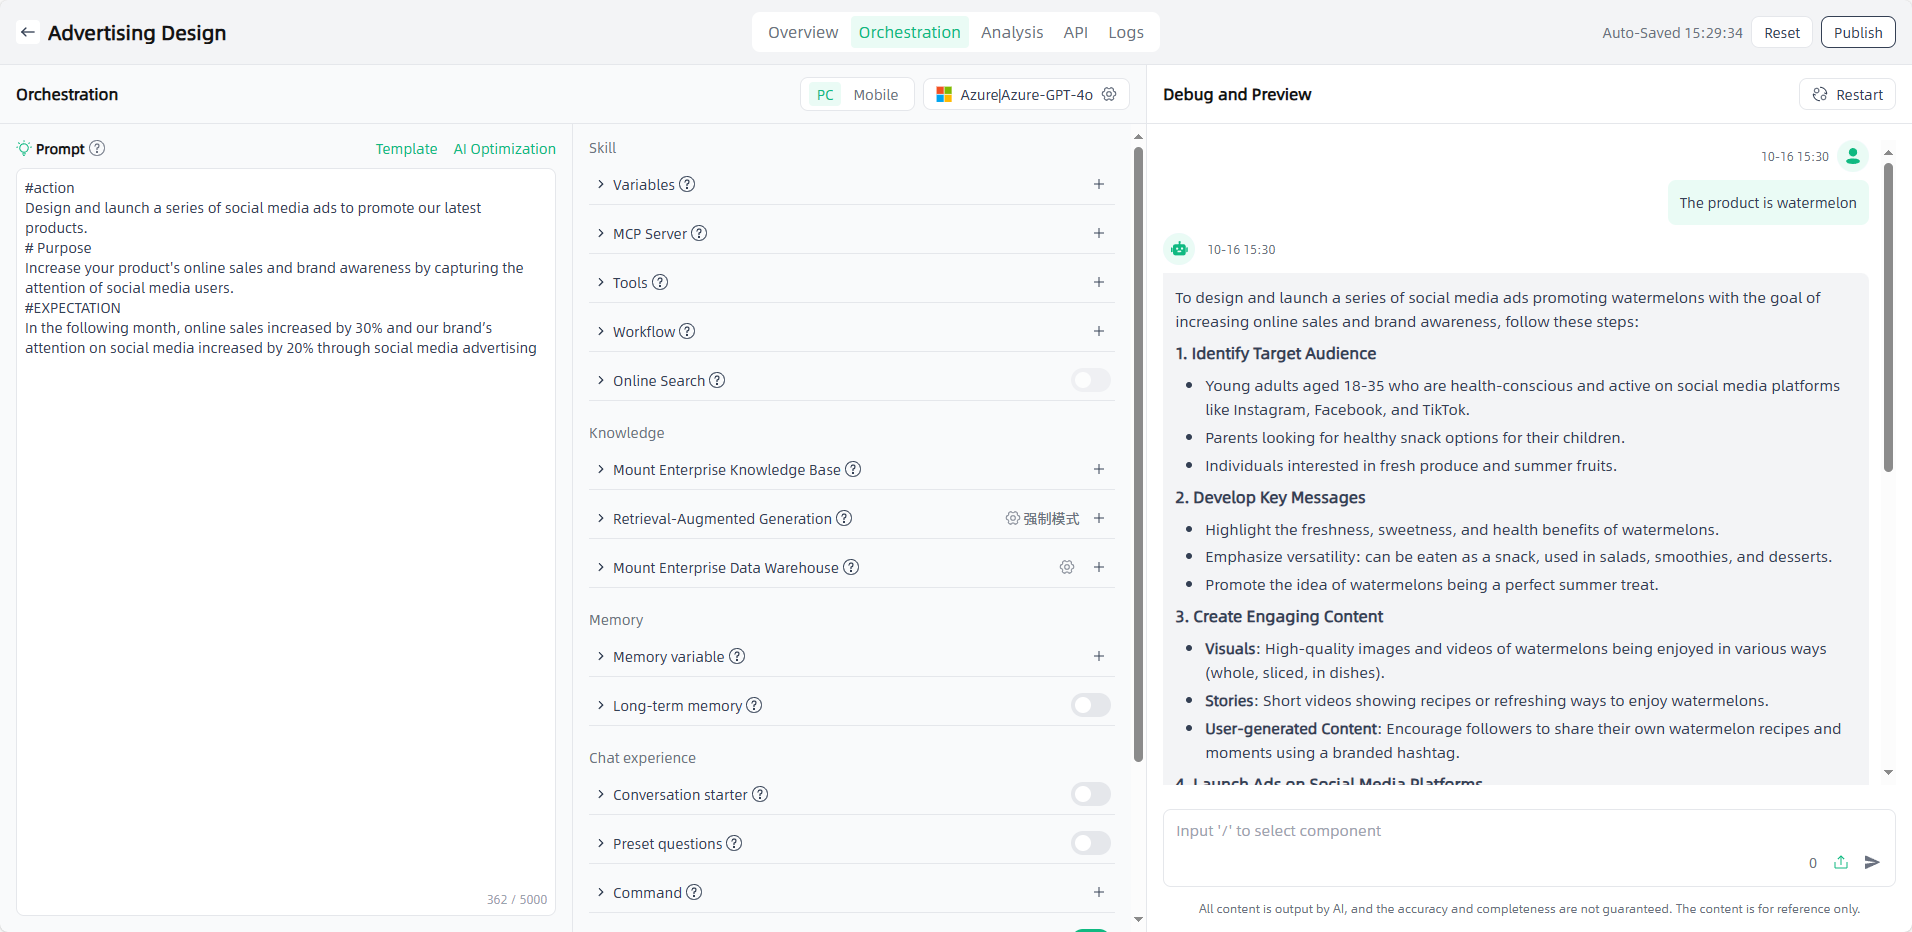
Smart Vision provides 14 prompt frameworks, and different frameworks are suitable for different scenarios. Take the A.P.E (Action, Purpose, Expectation) prompt framework as an example:
Framework Introduction: The APE framework advocates breaking down user requests into three main parts: Action, Purpose, and Expectation.
- Action: Define the specific task, action, or activity that needs to be completed. This is the first step of the framework and is intended to clarify the specific task or activity to be performed.
- Purpose: Discuss the intention or goal. This section is to explain why this specific task or activity is being performed, what the intention behind it is, and how it will support the larger goal or objective.
- Expectation: State the desired outcome. In this last step, clearly state the specific outcome or goal you expect to achieve by performing a specific task or activity.
Framework example: The APE framework is suitable for scenarios with clear tasks, goals and expected results. Suppose you are a marketing manager for a product sales company and you want to increase online sales of your product through social media advertising. According to the APE framework, you can create the following prompt:
Action: Design and launch a series of social media ads to promote our newest product.
Purpose: To increase online sales and brand awareness of products by attracting the attention of social media users.
Expectation: Increase online sales by 30% and increase our brand awareness on social media by 20% in the next month through social media advertising.
Application example: After using the APE framework prompt, you can just give a simple prompt and the AI application will automatically generate relevant information.
On the "Prompt Framework" page, click on the frame to enter the Prompt Framework Details page, where you can view samples and support one-click conversion to my prompt.
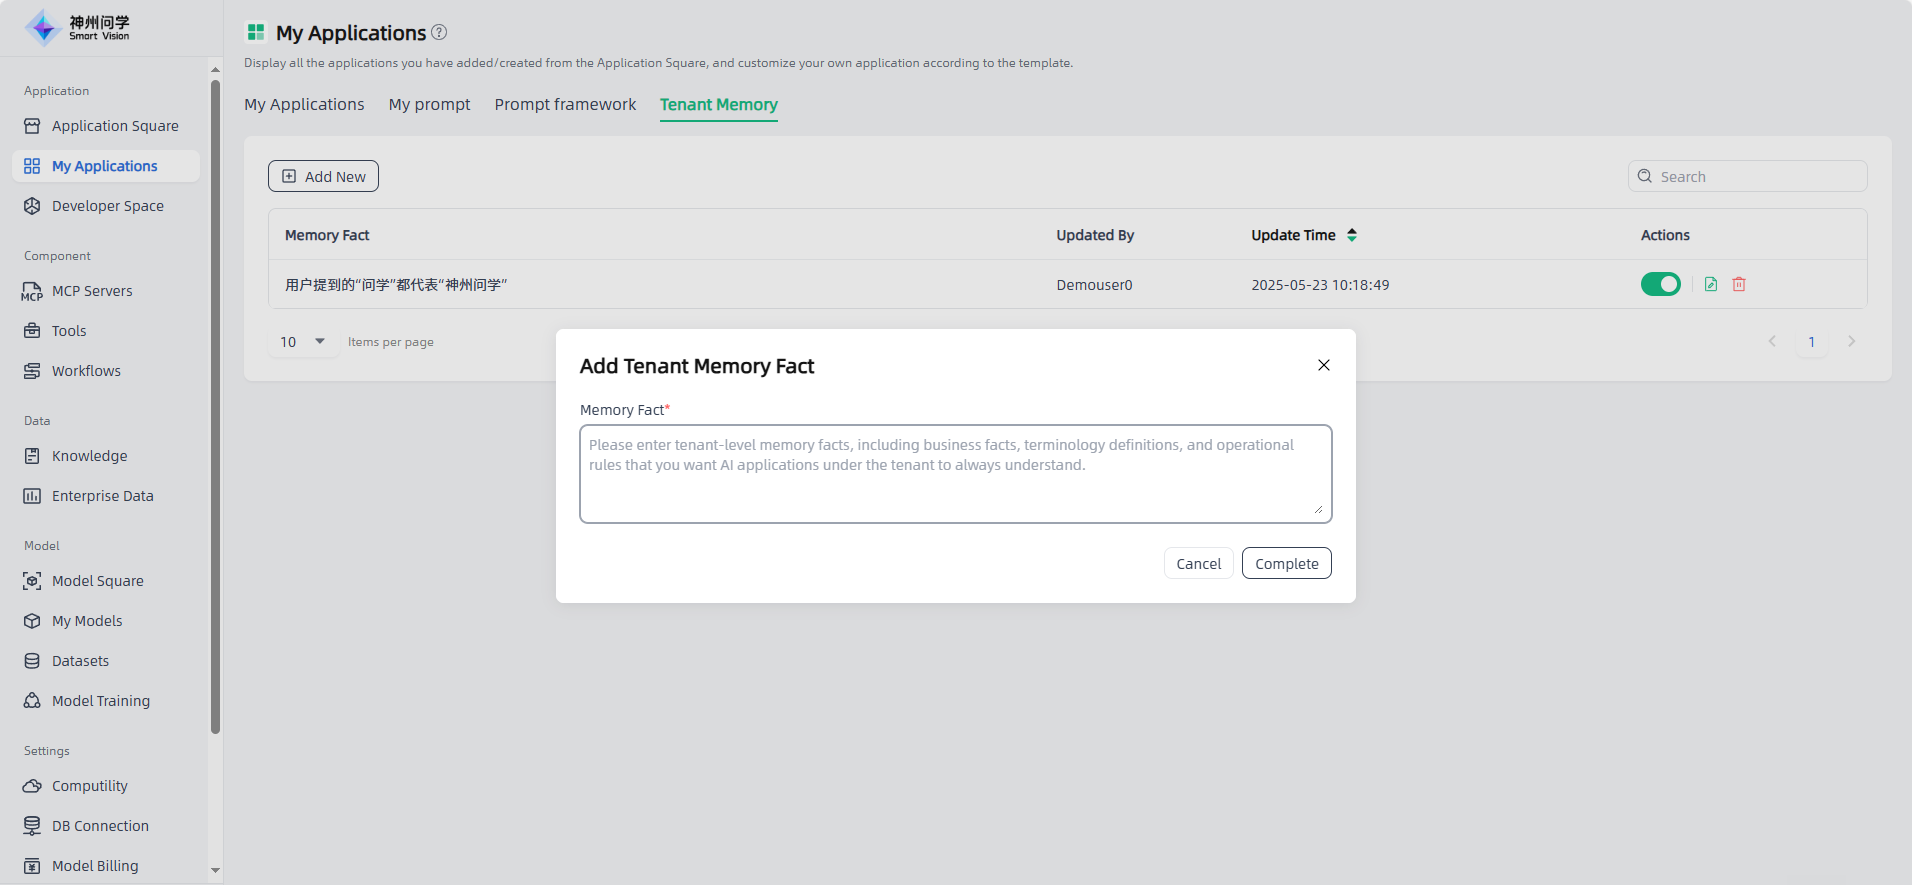
Tenant Memory
Smart vision supports configuring tenant memory. On the Applications - My Applications - Tenant Memory page, configured and enabled tenant memory will be applied to the session context of all applications under the tenant.